
Propagation
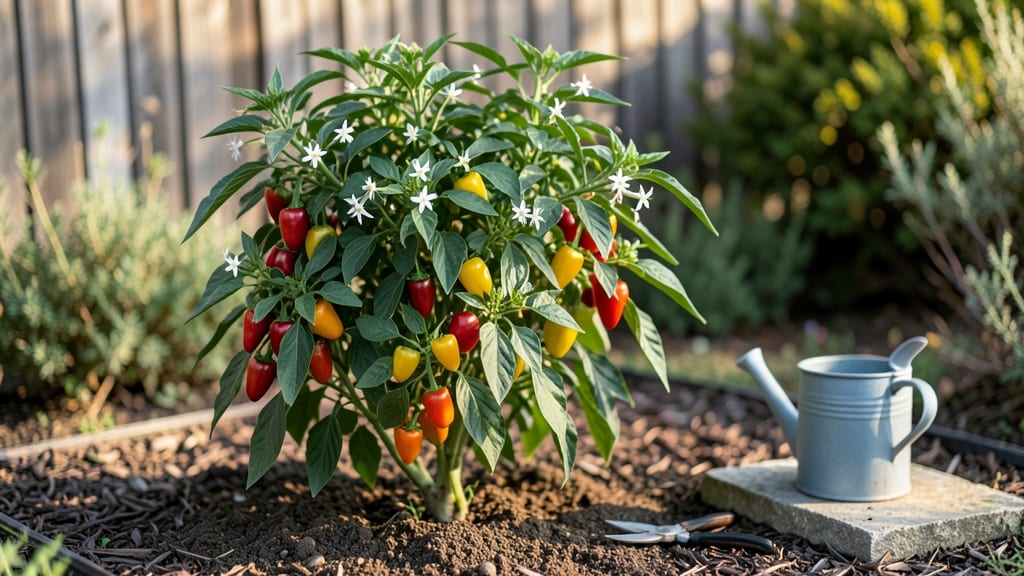
Growing charapita peppers from seeds unlocks a spicy, citrusy treasure that store-bought varieties can’t match. 🌱 These tiny seeds pack a punch of flavor and heat, but they need precise timing and care to transform into a thriving vertical garden in just 55 days.
My first batch surprised me—what started as fragile sprouts became a lush, compact plant bursting with fruit by midsummer.
Start indoors 8-10 weeks before your last frost, using a light, well-draining mix (think 60% potting soil, 30% perlite, and 10% compost). Charapita seeds germinate best in 75-85°F soil, so a heat mat helps if your home runs cooler.
Once sprouted, keep them under grow lights for 14-16 hours daily—they crave brightness from day one. Transplant outdoors only after nighttime temps stay above 55°F, and choose a spot with 6+ hours of direct sun.
Here’s the game-changer: vertical training. Use a 5-foot trellis or tomato cage to guide their vines upward, saving space and improving airflow. Water at the base (not overhead) to prevent fungal issues, and fertilize lightly every 2-3 weeks with a balanced organic feed.
By day 55, you’ll harvest small, fiery peppers—perfect for drying, pickling, or fresh salsas. The key? Patience and consistent care.
Watch for damping off (a fungal menace to seedlings) and aphids (those tiny green pests). If you see yellowing leaves, adjust watering or check for pests before assuming it’s a lost cause.
With the right setup, charapita peppers thrive in containers, raised beds, or small urban gardens—no sprawling plot required. Ready to grow your own spice powerhouse?
📚 In This Guide
- What you need
- Instructions
- Tips and common mistakes
- Wrapping up and next steps
What you need
- ● Charapita pepper seeds – 5-10 seeds (ensure they’re fresh or stored properly for best germination).
- ● Seed-starting trays or small pots – 2-4 inch pots (biodegradable pots work great for vertical gardens!).
- ● High-quality seed-starting mix – Lightweight, sterile, and well-draining (avoid garden soil—it’s too dense!).
- ● Grow lights or a sunny windowsill – 12-16 hours of light daily (south-facing windows or LED grow lights are ideal).
- ● Spray bottle with water – For gentle hydration (avoid overwatering—charapita seeds hate soggy soil!).
- ● Vertical garden structure – Trellis, hanging pockets, or a DIY tower (ensure it’s sturdy and has drainage holes).
- ○ Fertilizer (optional but helpful) – Balanced liquid fertilizer (5-5-5 or 10-10-10) (dilute to half-strength for seedlings).
- ● Plant ties or soft twine – To secure vines as they grow (charapita peppers climb like little spicy vines!).
- ○ Heat mat (optional but recommended) – For faster germination (charapita seeds thrive in 75-85°F soil temps).
- ● Humidity dome or plastic wrap – Keeps moisture in during germination.
- ● pH testing kit – Ensures soil pH is 6.0-6.8 (charapita peppers prefer slightly acidic soil).
- ● Epsom salt – A magnesium boost for healthier seedlings.
- ● Compost or worm castings – For extra nutrients as plants mature.
- ● Pruning shears – For shaping and maintaining your vertical garden.
Step-by-step guide to growing charapita peppers vertically
Here's how to transform your space into a thriving vertical spice garden in just 55 days—no sprawling beds required.
🌱 Step 1: Start Seeds Indoors with Warmth and Humidity
Fill 4-inch biodegradable pots with sterile seed-starting mix and plant 2-3 seeds per pot at a ¼-inch depth. Charapita seeds germinate best in warmth (75-85°F)—place pots on a seedling heat mat or in a warm spot (like on top of the fridge). Cover with a humidity dome or plastic wrap to retain moisture and warmth.
Keep the soil consistently moist but never soggy—water from the bottom by placing pots in ½-inch of water for 10 minutes daily. Germination typically takes 7-14 days, though some seeds may take up to 21 days. Once sprouts appear, remove the dome immediately to prevent damping-off disease—a fungal menace that can wipe out seedlings overnight.
☀️ Step 2: Provide Bright Light and Prevent Legginess
Charapita seedlings need 14-16 hours of light daily to avoid becoming leggy (thin, stretched stems). Place them under a full-spectrum LED grow light 2-3 inches above the tallest seedling. Raise the light as plants grow to maintain this distance—leggy seedlings can’t recover once they’ve outgrown their strength.
You’ll know your light setup is perfect when seedlings have thick stems, dark green leaves, and compact spacing between nodes (the points where leaves attach). If leaves turn pale or stems elongate, lower the light 1 inch closer immediately. Rotate pots quarter-turn daily to encourage even growth toward the light source.
🪴 Step 3: Transplant to Vertical Towers at 6-8 Inches Tall
Once seedlings reach 6-8 inches tall with 4-5 true leaves, transplant them into a vertical growing tower (like the 4-plant fabric pocket system you’ve prepped). Fill each pocket with moistened potting mix and gently remove the seedling from its pot, keeping the root ball intact. Place one plant per pocket, pressing soil lightly around the base to eliminate air gaps.
Water deeply after transplanting—until water runs out the bottom—to help roots establish in their new vertical home. Charapita peppers thrive in well-draining soil with 60-70% humidity, so mist the foliage daily if your home runs dry. Avoid overhead watering after transplanting to prevent fungal spores from splashing onto fresh wounds.
💧 Step 4: Train Vines and Manage Water for Maximum Yield
Charapita peppers are vigorous climbers—once planted in the tower, they’ll naturally twist upward. Use soft plant ties to gently guide vines along the tower’s vertical support strings (avoid wire or anything that can cut into stems). Prune side shoots that grow below the first flower cluster to redirect energy to fruit production—this is where your 55-day harvest timeline hinges.
Water every 2-3 days, checking the top inch of soil—it should feel dry but not bone-dry. Overwatering causes blossom-end rot, while underwatering leads to dropped flowers. Mulch the top of the tower with ½-inch of straw to retain moisture and keep roots cool. Fertilize every 2 weeks with a balanced liquid fertilizer (10-10-10) once flowers appear to support heavy fruit set.
✂️ Step 5: Harvest and Prune for Continuous Production
Charapita peppers mature in 55-60 days from transplant, but you can start harvesting small peppers as early as 45 days for mild heat. Pick peppers when they’re firm and bright green (or red, depending on variety) by twisting gently at the stem—never cut, as this can damage the plant. Regular harvesting encourages more flowers and fruit, so check plants daily during peak season.
After the first harvest wave, prune back any spent flowers and fertilize again to extend the season. If your tower space allows, succession plant a second batch of seeds 2 weeks after the first harvest to keep peppers coming all summer. Store harvested peppers in a cool, dark place for up to 2 weeks, or dry them for long-term storage—charapita’s smoky, earthy heat intensifies when dried.
Tips & tricks for growing charapita peppers vertically
Here's what I learned after growing these fiery beauties—turning potential pitfalls into guaranteed success.
Germination Warmth: That 75-85°F range is non-negotiable for charapita seeds. I placed my pots on a seedling heat mat and discovered the fridge top spot works too—just monitor closely. If your kitchen runs cooler, consider a small greenhouse tray with a built-in heat source. The difference between 70°F and 80°F can mean the difference between 7 days and 21 days of waiting for those first sprouts to appear.
Lighting Strategy: The 14-16 hours of daily light requirement is where most beginners stumble. I use a full-spectrum LED grow light on a timer, positioned 2-3 inches above seedlings. Here's the secret: Adjust the height every 3-4 days as plants grow. Too high? Leggy stems. Too low? Burned leaves. Think of it like Goldilocks—just right is everything. And don't forget to rotate those pots daily for even growth.
Transplanting Technique: When moving your 6-8 inch seedlings to the vertical tower, handle them like delicate glass—grip the leaves, not the stems. I found that adding a ½ teaspoon of cornmeal to the moistened potting mix in each pocket acts as a natural fungicide, preventing damping-off disease that can strike right after transplanting. Also, press the soil firmly around the base to eliminate air pockets that can strangle new roots.
Watering Wisdom: The 2-3 day watering schedule is a guideline, not a rule. Check that top inch of soil—it should feel like a wrung-out sponge. I've learned to water in the late afternoon rather than morning to give foliage time to dry before nightfall, reducing fungal risks. And here's a pro move: Use a spray bottle with lukewarm water for misting—cool water can shock the plants, especially in the vertical setup where airflow differs from ground planting.
Pro Tips for Charapita Pepper Seeds
- Here's what I learned after growing these fiery beauties—turning potential pitfalls into guaranteed success.
- Germination Warmth: That 75-85°F range is non-negotiable for charapita seeds. I placed my pots on a seedling heat mat...
- Lighting Strategy: The 14-16 hours of daily light requirement is where most beginners stumble. I use a full-spectrum ...
Frequently asked questions
How long does it take for charapita pepper seeds to germinate?
Charapita pepper seeds typically germinate within 7–14 days when kept in warm (70–85°F), moist conditions. For faster results, soak seeds in warm water for 4–6 hours before planting. Patience is key—some seeds may take up to 3 weeks, especially if the soil is too cold or dry.
Can I grow charapita peppers indoors without sunlight?
Yes, but you’ll need grow lights (LED or fluorescent) for 12–16 hours daily. Place lights 6–12 inches above seedlings and adjust as they grow. South-facing windows provide weak sunlight, so supplement with lights if natural light is insufficient. A sunny windowsill alone may stunt growth.
What’s the best alternative if charapita seeds don’t sprout?
Try these troubleshooting steps first: replant seeds deeper (1/4 inch), use fresh seed-starting mix, or test viability by cutting a seed open. If all else fails, consider transplanting a young charapita plant (available at specialty nurseries) or growing similar peppers like ají amarillo or rocoto for a comparable heat level.
How spicy are charapita peppers, and can I reduce the heat?
Charapita peppers rank 30,000–50,000 SHU (mild to medium heat, like a jalapeño). To mellow them, remove seeds and membranes before cooking, or blend with sweeter ingredients (tomatoes, onions, or citrus). For extreme heat reduction, soak sliced peppers in vinegar or lemon juice for 10–15 minutes.
What’s the ideal temperature for growing charapita peppers?
Charapita peppers thrive in 70–90°F soil and air temperatures. Seedlings prefer 65–75°F to avoid damping-off. If your climate dips below 50°F, start seeds indoors 8–10 weeks before the last frost. Use a heat mat for slow germination or move pots to a warmer spot (like near a sunny window or under grow lights).
Wrapping up and next steps
Growing charapita pepper seeds in just 55 days is an exciting way to bring bold, fruity heat to your kitchen—and your vertical garden! With the right setup, patience, and a little care, you’ll soon be harvesting peppers that pack flavor and spice like no other.
Whether you’re a seasoned gardener or a curious beginner, this method proves that even small spaces can yield big rewards.
Ready to take the next step? Start with your seeds today—plant, nurture, and watch your vertical spice garden thrive! Share your progress with fellow gardening enthusiasts or experiment with recipes featuring your homegrown charapita peppers. 🌱✨