
Picking
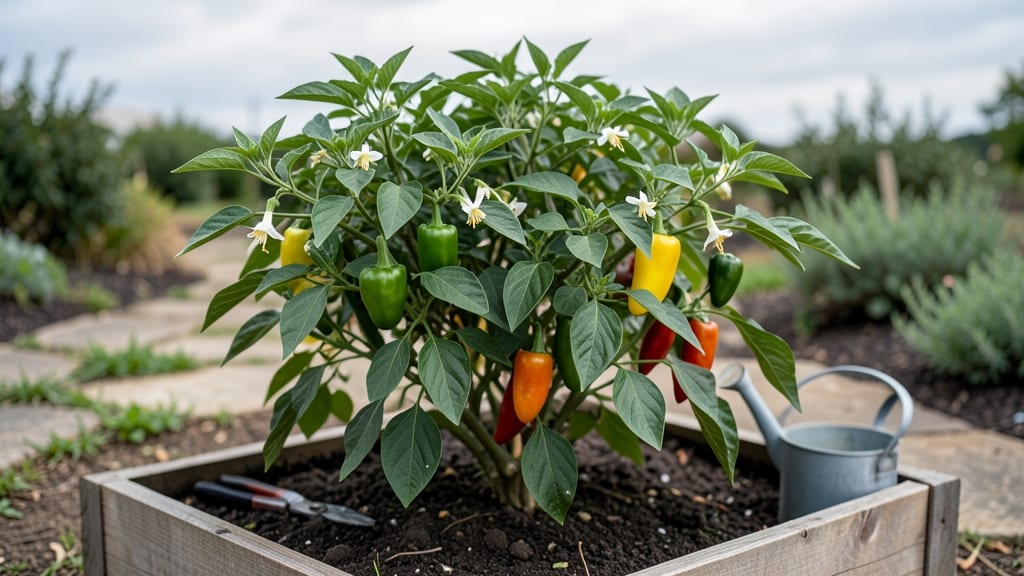
The secret to chili pepper growth on my balcony isn’t just vertical gardening—it’s coaxing fiery vines upward, turning my tiny space into a spice powerhouse without crowding my table. 🌱 The key? A sturdy trellis and a little patience. heat per square inch.
Last summer, my 3-foot trellis produced enough jalapeños and cayennes to fill a freezer jar, and I didn’t even need a greenhouse.
Start with the right setup: a sturdy vertical frame (I used PVC pipes wrapped in chicken wire), well-draining potting mix, and a spot that gets 6-8 hours of sunlight daily.
Chili peppers are finicky about moisture—too much water swells the peppers and dilutes the heat, while too little stunts growth. I water mine at the base every other day in summer, letting the top inch of soil dry out between sessions.
The vertical structure also improves air circulation, cutting down on fungal diseases that plague crowded plants.
By mid-July, you’ll see the magic happen: dark green leaves transforming into vibrant red, yellow, or purple peppers hanging like edible ornaments. The vertical method lets you grow 3-4 times more peppers in the same footprint, and harvesting becomes a game—just pluck them as they ripen.
My cayennes went from seed to jar in 90 days, and the neighbors kept asking how I fit so much into such a small space.
This works for any chili variety—jalapeños, habaneros, even ghost peppers—whether you’re in a sunny apartment or a backyard corner. The only real mistake? Waiting until summer to start. Seedlings need 8-10 weeks of warmth before transplanting, so begin indoors in late February or March if you want a full-season harvest.
Trust me, your future self will thank you when you’re snacking on homegrown heat in July.
📚 In This Guide
- What you need
- Instructions
- Tips and common mistakes
- Wrapping up and next steps
What you need
- ● Chili pepper seeds or seedlings: Choose heat-tolerant varieties like Jalapeño, Cayenne, or Habanero (3–6 plants per vertical setup).
- ● Growing containers: Deep pots (10–12 inches) or fabric grow bags (1–2 per plant).
- ● Vertical planters: Wall-mounted pockets, trellis systems, or hanging baskets (adjustable height for climbing varieties).
- ● Potting mix: Well-draining, organic mix (e.g., 50% peat moss, 30% perlite, 20% compost). Avoid garden soil—it’s too dense!
- ● Support structures: Trellises, stakes, or cages (3–4 feet tall for vining varieties).
- ● Twine or soft plant ties (for securing stems).
- ● Fertilizer: Balanced organic fertilizer (10-10-10 or fish emulsion) or slow-release granules.
- ● Watering can or drip irrigation: With a narrow spout for precision watering.
- ● Pruning shears: Sharp, clean pair for trimming and harvesting.
- ● Grow lights (LED full-spectrum, 12–16 hours/day for indoor setups).
- ● Self-watering system (for consistent moisture in small spaces).
- ● Heat mat (if growing indoors in cool climates).
- ● Spray bottle (for misting seedlings).
- ● Pest control: Neem oil or insecticidal soap (preventative measure!).
How to grow chili peppers vertically in small spaces
Here's how to maximize heat and harvest with minimal footprint—my go-to method for urban growers.
🪴 Step 1: Select Containers and Set Up Support Structures
Choose 5-gallon fabric grow bags or 12-inch deep pots with drainage holes—chilis need room for roots but hate soggy feet. I stack mine vertically using wall-mounted pockets or cinder block towers to save space. The key is stability: a wobbly tower will snap stems when peppers get heavy.
For support, install 3-foot bamboo stakes or galvanized wire cages at planting. Chili vines grow 2-4 feet tall, but determinate varieties (like 'Jalapeño') stay compact while indeterminate types (like 'Cayenne') need pruning to control height. Secure the stake with soft plant ties—never wire, which cuts into stems.
☀️ Step 2: Plant in Well-Draining Mix and Position for Maximum Light
Fill containers with a 50/50 blend of potting mix and perlite—chilis despise compacted soil. Amend with 1 cup compost per plant for nutrients without overfeeding, which reduces fruiting. Plant seeds ¼ inch deep or transplants 1 inch deeper than their nursery pots to encourage root spread.
Place your vertical setup in full sun (6+ hours daily)—south-facing windows work, but supplement with a T5 grow light if indoors. You'll know light is sufficient when leaves stay deep green and compact (not pale or stretched). Rotate pots quarter-turn weekly so plants grow straight toward the light source.
💧 Step 3: Water and Fertilize for Consistent Heat Production
Water when the top 2 inches of soil feel dry—chilis need 1-1.5 gallons per week, but less in humid climates. I use a drip irrigation kit attached to the vertical tower to deliver moisture evenly without wetting leaves (which causes disease). Let plants drink deeply until water runs from drainage holes.
Fertilize every 4 weeks with ½-strength balanced fertilizer (10-10-10) after flowering begins. Too much nitrogen = leafy vines, no peppers. Watch for yellowing leaves—this signals overwatering or nutrient burn. Prune suckers (side shoots in leaf axils) to direct energy to fruit production.
✂️ Step 4: Prune and Train for Vertical Growth
Pinch off the top set of leaves when the plant reaches 18 inches tall to encourage bushier growth. For indeterminate varieties, remove lower leaves up to 12 inches from the ground—this improves airflow and prevents soil-borne diseases. I also braid main stems around the support structure to create a trellis effect.
The real magic happens when you prune back ⅓ of the plant after the first harvest. This triggers new flowering sites and extends the season. Wear gloves—chili stems release capsaicin, which irritates skin. Harvest peppers when they reach 75% of their mature size for maximum flavor and heat.
🌱 Step 5: Extend the Season with Protective Measures
As temperatures drop below 50°F, move containers indoors near a sunny window or under grow lights. Reduce watering by 30%—chilis go dormant in cool weather but can still produce if protected. I wrap pots in burlap to insulate roots and add row covers for outdoor setups.
For year-round growth, harvest seeds from mature peppers and store them in a cool, dark place. Start new plants indoors 8-10 weeks before the last frost to ensure a continuous supply. The secret to small-space success? Prune aggressively, train vertically, and never let plants outgrow their support.
Tips & tricks for perfect vertical chili pepper growth
Here's what nobody tells you about squeezing maximum heat from minimal space—lessons I learned after watching my first tower collapse under pepper weight.
Container Stability is Non-Negotiable: That 50°F temperature threshold in Step 5 isn't just about cold tolerance—it's also when your vertical structure becomes most vulnerable to wind. I learned this the hard way when my bamboo stake tower toppled during a 40°F night. For outdoor setups, anchor your cinder block towers with U-shaped ground stakes or use wall-mounted brackets rated for 20+ pounds of weight. The extra $15 for heavy-duty hardware saved me from losing an entire season's harvest.
Light Quality Matters More Than Hours: Those 6+ hours of daily sun in Step 2? Focus on intensity, not duration. Place your vertical setup within 12 inches of a south-facing window or directly under grow lights. I test light sufficiency by observing leaf color—pale yellow leaves mean insufficient light, while deep green with slight red veins means perfect conditions. For indoor growers, LED grow lights with full-spectrum bulbs (not just white) produce better results than standard bulbs.
Pruning Strategy for Indeterminate Varieties: The ⅓ pruning recommendation in Step 4 works, but here's the real trick: prune at the first flower cluster rather than waiting for fruit. This forces the plant to produce more lateral branches with their own flower clusters, effectively doubling your harvest potential. For 'Cayenne' plants, I make a second pruning 6 weeks after the first to extend the fruiting season into fall. Always use sterilized pruning shears to prevent disease transmission between cuts.
Season Extension Hack: That 50°F threshold isn't absolute—chilis can tolerate brief dips to 45°F if you combine three protective measures: double-layer row covers, black plastic mulch around pots, and a small space heater (set to 60°F) placed 3 feet away. I've kept 'Serrano' plants producing through December using this method, though flavor becomes milder. The key is maintaining consistent humidity levels above 50% to prevent blossom-end rot.
Pro Tips for Chili Pepper Growth
- Here's what nobody tells you about squeezing maximum heat from minimal space—lessons I learned after watching my first tower collapse under pepper weight.
- Container Stability is Non-Negotiable: That 50°F temperature threshold in Step 5 isn't just about cold tolerance—it's also when your vertical structure becomes most vulnerable to wind.
- Light Quality Matters More Than Hours: Those 6+ hours of daily sun in Step 2?
Frequently asked questions
Got questions about growing chili peppers in small spaces? Here are some of the most common ones—and their answers!
How long does it take for chili peppers to grow from seed?
Most chili pepper varieties take 60–90 days to mature from seed, depending on the type. Hotter peppers (like habaneros) often mature faster than milder ones (like bell peppers). Start seeds indoors 8–10 weeks before your last frost date for a head start!
Can I grow chili peppers year-round, even indoors?
Yes! Chili peppers thrive indoors with 12–16 hours of light daily (grow lights work great). Keep temperatures between 70–85°F (21–29°C) and maintain humidity around 40–60%. Just watch for pests like spider mites in dry conditions.
What if my chili plants stop producing peppers?
Common causes include overwatering, lack of sunlight, or nutrient deficiencies. Try adjusting care: prune leggy plants, ensure 6+ hours of direct sun, and fertilize with a balanced 10-10-10 or high-phosphorus mix. Stress (like sudden temperature drops) can also halt flowering.
Are there low-maintenance chili pepper varieties for beginners?
Try Jalapeños, Cherry Bombs, or Shishito peppers—they’re forgiving and prolific. For vertical gardens, dwarf varieties like Thai Hot Pepper or Mini Bell Peppers are perfect. Look for "compact" or "bush" labels in seed packets.
Why are my chili peppers turning yellow or dropping?
Yellowing leaves often signal overwatering, nutrient burn, or fungal issues. Dropping peppers? It could mean underwatering, extreme heat, or pests. Check soil moisture (top inch should dry between waterings) and inspect for aphids or spider mites. Adjust care and monitor closely!
Wrapping up and next steps
Growing chili peppers in small spaces is not just possible—it’s rewarding! With the right vertical setup, you can maximize yields, save space, and enjoy fresh, homegrown heat year-round. Whether you’re a beginner or a seasoned gardener, these hacks make it easier than ever to cultivate your own spicy harvest.
Now that you’re armed with the best tips, why not start today? Grab your supplies, sketch a quick vertical plan, and let your chili dreams take flight—your taste buds (and Instagram feed) will thank you! 🌱🔥