
Picking
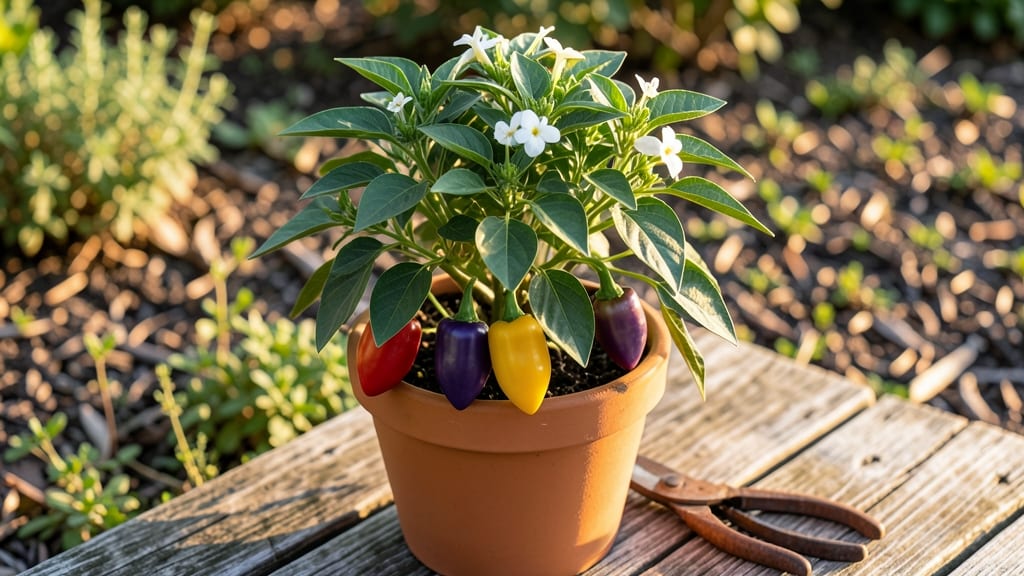
Growing chilly chili ornamental peppers in containers is like having a mini fireworks display in your garden—just without the noise. 🌶️ These tiny, colorful peppers pack heat (and beauty) into compact plants perfect for patios, windowsills, or even hanging baskets.
I’ve grown 'Apache' and 'Jalapeño Mini' for years, and they never fail to deliver bold flavors and striking red, orange, or purple peppers that last well into fall.
The secret to success starts with the right setup: 5-gallon containers with drainage holes, a well-draining potting mix, and 6-8 hours of sunlight daily. These peppers thrive in USDA Zones 9-11, but with a little indoor head start, you can grow them almost anywhere.
Plant seeds indoors 8-10 weeks before your last frost, or buy sturdy transplants in spring. Space them 12-18 inches apart to ensure airflow and prevent disease.
Once planted, keep the soil consistently moist but not soggy—these peppers hate wet feet. Feed them every 2-3 weeks with a balanced fertilizer (like 10-10-10) to encourage both flavor and foliage. Prune sparingly to maintain shape, and watch for pests like aphids or spider mites.
A quick spray of neem oil keeps them at bay. By mid-summer, you’ll be harvesting peppers that add heat, color, and texture to dishes—or just admire them in a vase.
Bonus: These peppers double as edible decor. String dried peppers for a festive garland, or let them ripen on the plant for a pop of color in winter arrangements.
Whether you’re growing for spice, show, or both, these little powerhouses deliver big rewards in small spaces. Ready to get started?
📚 In This Guide
- What you need
- Instructions
- Tips and common mistakes
- Wrapping up and next steps
What you need
- ● Dwarf ornamental pepper seeds or seedlings: Choose varieties like 'Apache,' 'Lunchbox,' or 'Jalapeño M.' (3-6 plants for a small container garden).
- ● Containers: 5-7 gallon pots with drainage holes (1 per plant). Terracotta or fabric pots work well!
- ● High-quality potting mix: Well-draining, nutrient-rich blend (avoid garden soil—it compacts!).
- ● Slow-release fertilizer: Balanced (10-10-10 or 5-10-10) for steady growth.
- ● Organic compost: Mix 20-30% into your potting soil for extra nutrients.
- ● Gloves & pruning shears: For handling peppers (some varieties pack a punch!).
- ● Watering can or spray bottle: Keep soil moist but not soggy.
- ● Plant markers: Label varieties if growing multiple types.
- ○ Trellis or cage (optional): Supports bushy varieties like 'Lunchbox.'
- ○ Mulch (optional): Straw or shredded leaves to retain moisture.
- ● Sunlight: 6+ hours of direct sun daily (south-facing window or balcony).
- ● Warmth: Peppers thrive in 70–85°F (21–29°C); use a heat mat if starting indoors early.
- ● Patience: Dwarf varieties mature in 60–90 days, but ornamental types may take longer.
How to grow thriving dwarf chili and ornamental peppers in containers
Container gardening makes these fiery beauties accessible—here’s how to coax vibrant, productive plants from seed to harvest.
🌱 Step 1: Start Seeds Indoors 8-10 Weeks Before Last Frost
Fill 2-inch deep seedling trays with a sterile seed-starting mix, keeping it lightly moist but not soggy. Press seeds ¼ inch deep—too shallow and they’ll dry out before sprouting. I like to use a toothpick to make small holes for each seed, then drop them in one at a time. Cover with a fine layer of mix and mist gently until the surface looks evenly damp.
Place trays under a grow light 12-14 hours daily at 75-85°F—a seedling heat mat helps if your home runs cooler. Germination takes 7-14 days, depending on the variety. Watch for the first true leaves (not the initial seed leaves) to appear before transplanting.
☀️ Step 2: Transplant Seedlings to Individual Containers
Once seedlings have 3-4 true leaves, move them to 5-inch pots filled with well-draining potting mix. Handle the stems carefully—these peppers are tender and can snap easily. Bury them to the same depth they were in the seed tray to avoid stressing the roots.
Place pots in a sunny window or under grow lights for 14-16 hours daily. Rotate them a quarter turn every few days so they grow straight instead of leaning toward the light. You’ll notice stronger stems and darker green leaves within a week of this adjustment.
🪴 Step 3: Acclimate and Harden Off Before Outdoor Placement
Two weeks before your last frost, start hardening off seedlings by placing them outside in a sheltered spot for 1-2 hours the first day. Gradually increase exposure over 10-14 days
Once hardened off, choose 6-8 inch containers with drainage holes for mature plants. Fill with a mix of potting soil and perlite (half and half) to improve drainage. Plant deeply, covering up to the first set of true leaves to encourage strong root growth. Water when the top inch of soil feels dry, but avoid soggy soil—peppers hate wet feet. I use a moisture meter to check, especially in hot weather. Fertilize every 4-6 weeks with a balanced organic fertilizer (10-10-10) to keep them producing vibrant foliage and peppers. Keep containers in full sun (6+ hours daily). If your summers are scorching, provide afternoon shade to prevent leaf scorch. Prune leggy growth to encourage bushier plants, and pinch off early flowers if you want larger peppers later in the season. Harvest peppers when they reach their mature size but before they fully ripen if you prefer a milder flavor. Use pruning shears to cut stems cleanly, leaving a small portion attached to the plant. This encourages more fruit to develop. Dwarf varieties like ‘Lunchbox’ or ‘Jalapeño M’ produce heavily in containers. Store harvested peppers in a cool, dry place or use them fresh in cooking. Watch for pests like aphids—spray with neem oil if you spot them early.💧 Step 4: Maintain Optimal Growing Conditions
✂️ Step 5: Harvest and Enjoy Your Peppers
Tips & tricks for thriving dwarf chili and ornamental peppers in containers
These container-specific insights will help you avoid common pitfalls and maximize your fiery harvests.
Seedling Heat Management: The 75-85°F temperature range during germination is crucial—too cool and seeds may take longer to sprout, while too hot can cause damping-off. I place my seedling trays on a heat mat set to 78°F for consistent results. If your home runs cooler, consider using a clear plastic dome over the tray to trap warmth.
Transplanting Technique: When moving seedlings to 5-inch pots in Step 2, use a toothpick to gently loosen the root ball before transferring. This prevents transplant shock and encourages faster establishment. I also water the seedlings thoroughly 24 hours before transplanting to reduce stress during the move.
Harden-Off Strategy: The gradual 10-14 day hardening process is essential for container-grown peppers. I start with just 1-2 hours of morning sun on the first day, then increase by 1-2 hours each subsequent day. Watch for slight wilting as a sign they're not ready for full sun exposure yet—this is normal and temporary.
Container Selection: For mature plants, prioritize containers with at least 6-8 inches of depth and multiple drainage holes. I recommend using fabric grow bags for their excellent aeration, which helps prevent root rot. Avoid glazed ceramic containers—they can trap excess moisture and lead to soggy soil.
Pro Tips for Chilly Chili Ornamental Pepper
- These container-specific insights will help you avoid common pitfalls and maximize your fiery harvests.
- Seedling Heat Management: The 75-85°F temperature range during germination is crucial—too cool and seeds may take lon...
- Transplanting Technique: When moving seedlings to 5-inch pots in Step 2, use a toothpick to gently loosen the root ba...
Frequently asked questions
Can chilly chili ornamental peppers grow in containers?
These dwarf varieties thrive in containers as long as you use well-draining soil and a pot at least 12 inches wide. Ensure the container has drainage holes to prevent root rot. Pro tip: Place pots in a sunny spot (6+ hours of light daily) for the best color and heat!
How long does it take for chilly chili peppers to produce fruit?
With proper care, you’ll see peppers forming 8–12 weeks after transplanting (or 60–90 days from seed). Patience is key—early blooms may drop, but consistent warmth and sunlight encourage fruit set. Bonus: Prune excess flowers to boost pepper size!
Are chilly chili peppers safe to eat if they’re ornamental?
Yes! While they’re prized for their vibrant colors and heat, these peppers are fully edible. Just note: some varieties pack a serious kick (up to 50,000+ Scoville units!). Start with a tiny taste and pair with dairy or bread to tame the spice!
Why are my chilly chili peppers turning yellow or dropping?
Yellowing leaves often signal overwatering or nutrient deficiency. Let the top inch of soil dry out between waterings, and fertilize with a balanced formula (like 10-10-10) every 4–6 weeks. Check: Dropping peppers can also mean too much heat or low humidity—try misting leaves or moving to a slightly cooler spot.
What’s a good alternative if I don’t have space for peppers?
Try dwarf hot peppers like ‘Apache’ or ‘Jalapeño M’—they’re compact, productive, and equally stunning. For zero-maintenance color, ornamental sweet peppers (like ‘Black Pearl’) offer bold hues without the heat. Both love containers and partial sun!
Wrapping up and next steps
Growing chilly chili ornamental peppers in containers isn’t just rewarding—it’s a burst of color and flavor right at your fingertips! 🌱 Whether you’re drawn to their fiery heat or stunning aesthetics, dwarf varieties make them perfect for balconies, patios, or sunny windowsills.
With the right care, you’ll enjoy a bountiful harvest (or a dazzling display) in no time.
Ready to dive in? Start by picking your favorite Capsicum annuum variety, gather your supplies, and give these vibrant plants the love they deserve. Soon, you’ll be sharing your homegrown peppers—or their show-stopping blooms—with pride! 🌶️✨