
Picking
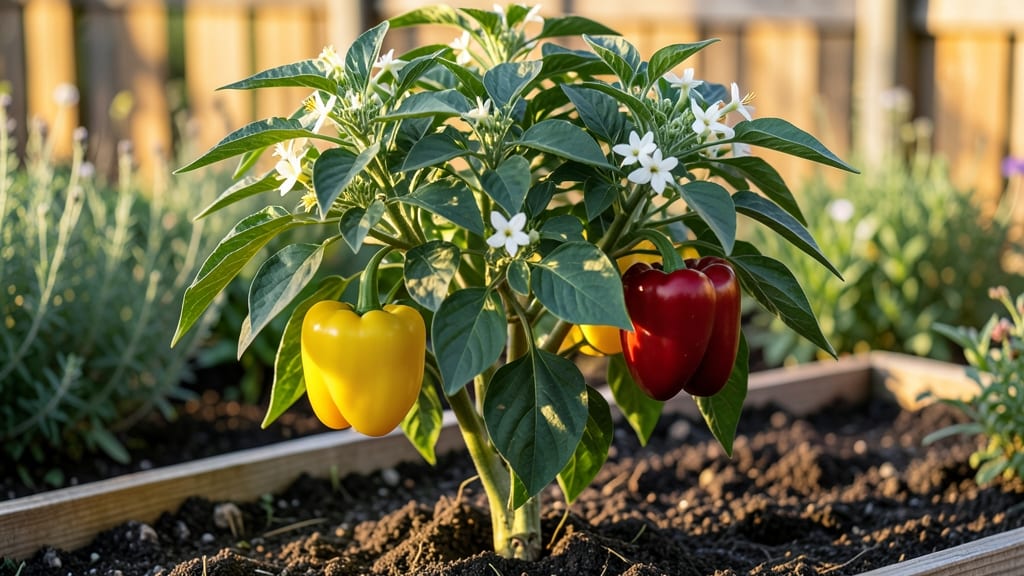
Growing Costa Rica peppers means fiery flavor in pots or small plots. 🌶️ These tropical beauties pack heat but need just the right balance of sun, warmth, and moisture to thrive—even in containers.
My first batch surprised me with their resilience, producing peppers all season long despite my "black thumb" tendencies.
Start with well-draining soil rich in organic matter and a container at least 12 inches deep if growing in pots. They crave full sun (6+ hours daily) and struggle below 60°F at night, so greenhouse growers or those in warmer zones have the edge.
Water consistently but avoid soggy soil—they hate wet feet.
You’ll recognize success with glossy leaves and peppers that start green, then turn red, yellow, or orange as they ripen. A single plant can yield 20-30 peppers if pollinated well, and they’re prolific even in small spaces.
The real magic? Their heat profile—milder than habaneros but with a complex, fruity kick.
For troubleshooting, watch for aphids (spray with neem oil) and blossom-end rot (calcium-rich soil helps). In cooler climates, grow them as annuals or overwinter indoors. With the right care, these peppers become the star of your kitchen—and your neighbors’ conversations.
📚 In This Guide
- What you need
- Instructions
- Tips and common mistakes
- Wrapping up and next steps
What you need
- ● Costa Rica pepper seeds (5–10 seeds per plant; opt for heirloom or organic varieties for best flavor).
- ● Well-draining potting mix (5–10 gallons per plant; blend with perlite or coconut coir for aeration).
- ● Containers (5–7 gallon pots with drainage holes or raised beds if planting outdoors).
- ● Organic compost (1–2 cups per plant to enrich soil).
- ● Balanced fertilizer (5-10-10 or organic options like fish emulsion).
- ● Mulch (straw or shredded leaves to retain moisture).
- ● Hand trowel or small shovel (for transplanting).
- ● Watering can or hose with gentle spray nozzle (peppers hate soggy roots!).
- ● Pruning shears (to trim leggy growth and encourage bushiness).
- ○ Garden gloves (optional but helpful for handling spiny stems).
- ○ Support stakes or cages (optional, for tall varieties like ají dulce).
- ● Warm climate or indoor grow lights (peppers thrive in 70–85°F; use a heat mat if starting seeds indoors).
- ● Full sun exposure (6+ hours daily; partial shade in scorching afternoons).
- ● Patience (Costa Rica peppers take 60–90 days to mature from seed!).
Step-by-Step instructions for growing Costa Rica peppers in containers
Here's how to cultivate fiery, flavorful Costa Rica peppers—even in limited space—using proven tropical growing techniques.
🌱 Step 1: Start Seeds Indoors Under Warmth and Humidity
Begin seeds 8-10 weeks before your last frost date in 75-80°F conditions. I use a seedling heat mat to maintain consistent warmth—these peppers germinate best when soil stays warm. Fill biodegradable pots with sterile seed-starting mix and plant seeds ¼ inch deep, two per pot for insurance.
Cover with a clear humidity dome or plastic wrap to trap moisture and warmth. Check daily but resist watering until condensation forms on the inside of the dome. Germination typically occurs in 10-14 days, but don't be surprised if it takes up to 3 weeks—patience pays off with stronger plants.
☀️ Step 2: Provide Bright Light and Prevent Leggy Growth
The moment seedlings emerge, move them to a south-facing window or under grow lights providing 14-16 hours of light daily. Costa Rica peppers despise leggy growth, so keep lights 2-3 inches above the plants and raise them gradually as seedlings grow. You'll know you're doing it right when stems stay thick and compact, not stretching toward light.
Rotate pots quarter-turn daily so plants grow evenly. If you notice leaves turning pale or stems elongating excessively, your light source is too far away. Strong seedlings develop deep green, glossy leaves and sturdy stems—this is your signal everything's on track.
🪴 Step 3: Transplant to Larger Containers with Excellent Drainage
When seedlings develop 4-5 true leaves (about 6-8 weeks after sowing), transplant them into 5-gallon containers with well-draining potting mix. Costa Rica peppers thrive in slightly acidic soil with a pH of 6.0-6.8. I add a handful of perlite or vermiculite to each pot to prevent waterlogging—these peppers rot quickly when roots sit in soggy soil.
Transplant on an overcast day or in late afternoon to reduce transplant shock. Water deeply immediately after planting to settle soil around roots, but avoid wetting leaves. Place pots in a warm, sunny location where temperatures stay above 70°F—cold snaps will stunt growth or trigger blossom drop.
💧 Step 4: Water Consistently and Fertilize for Maximum Heat
Keep soil evenly moist but never soggy—water when the top 1-2 inches feel dry. I use a moisture meter for accuracy, especially during hot spells. Costa Rica peppers produce their signature heat when given balanced fertilization every 2-3 weeks with a 10-10-10 or 20-20-20 formula. Reduce nitrogen slightly after flowering to encourage fruit production over leaf growth.
Watch for signs of stress: yellowing leaves often mean overwatering, while crisp edges signal underwatering. Prune suckers (the shoots that form in the leaf axils) to direct energy toward fruit production. This pepper variety rewards careful attention with bright red, glossy fruits that pack serious heat.
✂️ Step 5: Harvest and Encourage Continuous Production
Harvest peppers when they reach 3-4 inches long and develop their characteristic glossy red color. Use pruning shears to cut stems just above a leaf node to encourage branching. I harvest every 2-3 days during peak production—this prevents overcrowding and maintains plant vigor.
After harvest, feed plants with a low-nitrogen fertilizer to replenish nutrients. In warm climates, Costa Rica peppers can produce continuously. If your season cools, bring pots indoors near a sunny window and supplement with grow lights to extend the harvest. The more you pick, the more your plant will reward you with heat-filled fruits.
Tips & tricks for growing thriving Costa Rica peppers
Here's what I've learned from growing these fiery beauties in containers—lessons that'll help you avoid common pitfalls and maximize heat production.
Heat Matters: Those 75-80°F conditions in Step 1 aren't just recommendations—they're critical for germination. I've seen seeds take twice as long to sprout when soil temperatures dip below 70°F. Use a seedling heat mat if your home stays cool at night, and never let soil temperatures drop below 65°F or germination will stall.
Light Strategy: The 14-16 hours of light in Step 2 is non-negotiable for preventing leggy growth. I use a timer on my grow lights to automate this—set it to turn on at dawn and off at dusk. If you notice seedlings stretching toward light, they're telling you they need more intensity. Move them closer (but no less than 2-3 inches) or upgrade to brighter bulbs.
Transplant Timing: Waiting for 4-5 true leaves before transplanting in Step 3 gives seedlings enough strength to handle the shock. I've found that transplanting earlier often leads to stunted growth. Choose your 5-gallon containers carefully—they should have drainage holes and be at least 12 inches deep to accommodate root growth.
Fertilizer Precision: The 2-3 week fertilization schedule in Step 4 works because it mimics natural nutrient cycles. Too much nitrogen early on will give you lush leaves but few peppers. After flowering appears, switch to a low-nitrogen formula (like 5-10-10) to redirect energy toward fruit production. I fertilize right after watering to prevent root burn.
Pro Tips for Costa Rica Pepper
- Here's what I've learned from growing these fiery beauties in containers—lessons that'll help you avoid common pitfalls and maximize heat production.
- Heat Matters: Those 75-80°F conditions in Step 1 aren't just recommendations—they're critical for germination.
- Light Strategy: The 14-16 hours of light in Step 2 is non-negotiable for preventing leggy growth.
Frequently asked questions
How long does it take for Costa Rica pepper plants to produce fruit?
These tropical beauties are patient but rewarding! With ideal conditions (warmth, humidity, and full sun), you can expect first peppers in 80–120 days from transplanting. Dwarf varieties may fruit slightly sooner, while larger plants take the full range. Pro tip: Prune early flowers to boost root strength—future harvests will thank you!
Can Costa Rica peppers grow in containers, and what size pot do I need?
These peppers thrive in 5-gallon pots or larger to support their sprawling vines. Opt for containers with drainage holes and use a lightweight, well-draining potting mix. Bonus: Move pots indoors (near a sunny window) if temps dip below 55°F (13°C)—they’re tropical divas!
What’s the best way to save seeds from Costa Rica peppers?
Let your peppers fully ripen on the vine (they’ll turn deep red or orange), then scoop out the seeds and ferment them in a jar of water for 2–3 days. Rinse, dry on paper towels, and store in a cool, dark place. Warning: Some varieties are hybrid—check labels if you want true-to-type seeds!
Are Costa Rica peppers spicy, and how can I reduce heat if needed?
Mild to medium heat (1,000–5,000 SHU), but heat levels vary by variety. To mellow them, harvest early (green peppers are less spicy) or soak sliced peppers in milk or vinegar for 10–15 minutes. Pro tip: Remove seeds and membranes—they pack the most capsaicin!
What pests should I watch for, and how do I treat them naturally?
Common culprits: aphids, spider mites, and whiteflies. Blast pests off with water, introduce ladybugs, or spray neem oil (mix 1 tbsp per quart of water). For hornworms, handpick them (they’re camouflaged but easy to spot at night with a flashlight!). Prevention: Keep plants healthy with balanced fertilizer to deter infestations.
Wrapping up and next steps
Growing Costa Rica pepper is a rewarding adventure that brings bold flavors and lush greenery to even the smallest garden! Whether you’re a seasoned gardener or a curious beginner, these fiery little plants prove that tropical heat can thrive in limited spaces—just with a little patience and care. 🌱✨
Ready to spice up your harvest? Start small—plant a few seeds or seedlings this season and watch your passion for gardening (and peppers!) grow. Who knows? You might just become the next hotshot pepper grower in your neighborhood! 🔥