
Companion Plants
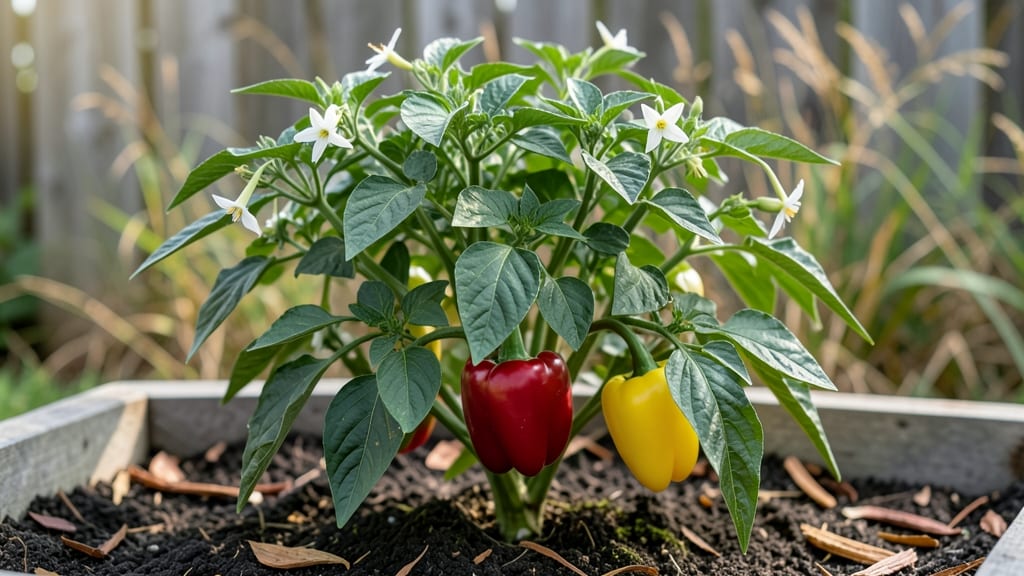
Transform your balcony or patio into a spicy harvest zone with hanging pepper plants—no yard required. 🌶️ I’ve packed my 5-gallon fabric pots with dwarf varieties like ‘Jalapeño M’ and ‘Shishito’ and ended up with more peppers than my ground-grown plants, all in half the space.
The secret? Right plant choice, proper drainage, and a little extra TLC for those dangling roots.
Start with compact pepper varieties bred for containers—they stay small but produce big. Your hanging pots need at least 5 gallons per plant (more for larger types) and drainage holes bigger than a quarter to prevent soggy roots.
A lightweight potting mix with perlite keeps things airy, and a saucer underneath catches water without weighing you down.
Place your baskets where they’ll get 6-8 hours of morning sun (afternoon shade helps in hot climates). Water when the top inch feels dry—hanging pots dry out faster than ground beds—and fertilize every 2-3 weeks with a balanced liquid feed.
Prune suckers early to focus energy on fruit, and watch those peppers turn from green to glorious in just 60-75 days.
Even in small spaces, you’ll harvest dozens of peppers per plant—perfect for salsas, pickling, or gifting to neighbors. The key is keeping roots happy (no overwatering!) and rotating baskets weekly for even sun exposure. Try it this season and turn dead space into a spicy success story.
📚 In This Guide
- What you need
- Instructions
- Tips and common mistakes
- Wrapping up and next steps
What you need
- ● Pepper plants: 3–5 healthy pepper seedlings (varieties like Jalapeño, Bell, or Cayenne work well for hanging). Choose compact or trailing types for best results.
- ○ Hanging planters: 2–4 10–12 inch diameter fabric or plastic grow bags (ensure they have drainage holes). Optional: Macramé hangers for a boho-chic touch!
- ● Potting mix: 1–2 bags of well-draining, organic potting soil (avoid garden soil—it compacts and suffocates roots). Mix in perlite or vermiculite (1 part per 4 parts soil) for extra aeration.
- ● Fertilizer: A balanced, water-soluble fertilizer (10-10-10 or 5-5-5) or organic options like fish emulsion or compost tea.
- ● Support: A sturdy hook or bracket to hang planters from ceilings, porches, or pergolas (ensure it can hold 10+ lbs per planter).
- ● Pruning shears: Small, sharp pair for trimming leggy stems or dead leaves.
- ● Watering can or spray bottle: With a narrow spout to avoid overwatering.
- ○ Trellis or stakes: Optional but helpful for varieties like Banana peppers that need light support.
- ○ Mulch: Optional: Straw or shredded leaves to retain moisture and regulate temperature.
- ○ Grow lights: Optional for indoor setups: LED full-spectrum bulbs (12–16 hours/day) if natural light is <6 hours/day.
- ● Sunlight: 6+ hours of direct sunlight daily (south-facing windows or outdoor spots). Pro tip: Rotate planters weekly for even growth! 💡
- ● Temperature: Peppers thrive in 70–85°F (60°F minimum). Avoid drafts or freezing temps.
- ● Space: Ensure hanging planters are 12–18 inches apart for airflow (prevents disease).
Step-by-step instructions for growing peppers vertically in hanging baskets
Here's how to transform your balcony or patio into a thriving pepper garden using space-saving hanging techniques.
🪴 Step 1: Select and Prepare the Hanging Containers
Choose fabric grow bags (at least 12-14 inches deep) or plastic hanging baskets with multiple drainage holes—peppers hate soggy roots. I prefer fabric because it breathes and prevents the soil from becoming waterlogged. Line the bottom with landscape fabric to prevent soil from escaping through the holes while still allowing water to drain freely.
Fill each basket ¾ full with a lightweight potting mix blended with 20% perlite for extra drainage. Avoid garden soil—it compacts in containers and strangles roots. Tap the basket gently to settle the soil without compacting it. The goal is a loose, fluffy mix that holds moisture but doesn't stay soggy.
🌱 Step 2: Plant Seedlings at the Right Depth and Spacing
Dig a hole twice as wide as the root ball but no deeper—peppers dislike having their stems buried too deeply. Gently remove the seedling from its nursery pot and place it in the hole, ensuring the top of the root ball sits just below the basket's rim. This prevents water from pooling around the stem and causing rot.
For four plants per basket, space them 8-10 inches apart in a square pattern. This gives each plant enough room to spread while maximizing vertical growth. Water immediately after planting to settle the soil around the roots. You'll see the soil surface firm up slightly—that's your signal the roots are making contact.
☀️ Step 3: Position for Maximum Sunlight and Airflow
Pepper plants need 6-8 hours of direct sunlight daily, so hang baskets where they'll receive full morning sun and afternoon shade if temperatures exceed 85°F. South- or west-facing walls are ideal. If your space only offers partial sun, choose dwarf or bush varieties like 'Shishito' or 'Jalapeño M', which tolerate slightly less light.
Ensure baskets are elevated slightly (use a sturdy hook or stand) to improve airflow around the roots. Poor circulation encourages fungal diseases like powdery mildew. You'll notice healthier plants when leaves stay dry and crisp rather than wilting or developing white powdery spots.
💧 Step 4: Water and Fertilize for Optimal Growth
Water deeply every 2-3 days, allowing 1 inch of water to penetrate the soil. Check moisture by sticking your finger 1 inch into the soil—if it feels dry, it's time to water. Avoid overhead watering; instead, use a drip irrigation system or watering can with a narrow spout to deliver water directly to the soil. Wet leaves invite fungal diseases.
Feed plants every 2 weeks with a balanced liquid fertilizer (10-10-10 or 20-20-20) diluted to half-strength. Stop fertilizing 4-6 weeks before harvest to allow flavors to concentrate. You'll see new growth and darker green leaves as a sign the plants are thriving. If leaves yellow, you're overwatering—let the soil dry out slightly between waterings.
✂️ Step 5: Prune and Support for Vertical Growth
When plants reach 12-18 inches tall, prune the bottom set of leaves (those closest to the soil) to improve airflow and prevent disease. Use clean, sharp pruners to make cuts just above a leaf node. This encourages the plant to focus energy on upward growth rather than bushy side branches.
Install a small trellis or tomato cage inside the basket to support the plant as it grows. Gently weave the main stem through the trellis and tie it loosely with soft plant ties every 6-8 inches. Avoid tying too tightly—peppers grow fast, and stems can split if restricted. You'll see the plant climb naturally if given enough support.
Tips & tricks for perfect vertical pepper growth
These space-saving secrets will help you maximize your harvest without sacrificing plant health.
Container Selection: Fabric grow bags are my top choice because they allow roots to breathe and prevent the dreaded soggy soil that can rot pepper roots. If using plastic baskets, make sure they have drainage holes AND add that landscape fabric lining—it's the difference between thriving plants and struggling ones. The 12-14 inch depth is non-negotiable for pepper varieties that develop robust root systems.
The Right Mix Matters: That 20% perlite blend in your potting mix isn't just filler—it creates the perfect air-to-moisture balance peppers crave. I've seen garden soil compact so badly in containers that roots actually suffocate. Tap that soil gently after filling to settle it without compacting, then water immediately to help roots establish contact with the soil particles. You'll know you've done it right when the soil surface firms up slightly after watering.
Sunlight Strategy: Those 6-8 hours of direct sunlight are critical, but timing matters just as much. Position baskets to catch morning sun first—it's less intense than afternoon rays. When temps hit 85°F, move baskets to afternoon shade to prevent heat stress. I've noticed my peppers develop a slight reddening on leaves when they're getting too much midday heat, and that's your warning sign to adjust positioning.
Watering Wisdom: The 1-inch moisture check might seem simple, but timing is everything. Water deeply every 2-3 days, but always in the morning so foliage has time to dry before evening. I've ruined multiple batches by watering at night—wet leaves overnight create the perfect environment for fungal diseases. A drip irrigation system solves this completely by delivering water right to the soil without wetting leaves.
Pro Tips for Hanging Pepper Plants
- These space-saving secrets will help you maximize your harvest without sacrificing plant health.
- Container Selection: Fabric grow bags are my top choice because they allow roots to breathe and prevent the dreaded soggy soil that can rot pepper roots.
- The Right Mix Matters: That 20% perlite blend in your potting mix isn't just filler—it creates the perfect air-to-moisture balance peppers crave.
Frequently asked questions
Got questions about growing hanging pepper plants? You’re not alone! Here are answers to the most common concerns—from setup to harvest—so you can confidently grow peppers in vertical style.
How do I prevent peppers from falling out of hanging planters?
Use secure, breathable grow bags (like fabric pots) or add a coconut coir liner inside rigid containers to prevent root escape. For extra stability, tie the planter to a sturdy hook with bungee cords or a soft rope. Avoid plastic pots—they can crack when wet and heavy.
When is the best time to harvest hanging pepper plants?
Harvest when peppers reach 70-80% of their mature size (e.g., bell peppers at 3-4 inches, jalapeños at 2-3 inches). For hot peppers, wait until they turn color (green to red/yellow). Pinch off peppers with clean scissors to avoid damaging the plant. Morning harvests reduce stress on the plant.
How do I keep hanging peppers from getting too hot or cold?
Pepper plants thrive in 65–85°F temps. In heatwaves, provide afternoon shade with a sheer curtain or move planters to a cooler spot. For chilly nights (<50°F), use a frost blanket or hang peppers near a south-facing wall. Avoid drafts—keep them away from AC vents or open windows.
Can I grow peppers in hanging planters if I don’t have a balcony or patio?
Try window boxes with south-facing exposure (6+ hours of sun) or a sunny indoor grow light (12–16 hours/day). For small spaces, dwarf varieties like ‘Mini Bell’ or ‘Shishito’ work best. If indoors, ensure good airflow to prevent fungal issues.
Why are my hanging pepper leaves turning yellow or black?
Yellow leaves often signal overwatering or nutrient deficiency (like nitrogen). Black spots? Likely fungal disease from excess moisture. Troubleshoot:
- Check soil moisture—water only when top 1–2 inches are dry.
- Improve airflow by spacing plants or trimming crowded foliage.
- Spray with neem oil or copper fungicide if black spots appear.
- Fertilize with a balanced 10-10-10 mix every 3–4 weeks.
Pro Tip: Rotate your hanging planters weekly to ensure even sun exposure—peppers lean toward light!
Wrapping up and next steps
Growing hanging pepper plants is a game-changer for small gardens and urban spaces—packing flavor into tight areas while keeping your harvests fresh and accessible! 🌿 With the right setup, you’ll enjoy bountiful, homegrown peppers year after year, whether you’re a seasoned gardener or just starting out.
Now that you’re armed with tips on containers, spacing, and care, it’s time to get creative!
Ready to transform your balcony or patio? Start by picking your favorite pepper varieties and gathering your supplies. Then, hang those plants with confidence—your future meals (and Instagram-worthy greens!) will thank you. Happy growing! 🌱