
Companion Plants
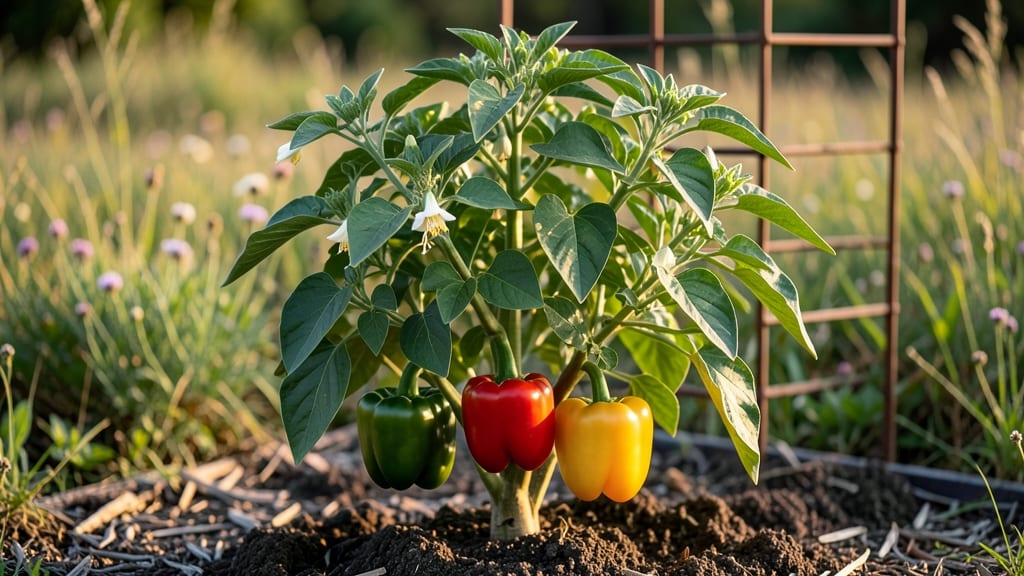
Growing healthy bell pepper plants starts with the right setup—pole training turns a single plant into a high-yielding, space-saving powerhouse. 🌱 I’ve turned my tiny balcony into a pepper paradise using this method, and the secret lies in how you train, water, and protect them from bitterness.
The key is consistent moisture (never soggy soil) and morning sunlight—peppers hate afternoon heat stress. My plants now produce 20+ peppers where one would normally give just a handful. The trick? Trellising them vertically and pruning suckers early to focus energy on fruit.
You’ll end up with glossy, sweet peppers that stay crisp even when fully ripe. The pole system also keeps foliage off the ground, reducing rot and pests. Plus, harvesting becomes a breeze—no more bending over! Works for any variety, from sweet bells to spicy jalapeños.
Let’s get those plants thriving without the bitterness or space struggles.
📚 In This Guide
- What you need
- Instructions
- Tips and common mistakes
- Wrapping up and next steps
What you need
- ● Bell Pepper Seeds or Seedlings: Choose disease-resistant varieties like 'Sweet Banana,' 'California Wonder,' or 'Jupiter' (3–5 plants for small spaces).
- ● Containers or Garden Bed: Containers: 5-gallon pots or fabric grow bags (1 per plant).
- ● Garden Beds: Raised beds (4’x8’ minimum) or in-ground plots with well-draining soil.
- ● Pole or Trellis System: Sturdy bamboo stakes (6–8 ft tall) or A-frame trellises (1 per plant or shared between 2–3 plants).
- ● High-Quality Potting Mix: 1 cubic foot of organic, well-draining mix (e.g., Fox Farm Ocean Forest or homemade blend: 60% compost, 20% coco coir, 20% perlite).
- ● Fertilizer: Balanced organic fertilizer (10-10-10) or compost tea (mix 1 tbsp per gallon of water).
- ● Mulch: Straw or shredded leaves (2–3 inches) to retain moisture.
- ● Hand Trowel or Transplant Spade (for planting seedlings).
- ● Pruning Shears (for trimming suckers and shaping plants).
- ● Garden Twine or Soft Plant Ties (to secure vines to poles).
- ● pH Test Kit (ideal soil pH: 6.0–6.8).
- ● Drip Irrigation or Watering Can (consistent moisture is key!).
- ○ Companion Plants: Optional but highly recommended for pest control and flavor: Basil, marigolds, or nasturtiums (repel pests).
- ● Onions or garlic (deter aphids).
Step-by-Step instructions for growing healthy bell pepper plants
Here's how I grow vigorous, productive bell peppers that stay sweet and bitter-free—no crowded beds or complicated setups.
🌱 Step 1: Start Seeds Indoors for Early Strength
Bell pepper seeds need warmth to germinate, so I begin them indoors 8-10 weeks before the last frost. Fill a seed tray with sterile seed-starting mix (not garden soil) and press it down lightly—just firm enough to hold seeds in place. Plant 1-2 seeds per cell at a depth of ¼ inch, since deeper planting delays germination.
Cover the tray with a clear plastic dome or plastic wrap to retain moisture and warmth. Place it in a warm spot (75-85°F)—a seedling heat mat speeds things up. Keep the soil consistently moist but never soggy. You'll see sprouts in 7-14 days, though some varieties take longer. Once seedlings emerge, remove the dome immediately to prevent fungal issues.
☀️ Step 2: Provide Strong Light to Prevent Leggy Growth
Leggy, weak seedlings are a red flag—your bell peppers need 14-16 hours of bright light daily from day one. A south-facing window rarely provides enough intensity, so I use a grow light positioned 2-4 inches above the seedlings. Raise it as they grow to maintain that distance. Without sufficient light, seedlings stretch toward the source, creating thin stems that can't support heavy fruit later.
Strong seedlings have thick stems, deep green leaves, and compact spacing between leaves. If yours look pale or stretched, move the light closer or add a second bulb. After 4-6 weeks, when seedlings have 3-4 true leaves, it's time to transplant them into individual pots.
🪴 Step 3: Train Peppers Vertically for Space Efficiency
Bell peppers thrive when their energy goes into fruit, not sprawling vines. I use 5-foot bamboo stakes or cattle panels to train each plant upward. When transplanting, place the stake next to the seedling and gently tie the main stem to it with soft plant ties as it grows. This keeps the plant upright and makes harvesting easier.
Prune side shoots that form in the first 12 inches of the plant—these compete with fruit production. Leave only the topmost shoot to grow upward. You'll see new leaves and buds forming along the main stem, which means the plant is directing its energy where you want it: upward and into peppers.
💧 Step 4: Water Deeply and Consistently for Sweetness
Bell peppers hate inconsistent moisture—they develop bitterness when stressed. I water deeply once a week, soaking the soil until water runs out the drainage holes. Let the top 2 inches of soil dry between waterings to prevent root rot. Mulch with 2-3 inches of straw to retain moisture and keep roots cool.
Overhead watering can spread disease, so I water at the base in the morning. You'll know your watering is right when the soil feels evenly moist but not waterlogged. Avoid wetting the leaves—this reduces fungal risks like powdery mildew, which can ruin a harvest.
✂️ Step 5: Prune and Harvest for Continuous Production
Pruning isn't just about shaping—it's about productivity. Remove yellowed or diseased leaves immediately to keep the plant healthy. When peppers start forming, I pinch off the first few flowers to encourage stronger root and stem growth. This ensures the plant has the energy to support a heavy harvest later.
Harvest peppers when they're firm and fully colored—this prevents them from becoming tough or bitter. Use pruning shears to cut the stem cleanly, leaving a small stub. Regular harvesting encourages the plant to produce more fruit. By mid-season, your vertically trained peppers will be loaded with sweet, vibrant peppers ready for the kitchen.
Tips & tricks for growing thriving pole-trained bell peppers
These simple tricks will help you grow sweet, productive bell peppers that stay healthy and bitter-free all season long.
Germination Boost: To speed up germination in Step 1, soak your bell pepper seeds in warm water for 4-6 hours before planting. This softens the seed coat and helps them sprout faster. I also recommend using a heating mat set to 80-85°F—this keeps the soil consistently warm, which is critical for those first few days. The goal is to have strong, uniform seedlings ready for transplanting in 8-10 weeks.
Lighting Strategy: In Step 2, if you notice seedlings stretching toward the light source (a classic sign of legginess), it's time to adjust. Move the grow light 1-2 inches closer—but no closer than 2 inches—to create more intense light. I also recommend rotating the tray quarter-turn daily to ensure even growth. This prevents seedlings from leaning toward one side, which can weaken their stems before they even reach the garden.
Vertical Training Secret: When you're training your plants upward in Step 3, use soft plant ties or old T-shirts cut into strips instead of plastic ties. These materials stretch as the plant grows, preventing damage to the stems. I also recommend tying the main stem to the stake at 3 points—the base, midway, and near the top—as the plant grows. This provides stability and prevents the plant from flopping over when heavy with fruit.
Watering Wisdom: In Step 4, the key to preventing bitterness is consistency. I use a moisture meter—a simple tool that tells you exactly when to water—to maintain that evenly moist—but not waterlogged—soil. If you don't have one, stick your finger 2 inches deep—that's how dry the top layer should be between waterings. Mulching with straw—not wood chips—is also crucial because it breaks down slowly and adds organic matter to the soil as it decomposes.
Pro Tips for Healthy Bell Pepper Plants
- These simple tricks will help you grow sweet, productive bell peppers that stay healthy and bitter-free all season long.
- Germination Boost: To speed up germination in Step 1, soak your bell pepper seeds in warm water for 4-6 hours before planting.
- Lighting Strategy: In Step 2, if you notice seedlings stretching toward the light source (a classic sign of legginess), it's time to adjust.
Frequently asked questions
How often should I water bell pepper plants when pole-trained?
Pole-trained bell peppers need consistent moisture—about 1–1.5 inches per week, especially during fruiting. Water deeply at the base 2–3 times per week (more in extreme heat). Avoid wetting leaves to prevent disease. Mulch helps retain moisture and keeps roots cool. Pro tip: Let the top inch of soil dry out between waterings to prevent overwatering.
When is the best time to harvest bell peppers to avoid bitterness?
Harvest when peppers are firm, glossy, and fully colored—never let them overripe or turn soft. For sweetness, pick green peppers when mature (they won’t sweeten further) or wait for red/yellow if you prefer riper flavors. Morning harvests yield the freshest peppers. Pro tip: Use pruning shears to avoid damaging the plant, and harvest regularly to encourage more production!
Why are my pole-trained bell peppers turning bitter, even with proper care?
Bitterness often stems from stress, like inconsistent watering, extreme heat, or overcrowding. Ensure your plants get full sun (6+ hours/day), balanced fertilizer (high in phosphorus), and even moisture. Avoid pruning too aggressively, as this can stress the plant. If bitterness persists, check for pests (like aphids) or nutrient deficiencies (e.g., calcium). Pro tip: Companion plants like basil or marigolds can deter pests naturally!
Can I grow bell peppers in containers if I only have a small balcony?
Choose a 5-gallon container or larger with drainage holes and use a lightweight potting mix. Pole training is perfect for small spaces—trellis or stake your plants to save room. Just ensure the container gets full sun and you fertilize regularly (every 2–3 weeks). Dwarf varieties like ‘Snackable’ or ‘Jalapeño M’ work well. Pro tip: Rotate containers weekly for even sun exposure!
What’s the best companion plant to keep bell peppers healthy and pest-free?
Pair bell peppers with basil, marigolds, or onions to repel pests like aphids and spider mites. Avoid planting near fennel or brassicas (like cabbage), which can stunt growth. Pro tip: Interplant with carrots or lettuce to maximize space and improve soil health naturally!
Wrapping up and next steps
Growing healthy bell pepper plants in small spaces is totally doable—and delicious! 🌱 By embracing pole training, you’ll save space, boost yields, and keep bitterness at bay.
Whether you’re a seasoned gardener or just starting out, these tips and tricks make it simple to cultivate vibrant, productive plants that thrive even in tight quarters.
Now that you’re armed with the how-to, it’s time to roll up your sleeves and get planting! Start with a single seedling or transplant, and watch your vertical garden transform into a pepper paradise. Happy gardening—and enjoy those sweet, homegrown harvests! 🌿