
Companion Plants
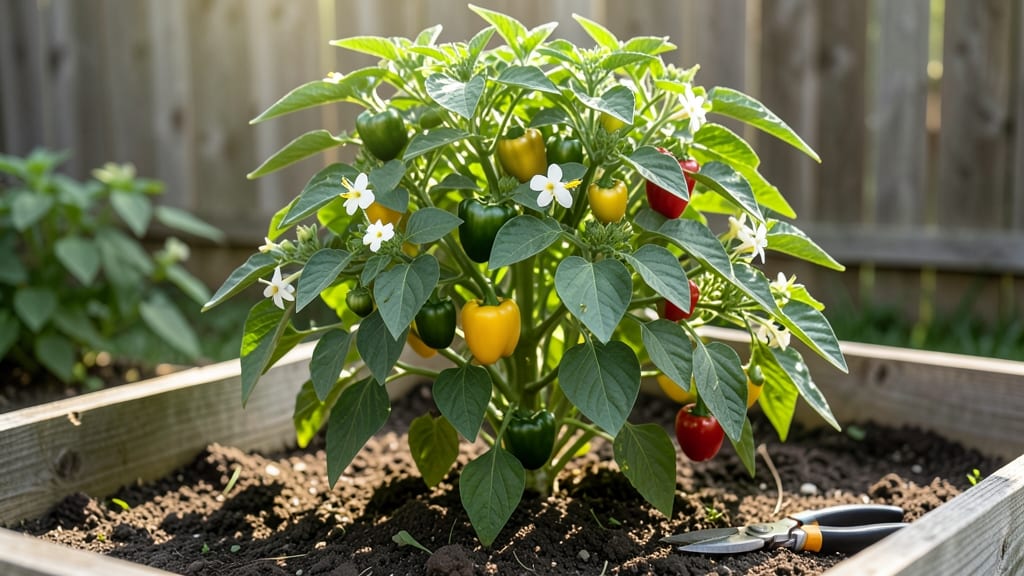
Growing healthy pepper plants isn't about luck—it's about light, warmth, and smart training. 🌱 I’ve turned my tiny balcony into a pepper powerhouse by treating plants like climbers, not bushes. The secret? Pole training maximizes space while boosting yields, even in small gardens where every inch counts.
Most gardeners overwater or over-fertilize, but peppers hate soggy roots and salty soil. My plants thrive with 1 inch of water per week and a balanced feed every 4-6 weeks. Pruning the right way—pinching off flowers on the first few branches—lets the plant focus energy on stronger stems before fruiting.
By midsummer, you’ll see vibrant green foliage and a steady stream of peppers, from sweet bell varieties to fiery jalapeños. The pole system keeps plants upright, reduces disease, and makes harvesting a breeze—no more bending over. Works for any pepper type, from compact chiles to giant bell peppers.
Here’s how to grow them strong from seed to harvest!"
📚 In This Guide
- What you need
- Instructions
- Tips and common mistakes
- Wrapping up and next steps
What you need
- ● Pepper plants: 3–5 healthy seedlings or transplants (choose varieties like Jalapeño, Bell, or Cayenne for pole training).
- ● Pole system: 1–2 bamboo stakes or wooden posts (6–8 ft tall, 1–2 inches in diameter).
- ● Twine or plant ties (10–15 ft of biodegradable or soft jute twine).
- ● Potting mix: 1–2 bags of well-draining, organic potting soil (or a mix of compost + coconut coir).
- ● Containers or garden bed: For containers: 5-gallon pots or fabric grow bags (with drainage holes).
- ● For in-ground: A raised bed or sunny spot with loose, fertile soil (6+ hours of sunlight daily).
- ● Fertilizer: Balanced organic fertilizer (10-10-10) or compost tea for nutrient boosts.
- ● Gloves & pruning shears (for handling plants and trimming).
- ● Watering can or hose with a gentle spray nozzle (peppers hate soggy roots!).
- ○ Mulch (optional): Straw or shredded leaves to retain moisture and suppress weeds.
- ○ Support clips (optional): Soft plant clips for securing vines to poles without damaging stems.
- ○ Shade cloth (optional): Lightweight cloth for hot climates to protect plants from scorching.
Step-by-step instructions for growing healthy pepper plants
Here’s how I grow sturdy, productive pepper plants that yield all season—even in tight spaces.
🌱 Step 1: Start Seeds Indoors for a Head Start
Peppers need warmth to germinate, so I start seeds indoors 6-8 weeks before the last frost. Fill small pots with sterile seed-starting mix (not garden soil) and plant 2 seeds per pot just ¼ inch deep. Cover lightly with mix and mist until damp—don’t soak.
Place pots in a warm spot (75-85°F) like on top of the fridge or under a seedling heat mat. Germination takes 7-14 days, but don’t water again until the soil surface feels dry to the touch. Once sprouts appear, remove the weaker seedling, leaving the strongest one per pot.
☀️ Step 2: Provide Light and Prevent Leggy Growth
Seedlings need 14-16 hours of light daily—a sunny windowsill won’t cut it. I use a grow light held 2-4 inches above the plants, raising it as they grow. Without enough light, stems stretch thin and weak (called "leggy"), and plants never recover.
Watch for first true leaves (the second set after the initial cotyledons). At this stage, fertilize lightly with a balanced, water-soluble fertilizer (half-strength) to encourage strong roots. Rotate pots a quarter turn daily so plants grow straight, not lopsided toward the light.
🪴 Step 3: Transplant to Larger Pots and Train Up Poles
When seedlings have 4-5 true leaves (about 4-6 weeks after sowing), move them to 5-7 inch pots with fresh potting mix. Peppers love warmth, so I keep them indoors until nighttime temps stay above 55°F. Harden off gradually by placing them outside in shade for 1-2 hours the first day, increasing time over 7-10 days.
Install bamboo stakes or trellis poles (5-6 feet tall) next to each plant. As soon as plants are outdoors, gently tie the main stem to the pole with soft twine. This encourages vertical growth, saving space and improving air circulation to prevent disease.
💧 Step 4: Water Deeply and Feed for Continuous Fruit
Peppers hate soggy roots but need consistent moisture. Water deeply once a week, letting 2-3 inches of soil dry between waterings. Check by sticking your finger in—if it’s dry past your first knuckle, it’s time. Water at the base, avoiding leaves to prevent fungal issues like blight.
When flowers appear (4-6 weeks after transplanting), switch to a low-nitrogen, high-phosphorus fertilizer (like 5-10-10) to boost fruiting. Feed every 2-3 weeks during the growing season. Prune suckers (side shoots in leaf axils) to direct energy to fruit production, but leave lower leaves for support.
✂️ Step 5: Harvest and Prune for Ongoing Productivity
Harvest peppers when they’re firm and fully colored—don’t wait until overripe. Use pruning shears to snip stems just above the fruit to avoid damaging the plant. This encourages more blooms and fruit to form. I harvest every 2-3 days in peak season to keep plants producing.
As the season progresses, prune yellowing or diseased leaves immediately to prevent spread. In late summer, reduce watering slightly to concentrate flavor in remaining peppers. If frost threatens, bring potted plants indoors and keep them in a sunny window until they’re done fruiting.
Tips & tricks for pole-trained pepper plants
These small adjustments make all the difference between struggling plants and a thriving pepper harvest—especially when working with limited space.
Germination Warmth Tip: I learned this the hard way after ruining three batches—pepper seeds need consistent warmth between 75-85°F to germinate. If your home runs cooler, place pots on a heating pad or seedling heat mat. I keep mine on top of my fridge where it stays warm and stable. The key is maintaining that temperature range without fluctuations, which can stall germination.
Lighting Strategy: That 14-16 hours of daily light isn't just about duration—it's about intensity too. If you notice leggy seedlings stretching toward the light, you're not providing enough. I use a full-spectrum LED grow light on a timer, keeping it just 2-4 inches above the plants. Move it up as they grow to prevent burning. Without proper light, your plants will waste energy growing tall instead of developing strong roots and foliage.
Transplanting Timing: The 4-6 week mark for transplanting isn't arbitrary—it's when seedlings develop enough leaves (4-5 true leaves) to support themselves. I wait until the second set of true leaves appears before moving them. This ensures they have enough energy reserves for the transplant shock. Also, only harden off for 1-2 hours the first day—gradual exposure prevents stress that could set back growth.
Pole Training Secret: When you're tying plants to their bamboo stakes, don't just tie at the base. As your pepper plants grow, add a second tie point about halfway up the stem. This prevents the plant from bending under its own weight or breaking in windy conditions. I use soft twine that won't cut into the stems, and I check the ties weekly to adjust as the plant grows.
Pro Tips for Healthy Pepper Plants
- These small adjustments make all the difference between struggling plants and a thriving pepper harvest—especially when working with limited space.
- Germination Warmth Tip: I learned this the hard way after ruining three batches—pepper seeds need consistent warmth between 75-85°F to germinate.
- Lighting Strategy: That 14-16 hours of daily light isn't just about duration—it's about intensity too.
Frequently asked questions
Got questions about growing thriving pepper plants in small spaces? You’re not alone! Here are some of the most common concerns—and their solutions—to help you cultivate a bountiful harvest with ease.
How do I keep my pepper plants healthy in small gardens?
Use pole training to save space and improve airflow, which reduces disease risk. Ensure your plants get 6–8 hours of sunlight daily and use container-friendly potting mix with good drainage. Companion plants like basil or marigolds can also deter pests naturally.
When is the best time to plant pepper seeds indoors?
Start seeds 8–10 weeks before your last frost date—typically February or March in most climates. Peppers thrive in warm soil (70°F+), so wait until nighttime temps stay above 55°F before transplanting outdoors. A heat mat can speed up germination if your home is chilly!
Can I grow peppers in containers without poles?
Yes! Use compact varieties like ‘Shishito’ or ‘Jalapeño M’ for containers, but expect smaller yields. Without poles, prune plants to focus energy on fruit production. Just ensure containers are at least 12–18 inches deep and wide enough for 2–3 plants per pot.
What should I do if my pepper plants get yellow leaves?
Yellow leaves usually signal overwatering, nutrient deficiency, or pests. Check soil moisture—peppers hate soggy roots. Feed with a balanced fertilizer (like 10-10-10) and inspect for aphids or spider mites. Neem oil is a great organic fix for pests!
Do pepper plants need extra heat in cool climates?
Peppers are heat-lovers—they struggle below 50°F. Use row covers, black plastic mulch, or a small greenhouse to warm soil. If frost threatens, bring potted plants indoors near a sunny window or under grow lights until danger passes.
Wrapping up and next steps
Growing healthy pepper plants in small gardens is absolutely achievable with the right techniques—like pole training! By maximizing vertical space, choosing companion plants, and providing proper care, you’ll enjoy a bountiful harvest even in tight spots. 🌱
Now that you’re armed with tips and answers to common questions, it’s time to roll up your sleeves and start planting. Pick your favorite pepper varieties, set up those poles, and watch your garden thrive! Happy gardening—your future meals will thank you. 🌶️✨