
Picking
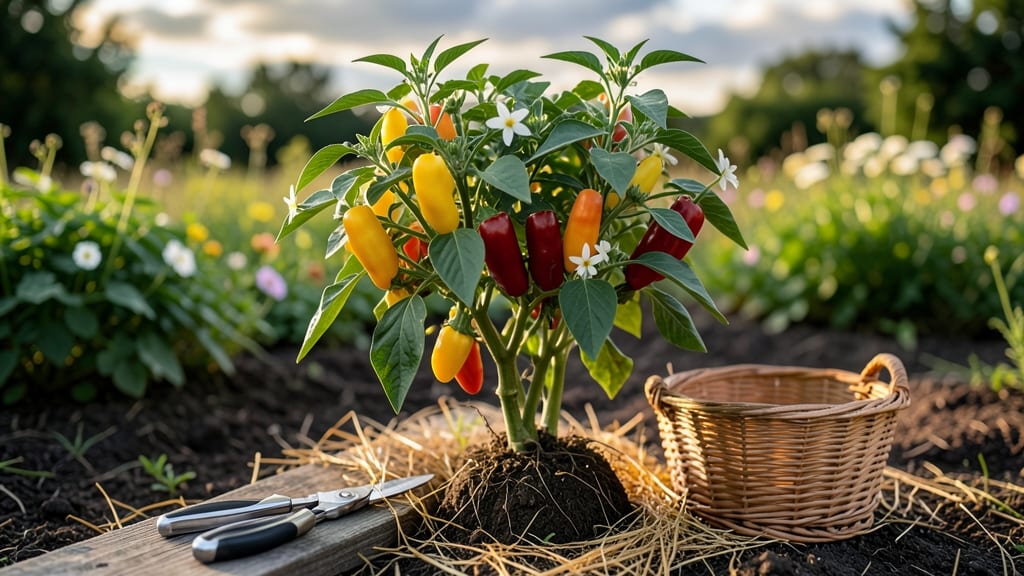
Growing hot banana peppers on a pole cuts the bitterness while packing 60 days of fiery harvests into tight spaces. 🌱 I learned this trick after my first batch turned out bitter and stunted—until I trained them vertically.
The key is sunlight, consistent moisture, and a little heat-loving patience. These peppers thrive in full sun (6+ hours daily) and well-draining soil mixed with compost. Start seeds indoors 8–10 weeks before last frost or transplant young plants after soil warms to 65°F.
Water at the base to avoid wetting leaves, which breeds disease. By mid-summer, you’ll see bright yellow-orange peppers dangling like nature’s chili strings. Pole training keeps them off the ground, reduces pests, and prevents fruit rot. Just pinch off early blooms to focus energy on stronger vines.
Works in zones 9–11 or containers for cooler climates. The secret? Let them climb—your harvest (and neighbors’ jaws) will drop. Ready to grow?
📚 In This Guide
- What you need
- Instructions
- Tips and common mistakes
- Wrapping up and next steps
What you need
- ● Hot banana pepper seeds – 3–5 seeds (or 1–2 seedlings if starting with transplants). Look for Capsicum chinense varieties labeled for heat and sweetness.
- ● Pole or trellis – A 6–8 ft tall bamboo stake, wooden post, or metal trellis (diameter: 1–2 inches). Pro tip: Use a 5-gallon bucket with drainage holes for container growing!
- ● Potting mix – 10–12 quarts of well-draining soil blend (60% potting soil + 30% compost + 10% perlite or vermiculite). Avoid garden soil—it’s too dense!
- ● Containers or garden bed – 5-gallon pots (1 per pepper) or a raised bed (12" deep, 18" wide). Ensure pots have drainage holes!
- ○ Fertilizer – Balanced 5-5-5 or 10-10-10 organic fertilizer (1 tbsp per plant at planting, then monthly). Optional: Fish emulsion or worm castings for extra nutrients.
- ● Mulch – Straw or shredded leaves (2–3 inches) to retain moisture and suppress weeds.
- ● Gloves – Heavy-duty gardening gloves (peppers can be spicy to handle!).
- ● Trowel or small shovel – For planting and transplanting.
- ● Pruning shears – Sharp, sterilized shears to trim suckers and encourage pole growth.
- ● Twine or plant ties – 3–4 ft of soft twine or Velcro plant ties to secure peppers to the pole.
- ● Spray bottle – For misting seedlings (especially if starting indoors).
- ○ pH test kit – Optional but helpful to check soil pH (aim for 6.0–6.8).
- ● Row cover or shade cloth – Lightweight fabric (30–50% shade) to protect seedlings from pests or harsh sun.
- ● Sunlight – 6+ hours of direct sunlight daily. A south-facing window or grow lights work for seedlings.
- ● Warmth – Peppers thrive in 70–90°F soil temps. Wait until after the last frost or use a heat mat for early starts.
- ● Watering routine – Consistent moisture (1–1.5 inches per week). Pro tip: Water at the base to avoid fungal issues!
- ● Patience – Pole-trained peppers take 60–75 days to harvest, but the wait is worth the sweet heat!
Step-by-step instructions for growing hot banana peppers pole-trained
Here’s my foolproof method for growing fiery, bitterness-free hot banana peppers on a trellis—ready for harvest in just 60 days.
🌱 Step 1: Start Seeds Indoors Under Grow Lights
Fill 3-inch biodegradable pots with sterile seed-starting mix (never garden soil—it’s too dense and can harbor pathogens). Plant 2 seeds per pot at a depth of ¼ inch, pressing lightly to ensure good soil contact. I use a heat mat set to 75-80°F to speed germination, which typically occurs in 7-10 days. Keep the soil consistently moist but not soggy—you’ll know it’s right when the surface feels damp but not glistening.
Once the seeds sprout, remove the weaker seedling, leaving only the strongest. Position a full-spectrum LED grow light just 2-3 inches above the seedlings and set a timer for 14-16 hours of light daily. Without enough light, seedlings stretch and become leggy, which weakens them permanently. Watch for first true leaves (the second set after the initial cotyledons)—this is your signal to begin fertilizing lightly with a balanced liquid fertilizer diluted to half strength.
☀️ Step 2: Transplant to Trellis System After True Leaves Form
When seedlings have 4-5 true leaves (about 4-6 weeks after sowing), it’s time to move them to their 5-foot tall trellis. Choose a 5-gallon container with drainage holes and fill it with well-draining potting mix mixed with compost for nutrients. Dig a hole large enough to accommodate the root ball, place the seedling in, and backfill with soil, pressing gently to eliminate air pockets. Water deeply right after transplanting to help roots establish.
Install the trellis immediately and tie the main stem to the central support with soft plant ties. As the plant grows, guide the main stem upward while pinching off side shoots until it reaches the top of the trellis. This vertical training saves space and ensures better air circulation, which reduces disease risk. You’ll notice new leaves emerging within 7-10 days—this confirms the plant is thriving and adapting to its new home.
💧 Step 3: Maintain Consistent Water and Fertilizer Schedule
Water the plants deeply every 2-3 days, allowing the top 1-2 inches of soil to dry out between waterings. Overwatering leads to blossom-end rot, while underwatering causes peppers to become bitter. I use a drip irrigation system or water at the base in the morning to prevent fungal issues. Mulch the soil surface with 2 inches of straw to retain moisture and suppress weeds, which is especially important in hot climates.
Fertilize every 2 weeks with a low-nitrogen, high-phosphorus formula (like 5-10-10) to encourage flowering and fruiting. Stop fertilizing 4-6 weeks before harvest to allow the peppers to develop their signature heat without excess nitrogen. Watch for white flowers appearing along the trellis—these signal the start of pepper formation. Hand-pollinate if needed by gently shaking the trellis to distribute pollen, especially in greenhouses or during rainy weather.
✂️ Step 4: Prune and Harvest for Maximum Yield
Prune the plant by removing lower leaves that touch the soil to improve airflow and reduce disease risk. As peppers begin to form, prune suckers (the shoots that grow in the leaf axils) to redirect energy to fruit production. I leave 2-3 peppers per cluster to ensure they grow large and hot, rather than small and underdeveloped. Harvest yellow peppers when they reach 3-4 inches long—this is the peak for hot banana peppers, balancing heat and sweetness.
Use clean pruning shears to snip peppers at the stem, leaving a small portion attached. Harvesting encourages more fruit to develop, and peppers picked at this stage have the best flavor and heat profile. Store harvested peppers in a cool, dark place for up to 2 weeks, or dry them for long-term storage. If you miss the yellow stage, red peppers will still be spicy but slightly sweeter—great for drying or making hot sauces.
🌿 Step 5: Extend the Season with Proper Care
To keep your hot banana peppers producing, remove spent flowers after harvest to encourage new blooms. If temperatures drop below 50°F, bring the container indoors near a south-facing window or under grow lights. Reduce watering slightly in cooler months, as the plant’s growth slows. I’ve kept my trellis-trained peppers producing for 6-8 months with consistent care, far exceeding the typical 60-day harvest window.
By late fall, the plant will slow down, but you can save seeds from the best peppers for next year. Cut open a ripe pepper, scoop out the seeds, and dry them on a paper towel for 3-5 days before storing in an airtight container. This ensures you’ll have a fresh supply of heat for your next growing season. The key to success? Patience and consistency—your trellis will be laden with fiery, bitterness-free peppers in no time.
Tips & tricks for pole-trained hot banana peppers
Between us, these tricks will help you avoid common pitfalls and maximize your fiery harvest.
Lighting Strategy: The 14-16 hours of daily light is non-negotiable for strong seedlings. I use a timer on my LED grow lights to automate this—it’s the only way to prevent leggy, weak stems that’ll never reach your trellis. If you notice seedlings stretching toward the light, lower the fixture by ½ inch immediately. Proper light positioning is what separates thriving plants from sad, spindly failures.
Transplanting Technique: When moving your 4-6 week old seedlings to the 5-gallon container, I always make a small trench around the root ball before placing it in the hole. This encourages roots to spread outward rather than staying compact. After transplanting, give the soil a firm press around the base—this eliminates air pockets that can strangle new roots. The 7-10 day recovery period is your first real test of success.
Watering Wisdom: The "top 1-2 inches dry" rule is crucial for avoiding bitterness. I use a moisture meter to check soil moisture—it’s the only reliable way to judge without guessing. Water deeply in the morning so leaves have time to dry before evening, which prevents fungal spores from taking hold. That 2-inch straw mulch isn’t just decoration—it’s what keeps moisture consistent and weeds at bay during those hot summer days.
Harvest Timing: Those 3-4 inch yellow peppers are your sweet spot for maximum heat without bitterness. I harvest every morning before the sun gets too intense—peppers left on the plant too long develop more capsaicin, which can make them overly spicy. Use clean pruning shears and always cut at the stem rather than pulling, which can damage the plant and invite disease.
Pro Tips for Hot Banana Peppers
- Between us, these tricks will help you avoid common pitfalls and maximize your fiery harvest.
- Lighting Strategy: The 14-16 hours of daily light is non-negotiable for strong seedlings.
- Transplanting Technique: When moving your 4-6 week old seedlings to the 5-gallon container, I always make a small trench around the root ball before placing it in the hole.
Frequently asked questions
about hot banana peppers—because growing these fiery gems comes with a few spicy surprises!How do I know when hot banana peppers are fully ripe?
Hot banana peppers turn from green to yellow when fully ripe—usually in 60–75 days after transplanting. They’ll also soften slightly and develop a waxy sheen. Pro tip: Pick them when they’re still firm but vibrant yellow to avoid bitterness!
Can I eat hot banana peppers raw, or do I need to cook them first?
These peppers are perfectly safe raw—they’re milder than jalapeños but pack a slow-building heat. For extra flavor, try roasting or pickling them. Warning: Start with a tiny slice to test your spice tolerance!
What if my banana peppers stay green and never turn yellow?
If your peppers stay green past 75 days, they’re likely underripe. Check for these fixes:
- More sunlight: Ensure 6–8 hours of direct sun daily.
- Consistent watering: Keep soil moist but not soggy.
- Warmth: Ideal temps are 70–85°F (21–29°C).
Are hot banana peppers the same as regular banana peppers?
Not quite! Hot banana peppers are smaller, spicier (1,000–2,000 SHU), and slower to ripen than their milder cousins (300–500 SHU). They’re also less prone to bitterness if harvested at the right stage. Think of them as the "chili pepper" version of banana peppers!
What’s the best way to store hot banana peppers long-term?
For freshness (1–2 weeks): Store whole peppers in a paper bag in the fridge. For long-term (months):
- Pickling: Preserves flavor and heat perfectly.
- Freezing: Chop, blanch for 2 mins, then freeze in bags.
- Drying: Hang peppers in a dark, dry place for 1–2 weeks.
Wrapping up and next steps
Hot banana peppers are a game-changer for home gardeners—packing heat, flavor, and zero bitterness in just 60 days! Whether you’re growing them vertically for space-saving or experimenting with spicy salsas, these peppers prove that fiery flavors don’t require compromise.
Now that you’re armed with the right techniques, get your hands dirty and enjoy the satisfaction of a thriving, pole-trained harvest!
🌱 Next step: Mark your calendar, grab those seeds, and watch your garden transform into a spice paradise! Share your progress—or your first batch of hot banana pepper jam—with fellow gardeners. 🔥