
Picking
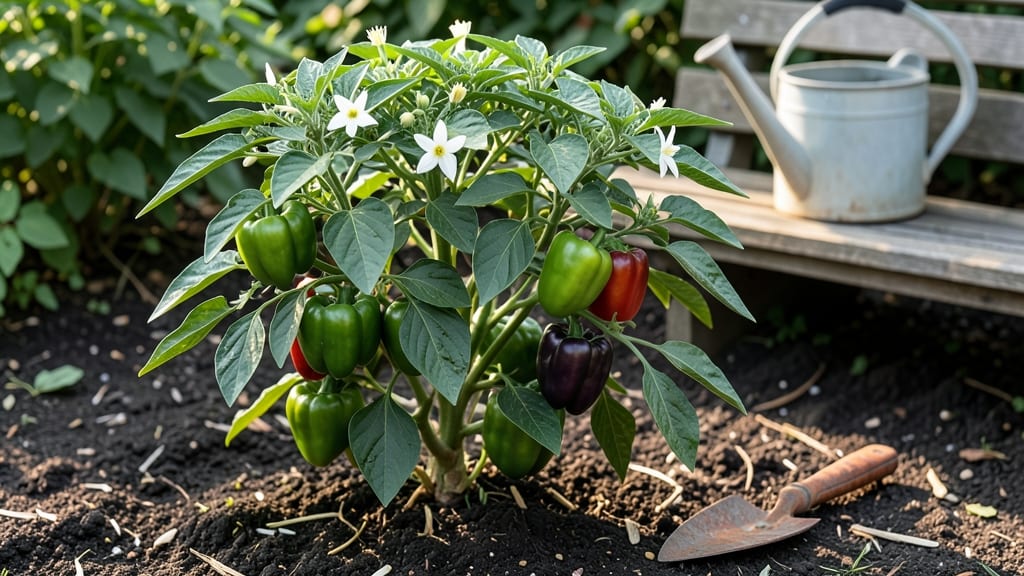
Growing Lady Bell peppers from seed to harvest in just 60 days feels like magic—especially when you train them up a pole. 🌱 I’ve grown dozens of pepper varieties, but these compact, sweet peppers win for their speed and versatility in dishes (or straight off the vine).
The key? Warm soil, consistent moisture, and a little vertical help to save space. Start seeds indoors 8-10 weeks before your last frost, using a seed-starting mix that drains well. Lady Bells love heat—keep soil above 60°F at all times, or they’ll sulk and refuse to germinate.
Once seedlings sprout, move them to a sunny windowsill or under grow lights for 12-14 hours of light daily. Transplant outdoors only after nighttime temps stay above 55°F, and harden them off for a week first.
By midsummer, your pole-trained plants will be climbing, producing bright red, yellow, or orange peppers that stay sweet even when fully ripe. Harvest every 3-5 days to encourage more production, and pinch off early flowers if you want larger fruits. The real secret?
A balanced fertilizer (like 10-10-10) applied every 2-3 weeks keeps them happy without overfeeding. Best for zones 8-11, but with a greenhouse or row covers, you can grow them in cooler climates too. Even beginners nail this—just don’t skimp on the sun or the pole support!
📚 In This Guide
- What you need
- Instructions
- Tips and common mistakes
- Wrapping up and next steps
What you need
- ● Lady Bell Pepper Seeds: 3–5 seeds (choose disease-resistant varieties like 'Lady Bell' or 'Sweet Banana').
- ● Growing Containers or Garden Bed: Containers: 5–10 gallon pots (with drainage holes) or fabric grow bags.
- ● Garden Bed: Full sun (6+ hours/day), well-draining soil (pH 6.0–6.8).
- ● Pole-Training Supports: 3–4 ft bamboo stakes or trellis netting (for vertical growth).
- ● Soft plant ties or Velcro strips (to secure vines).
- ● Potting Mix: Seed-starting mix (sterile, lightweight) or compost-amended garden soil.
- ● Fertilizer: Balanced organic fertilizer (10-10-10) or compost tea (for seedlings).
- ● Watering Can or Hose: With a gentle spray nozzle (to avoid disturbing seedlings).
- ● Pruning Shears: Small, sharp scissors (for trimming and harvesting).
- ● Heat mat (if starting seeds indoors in cool climates).
- ● Grow lights (for indoor seedling stage).
- ● Mulch (straw or shredded leaves to retain moisture).
- ● Pest control: Neem oil or insecticidal soap (for aphids/spider mites).
- ● Row covers (to protect young plants from pests).
Step-by-Step instructions for pole-trained lady bell peppers
Here's how I turn delicate lady bell pepper seedlings into prolific, trellised plants that produce faster and cleaner than traditional bush varieties.
🌱 Step 1: Start Seeds Indoors for Early Growth
Sow seeds 8-10 weeks before your last frost date in biodegradable pots filled with sterile seed-starting mix. I press each seed ¼ inch deep—any deeper and they struggle to push through the soil. Keep the soil consistently moist at 75-85°F using a seedling heat mat until germination, which typically takes 7-14 days.
Once sprouts emerge, move them to a sunny windowsill or under grow lights for 14-16 hours daily. You'll see the first true leaves appear in 2-3 weeks—these are your signal to harden off seedlings before transplanting. I always test soil moisture by sticking my finger in: if the top inch feels dry, it's time to water.
🪴 Step 2: Transplant to Larger Pots or Garden Beds
Lady bell peppers thrive with 18-24 inches of vertical space, so I transplant each seedling into a 5-gallon container or directly into the garden where they'll have 18 inches of space between plants. The key is burying them deeper than their original container—this encourages stronger root development.
Mulch heavily with 2-3 inches of organic mulch to retain moisture and suppress weeds. I use straw because it breaks down slowly and improves soil structure over time. Water deeply right after transplanting to help roots establish without shock.
☀️ Step 3: Set Up Trellis System Early
Install your trellis or pole system within 2 weeks of transplanting—this prevents leggy growth later. I use 6-foot bamboo stakes with twine tied in a crisscross pattern to create a sturdy frame. The moment the first flower buds appear, gently tie the main stem to the trellis to guide upward growth.
Lady bell peppers grow faster when trained vertically, so I prune side shoots that develop below the first 12 inches of growth. This redirecting energy to the main stem produces earlier and larger fruit. Watch for dark green leaves with white flowers—these indicate readiness for pollination.
💧 Step 4: Maintain Consistent Water and Fertility
Water at the base 1-2 inches deep every 2-3 days during hot weather, adjusting for rainfall. I always water in the morning to prevent fungal issues. Lady bell peppers are sensitive to calcium deficiencies, so I add crushed eggshells to the soil monthly for extra calcium support.
Fertilize every 3-4 weeks with a balanced organic fertilizer (10-10-10) once flowers appear. You'll notice fruit set within 6-8 weeks after transplanting—this is when I switch to a low-nitrogen, high-phosphorus formula to boost fruit production.
✂️ Step 5: Harvest and Prune for Continuous Production
Pick peppers when they reach 3-4 inches long for the sweetest flavor and to encourage more fruit. I use clean scissors to snip stems just above the fruit to prevent damage. Lady bell peppers produce continuously, so I harvest 2-3 times per week during peak season.
Prune any yellowing or diseased leaves immediately to maintain plant health. By mid-season, you'll have a 6-foot vertical plant producing 20-30 peppers per season—far more than bush varieties in the same space. The trellis keeps fruit clean and reduces rot from ground contact.
Tips & tricks for pole-trained lady bell peppers
Real talk: Vertical growing isn't just for show—it transforms your pepper harvest. Here's how I've optimized this method after years of trial and error.
Seed Starting Secret: The 75-85°F soil temperature range is non-negotiable for germination. I use a seedling heat mat and monitor temps with a small thermometer—cold soil delays sprouting by days. If your kitchen runs cooler, place pots on top of the fridge (not inside) to maintain consistent warmth.
Transplanting Technique: When burying seedlings deeper than their original pots in Step 2, aim for about 2 inches of stem buried. This creates stronger root development from the buried stem nodes. I make a small trench, place the seedling, and gently firm soil around it while keeping the soil level above the top leaves.
Trellis Timing: That 2-week window for setting up your trellis in Step 3 is critical—any later and you'll deal with leggy plants that struggle to support their own weight. I install my bamboo stakes immediately after transplanting and tie the main stem to the trellis as soon as I see flower buds forming. This redirecting energy upward prevents sprawling growth.
Harvest Hack: The 3-4 inch size guideline for harvesting is flexible—pick when peppers reach your preferred size, but never let them exceed 4 inches or they'll start developing thicker walls. I harvest every 2-3 days during peak season to maintain continuous production, using clean scissors to avoid damaging stems.
Pro Tips for Lady Bell Pepper
- Real talk: Vertical growing isn't just for show—it transforms your pepper harvest.
- Seed Starting Secret: The 75-85°F soil temperature range is non-negotiable for germination.
- Transplanting Technique: When burying seedlings deeper than their original pots in Step 2, aim for about 2 inches of stem buried.
Frequently asked questions
Got questions about growing lady bell peppers? You’re not alone! Here are answers to the most common queries—from seedling care to harvest tips—to help you grow these sweet, compact peppers like a pro.
How long does it take for lady bell pepper seeds to germinate?
Lady bell pepper seeds typically germinate in 7–14 days when kept in warm (70–85°F), moist soil. Use a heat mat if your home runs cool, and keep the soil consistently damp (not soggy) to speed up sprouting. Patience pays off—just don’t overwater!
When is the best time to transplant lady bell pepper seedlings outdoors?
Wait until after the last frost and soil temps hit 60°F+ (usually late spring/early summer). Harden off seedlings for 7–10 days by gradually exposing them to outdoor conditions. Transplant in the morning to reduce stress, and space plants 18–24 inches apart for pole-trained varieties.
Why are my lady bell peppers turning yellow or dropping?
Yellowing or dropping peppers often signal underwatering, overwatering, or nutrient issues. Check soil moisture (top inch should be dry); peppers hate soggy roots. Lack of calcium (blossom-end rot) or nitrogen (pale leaves) can also cause problems. Feed with a balanced fertilizer and mulch to retain moisture.
Can I grow lady bell peppers in containers, and what size pot do I need?
Lady bell peppers thrive in 5-gallon containers or larger (minimum 12–14 inches deep). Use well-draining soil with compost, and provide a trellis or cage for pole-trained varieties. Place pots in full sun (6–8 hours daily) and water consistently—containers dry out faster than garden beds.
What’s a good alternative if lady bell peppers don’t grow well in my climate?
Try shishito peppers (mild, prolific) or mini bell peppers (like ‘Snackable’ or ‘Apache’). For shorter seasons, opt for early-maturing varieties like ‘Lucky Lady’ (55–60 days) or ‘Jupiter’ (60 days). If heat is the issue, grow in partial shade or extend the season with row covers.
Wrapping up and next steps
Growing lady bell peppers from seed is a rewarding journey that yields delicious, homegrown harvests—especially when you embrace the pole-training trick for speed and efficiency! 🌱 With the right soil, sunlight, and a little patience, you’ll soon enjoy crisp, sweet peppers straight from your garden.
Whether you’re a seasoned gardener or a curious beginner, this method makes it easy to turn tiny seeds into a bountiful crop.
Ready to take the next step? Start your seeds indoors now (or plant them outside in warmer climates) and watch your lady bell pepper plants thrive. Happy gardening—and enjoy those fresh, homegrown flavors! 🌿🍽️