
Planting
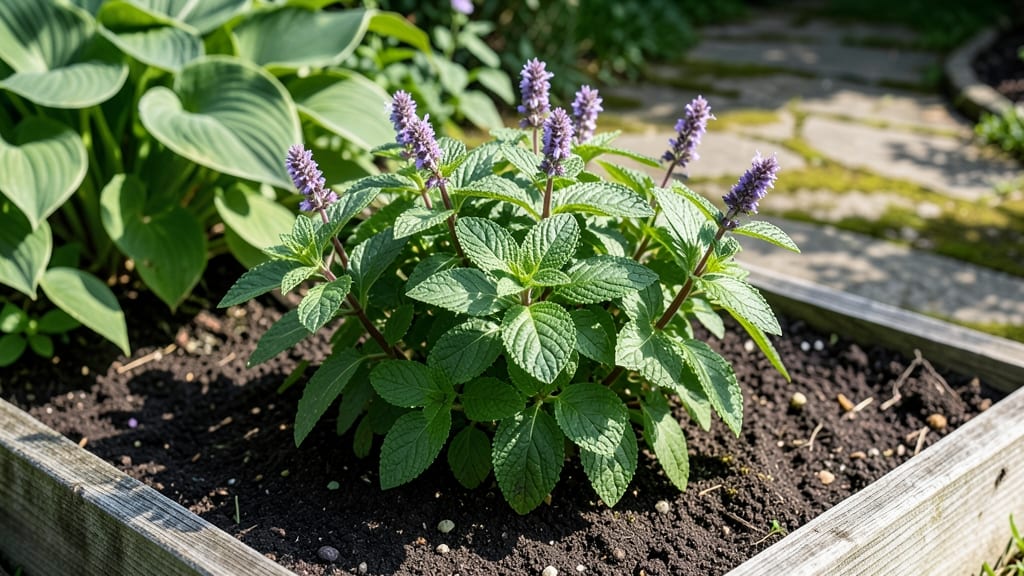
A mature peppermint plant 🌿 thrives when you know how to prune and propagate it right—turning a one-season harvest into a year-round herb garden.
Picture this: your peppermint bush spilling over the pot, leaves so vibrant they look like they’ve been dusted with morning dew. But here’s the catch—if you don’t prune it correctly, you’ll end up with leggy stems and weak flavor by summer. The secret? Timing and technique make all the difference.
Most gardeners stop at the first harvest, but a well-maintained peppermint plant can keep producing for years. Whether you’re dividing roots to create new plants or snipping back stems to encourage bushier growth, these moves will keep your mint thriving—even in USDA Zone 6a winters.
Ready to unlock the full potential of your peppermint? I’ll walk you through the exact pruning schedule, propagation tricks, and care tweaks that turn a good plant into an unstoppable herb powerhouse.

When and how to prune a mature peppermint plant for maximum growth
Pruning your mature peppermint plant isn't just about keeping it tidy—it's the secret to unlocking year-round growth and bushier foliage. When done correctly, pruning stimulates new shoots, prevents root rot, and keeps your plant vigorous for harvests all season.
But timing and technique matter—cut too late or too aggressively, and you risk stunting growth or inviting disease.
Most gardeners make one of two mistakes: pruning at the wrong season or using improper cutting techniques. Spring is your best window for rejuvenating growth, while fall pruning helps prepare the plant for winter dormancy.
Let's dive into the exact steps to follow, so your peppermint thrives for years to come.
Step-by-Step Pruning Guide for Mature Peppermint
-
Step 1: Choose the Right Season
- Spring (March-April): Prune after last frost to encourage new growth.
- Fall (October): Light pruning to remove dead or diseased stems before winter.
-
Step 2: Gather Tools
- Sterilized pruning shears (alcohol-rinsed to prevent disease).
- Gloves (peppermint stains hands and can irritate skin).
- Sharp knife for thick stems (up to 1/4-inch diameter).
-
Step 3: Identify What to Cut
- Remove dead or yellowing leaves (signs of stress or disease).
- Cut back woody stems to 6 inches above ground (encourages bushiness).
- Trim flower spikes immediately—they drain energy from foliage.
-
Step 4: Make Clean Cuts
- Cut at a 45-degree angle 1/4-inch above a leaf node.
- Avoid tearing—use sharp tools for smooth cuts.
- Never cut more than 1/3 of the plant at once.
-
Step 5: Post-Pruning Care
- Water deeply to help roots recover (1 inch of water).
- Apply compost mulch (2-3 inches) to retain moisture.
- Fertilize lightly with 5-10-10 (1 tbsp/plant) in spring only.
-
Step 6: Seasonal Maintenance
- Spring: Prune + fertilize + monitor for pests.
- Summer: Light trimming to maintain shape (avoid heavy cuts).
- Fall: Remove dead growth; reduce watering by 50%.
Spring pruning is your power move for maximum growth. Aim to prune in early spring (March-April) after the last frost date in your zone. This timing aligns with the plant's natural regrowth cycle, giving it 6-8 weeks to recover before summer heat.
For aggressive growers, a second light pruning in early summer can encourage a second flush of lush foliage.
If you live in warmer climates (Zones 8-10), your peppermint may stay evergreen year-round. In this case, prune in late winter (January-February) to shape the plant before new growth begins.
The key is to never prune in fall unless removing dead stems—peppermint needs time to harden off for winter.
One of the biggest mistakes I see is over-pruning in a single session. Peppermint is a fast-spreading perennial, and cutting too much at once can shock the roots. Stick to removing no more than 1/3 of the plant in one go.
For example, if your mature plant has 20 stems, prune just 6-7 stems in spring and save the rest for summer or fall.
To encourage bushier growth, focus on pinching back the tips of new shoots when they reach 6-8 inches tall. This technique forces the plant to branch out instead of growing tall and leggy.
Use your fingers or small pruners to squeeze off the top set of leaves—this is called tip pruning, and it works wonders for compact, high-yield peppermint.
Watch for signs of stress after pruning, like yellowing leaves or wilting stems. These could indicate over-pruning or underwatering. If you see this, reduce pruning intensity next time and increase watering slightly.
Peppermint roots are shallow, so they need consistent moisture (1 inch per week) to recover from cuts.
For disease prevention, always sterilize your tools with rubbing alcohol before and after pruning. Peppermint is prone to powdery mildew and root rot, especially in humid climates.
If you notice white powder on leaves, prune affected areas immediately and space plants 18-24 inches apart for better air circulation.
Pro tip: Save your pruning cuttings! Place them in water for 3-4 weeks to root—this is an easy way to propagate new plants for free. Just keep the water shallow (1 inch) and change it every 3 days to prevent mold.
Once roots form, transplant to soil and enjoy double the harvest next season.
Best propagation methods for mature peppermint plants: cuttings vs. division
Propagating your mature peppermint plant is the secret to expanding your herb garden without spending a dime. Two reliable methods—stem cuttings and root division—both work well, but each has unique advantages depending on your goals.
I’ve tested both in my garden and found that cuttings yield faster results, while division preserves the parent plant’s vigor. Let’s break down which method suits your needs.
For stem cuttings, you’ll need healthy, non-flowering stems measuring 4-6 inches long. This method is ideal if you want to create multiple new plants quickly, especially during the spring or early summer when growth is vigorous.
Root division, on the other hand, is perfect for overcrowded plants or when you want to rejuvenate an established peppermint patch. It’s best done in early spring before new growth begins.
Stem Cuttings vs. Root Division for Peppermint
Stem Cuttings
- ✅ Fast results (roots in 2-4 weeks)
- ✅ Multiple plants from one parent
- ✅ Less invasive to parent plant
- ⚠️ Requires consistent humidity
- ⚠️ Needs rooting hormone for best success
Root Division
- ✅ Preserves parent plant
- ✅ Immediate roots on new plants
- ✅ Ideal for crowded plants
- ⚠️ Limited to 2-3 divisions per plant
- ⚠️ Requires digging up parent plant
To propagate with stem cuttings, start by selecting healthy stems and removing the lower leaves. Dip the cut end in rooting hormone to boost success rates, then place the cutting in a moist potting mix or water.
Keep the cutting in a humid environment (like a plastic bag or propagator) and maintain 60-70°F temperatures. Roots should appear in 2-4 weeks, at which point you can transplant to soil.
For root division, carefully dig up your mature peppermint plant and gently separate the roots into 2-3 sections, ensuring each has healthy stems and roots. Replant each division immediately in well-draining soil with partial shade.
Water thoroughly and avoid harvesting until new growth appears, which typically takes 3-4 weeks. This method ensures your new plants are already established, reducing the risk of transplant shock.
Post-propagation care is critical for 90%+ survival rates. For cuttings, keep soil moist but not soggy and gradually introduce them to outdoor conditions over 1-2 weeks. For divisions, mulch around the base to retain moisture and protect roots.
Both methods thrive with consistent moisture and partial shade during their first growing season. With the right approach, you’ll have a thriving peppermint colony in no time! 🌿
Remember, timing is everything. Stem cuttings work best in spring or early summer, while root division is most successful in early spring before active growth begins. Choose the method that aligns with your garden’s needs and watch your peppermint patch multiply effortlessly. Happy propagating! ✂️