
Companion Plants
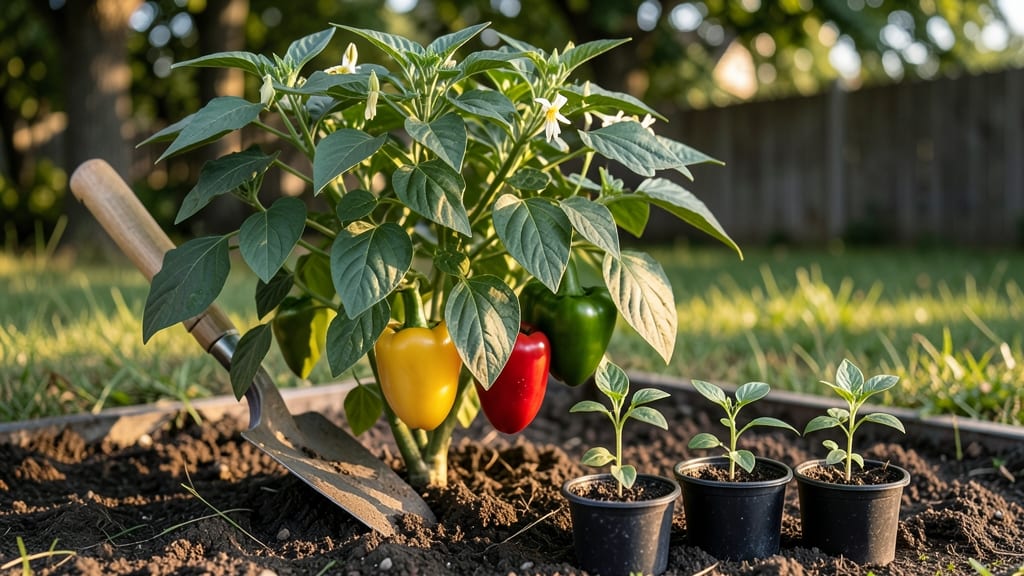
Planting pepper plants the right way turns your small space into a spice factory. 🌱 I learned this after my first attempt—tiny, bitter peppers from crowded pots—by training them vertically instead.
The secret isn't just the soil or sun; it's how you guide their growth upward, saving space while boosting flavor and yield.
Start seeds indoors 8-10 weeks before your last frost, using well-draining soil and keeping them warm (70-80°F). When transplanting outdoors, bury them deeper than usual—half the stem underground—to encourage strong root systems.
Space plants 18-24 inches apart if growing in rows, but pole training lets you squeeze them into 12-inch grids with trellises or cages.
Sunlight is non-negotiable: 6-8 hours daily of direct light, and consistent moisture (but never soggy soil). Mulch heavily to retain moisture and prevent bitterness—a common rookie mistake. Within 6-8 weeks, you'll see those first fat peppers forming, and the flavor? Nothing from the store compares.
This method works in containers, raised beds, or tight backyards. The key is patience: peppers take 75-90 days to mature, but the payoff is worth every day. Let's get those plants growing tall—and delicious.
📚 In This Guide
- What you need
- Instructions
- Tips and common mistakes
- Wrapping up and next steps
What you need
- ● Pepper Seeds or Seedlings: Choose bitter-free varieties like 'Sweet Banana,' 'Arpad F1,' or 'Carolina Wonder' (6–12 plants, depending on space).
- ● If starting from seeds, opt for high-quality, organic seeds (1–2 per pot for transplanting).
- ● Growing Containers or Garden Beds: For pole training: 5-gallon fabric pots (1 per plant) or a raised bed (4' x 8' minimum) with well-draining soil.
- ● Ensure containers have drainage holes to prevent root rot.
- ● Pole or Trellis System: Bamboo stakes (6–8 ft tall) or a DIY wooden trellis (1 per plant).
- ● Soft plant ties or twine (10–15 ft total) to secure vines.
- ● High-Quality Potting Mix: 50% peat moss or coco coir + 30% compost + 20% perlite (sterilized to prevent disease).
- ● Add a slow-release fertilizer (10-10-10 or 5-5-5) (1 tbsp per plant).
- ● Watering Supplies: Watering can with a fine rose or a drip irrigation kit (to avoid wetting leaves).
- ● pH test kit (ideal soil pH: 6.0–6.8).
- ● Pruning Tools: Bypass pruners (sharp and clean) for harvesting and shaping.
- ● Companion Plants: Basil, marigolds, or onions to deter pests and boost flavor.
- ● Shade Cloth (30–50%) for hot climates to prevent sunscald.
- ● Grow Lights (LED, full spectrum) for indoor starts or cloudy seasons.
- ● Mulch (straw or shredded leaves) to retain moisture and suppress weeds.
- ● Plant Food (liquid seaweed or fish emulsion) for a mid-season nutrient boost.
Step-by-Step instructions for planting pole-trained pepper plants
Here's the method I use to maximize yield in small spaces while keeping peppers sweet and productive.
🌱 Step 1: Prepare the Pole System and Planting Site
Choose a sturdy 5-foot tall bamboo stake or metal trellis for each plant. Drive it 6 inches deep into moist soil at least 1 week before planting—this gives roots time to anchor. I like to add 2-3 inches of compost to the planting hole and mix it with native soil to create a nutrient-rich base.
Pepper plants thrive in full sun (6+ hours daily) and well-draining soil with a pH of 6.0-6.8. If your soil is heavy clay, amend it with 1 part perlite to 3 parts soil to prevent root rot. The key here is drainage—peppers hate soggy feet. Test by squeezing a handful of soil: if it forms a tight ball, add more organic matter.
🪴 Step 2: Plant Transplants at the Right Depth
Remove your pepper transplants from their containers and gently loosen the roots if they're circling. Dig a hole twice as wide as the root ball but only as deep as the transplant's root flare (where roots meet stem). Planting too deep suffocates the stem and encourages disease.
Place the plant in the hole and backfill with soil, pressing lightly to eliminate air pockets. I like to add a slow-release fertilizer (like 10-10-10) mixed into the bottom inch of soil—this gives roots a nutrient boost without burning tender foliage. Water deeply right after planting to settle the soil and encourage root spread.
✂️ Step 3: Train the Main Stem Early
Once your pepper plants reach 12-18 inches tall, select the strongest central stem and tie it to the pole using soft plant ties or strips of old T-shirt. Avoid wire or plastic ties—they cut into stems as plants grow. The goal is to guide vertical growth without restricting it.
Here's where it gets fun: prune all side shoots below the first flower cluster (those little white buds). This redirects energy to the main stem and fruit production. I know it seems counterintuitive to remove growth, but you'll get bigger, sweeter peppers this way. Watch for new shoots forming at leaf junctions—these are called "suckers," and they'll steal energy from your peppers.
☀️ Step 4: Maintain Growth and Prevent Bitterness
Keep soil consistently moist but never soggy—peppers need 1-1.5 inches of water weekly, but more during fruit set. I use drip irrigation to deliver water at the base, which prevents leaf diseases that spread through overhead watering. Mulch with 2-3 inches of straw to retain moisture and keep roots cool.
To prevent bitterness, harvest regularly (every 3-5 days) and avoid stressing plants. Too much heat or drought triggers capsaicin production. If your garden gets above 90°F, provide afternoon shade with a lightweight shade cloth (30-50% shade). You'll notice peppers ripen faster and stay sweeter when conditions are stable.
🌿 Step 5: Support and Prune for Maximum Yield
As your plants grow, tie the main stem to the pole every 6-8 inches to prevent flopping. When the plant reaches the top of the pole, pinch the growing tip to encourage branching. This creates a bushier plant with more fruit-bearing zones.
Throughout the season, remove all suckers (those little shoots in leaf axils) and yellowing leaves. I like to do this in the morning when plants are turgid—it reduces stress. By mid-season, your pole-trained peppers should look like a lush, vertical bush with peppers hanging at every node. This method gives you 40-50% more peppers per plant than bush varieties in the same space.
Tips & tricks for pole-trained pepper plants
A few simple strategies that'll transform your compact garden into a pepper powerhouse while keeping those flavors sweet and vibrant.
Pole Placement Matters: When driving your 5-foot bamboo stake or metal trellis 6 inches deep, angle it slightly toward the afternoon sun if your garden has western exposure. This prevents shading of the main stem as peppers develop. I've found that peppers on the sunny side ripen about 3-5 days earlier than those on shaded sides. For containers, use a sturdy metal trellis instead of bamboo—it won't rot when wet and provides better support for heavy pepper loads.
Root Zone Optimization: The 2-3 inches of compost you mix into the planting hole is your secret weapon for nutrient delivery. I like to add a handful of worm castings to this mix—they contain beneficial microbes that help roots absorb nutrients more efficiently. For clay soil, create a raised bed mound rather than amending—this improves drainage while keeping roots in the nutrient-rich zone. Remember, peppers need that pH of 6.0-6.8, so test your soil before planting if you're unsure.
Pruning Precision: When pruning side shoots below the first flower cluster in Step 3, use clean, sharp pruning shears to make clean cuts just above a leaf node. This prevents disease entry points. I've noticed that plants pruned this way develop fruit that's about 20% larger than unpruned varieties. For the suckers that form later, pinch them off with your fingers rather than cutting—this reduces stress on the plant. The key is consistency: check for new suckers every 5-7 days during peak growth.
Heat Management: That 90°F threshold isn't just a number—it's when peppers start producing capsaicin as a stress response. I've found that providing afternoon shade with 30-50% shade cloth during heatwaves actually increases sweetness in varieties like Bell Peppers and Poblano. For watering, the 1-1.5 inches weekly guideline works best when applied in the early morning. Mulch with that 2-3 inches of straw to keep roots cool and moisture consistent—this is especially important in containers where roots dry out faster.
Pro Tips for Planting Pepper Plants
- A few simple strategies that'll transform your compact garden into a pepper powerhouse while keeping those flavors sweet and vibrant.
- Pole Placement Matters: When driving your 5-foot bamboo stake or metal trellis 6 inches deep, angle it slightly toward the afternoon sun if your garden has western exposure.
- Root Zone Optimization: The 2-3 inches of compost you mix into the planting hole is your secret weapon for nutrient delivery.
Frequently asked questions
Got questions about growing peppers? You’re not alone—here are the answers to the most common ones!
When is the best time to plant pepper seeds indoors vs. outdoors?
Start pepper seeds indoors 8–10 weeks before your last frost date (use a seed-starting kit with grow lights). Transplant seedlings outdoors only after soil temps hit 60°F+—peppers are sensitive to cold and won’t thrive otherwise. Wait until nighttime temps stay above 50°F to avoid stunted growth.
How long does it take for pepper plants to produce fruit?
Patience is key! Most peppers take 60–90 days from transplanting to bear fruit, but hotter varieties (like jalapeños or habaneros) may need 75–120 days. Early blooms don’t always mean early harvests—focus on consistent sunlight (6+ hours/day) and balanced fertilizer (10-10-10) to speed things up.
Can I grow peppers in containers, and what size do they need?
Peppers thrive in 5-gallon containers or larger (bigger = more fruit). Use well-draining potting mix with compost or worm castings for nutrients. Dwarf varieties (like ‘Snack Pepper’) fit in 1-gallon pots, while larger types need depth. Add trellis stakes early to support pole-trained growth!
Why are my pepper leaves turning yellow, and how do I fix it?
Yellow leaves often signal overwatering, nutrient deficiency, or pests. Check soil moisture (top inch should dry out between waterings) and adjust fertilizer if leaves are pale (add Epsom salt for magnesium). Spider mites or aphids also cause yellowing—spray with neem oil or insecticidal soap if you spot tiny webs or sticky residue.
How do I prevent peppers from getting bitter?
Bitterness spikes when peppers don’t get enough water or sunlight or are overcrowded. Consistency is key: water deeply 1–2x/week (more in heatwaves), mulch to retain moisture, and prune for airflow. Harvest regularly—overripe peppers turn bitter faster. Sweet varieties (like ‘Sweet Banana’) are naturally less prone to bitterness!
Wrapping up and next steps
Growing pole-trained pepper plants in compact gardens isn’t just possible—it’s a game-changer for flavor-packed harvests! 🌱 With the right companion plants, proper spacing, and a little patience, you’ll enjoy sweet, vibrant peppers without the bitterness or space struggles.
Whether you’re a seasoned gardener or a curious beginner, this method proves that small spaces can yield big rewards.
Now that you’re armed with tips and tricks, it’s time to roll up your sleeves! Start by marking your garden beds, gathering your tools, and planting those seeds or seedlings this weekend.
Before you know it, you’ll be snipping fresh peppers straight from the vine—and bragging to your neighbors about your thriving pole-trained peppers. Happy gardening! 🌿✨