
Shrubs
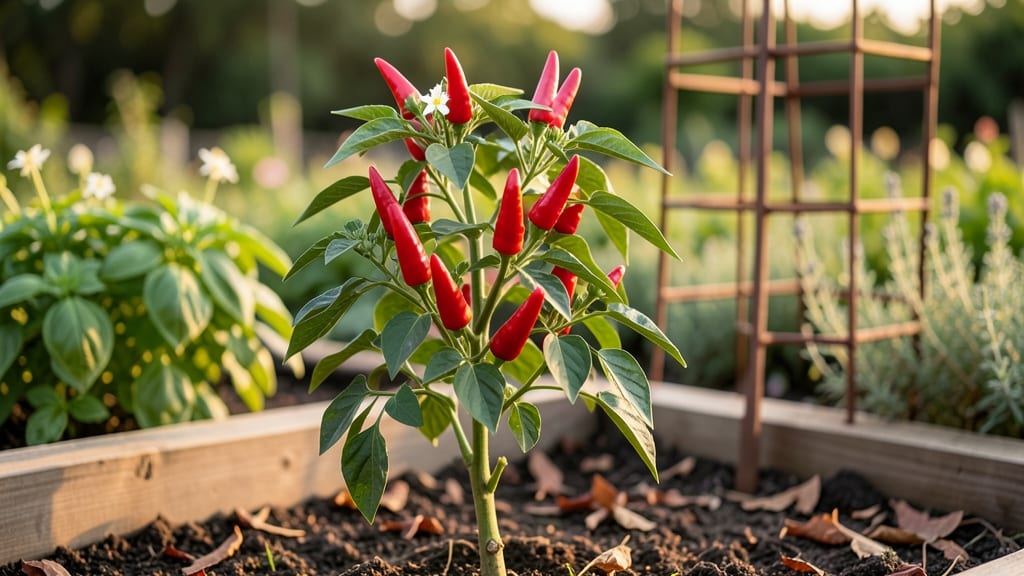
Growing small hot chili peppers like Thai, habanero, or bird’s eye varieties is my secret weapon for packing heat into tiny spaces. 🌶️ These fiery plants thrive when trellised, turning a 2-foot square into a pepper factory that outproduces sprawling bush varieties.
The key isn’t just the right spot—it’s matching their tropical roots to your microclimate while keeping them happy in containers or small beds.
Start with well-draining soil rich in compost (they hate soggy roots) and place them where they’ll get 6-8 hours of direct sun daily. Water consistently but let the top inch dry between waterings—overwatering is the #1 way to lose these heat-seekers.
A simple bamboo stake or tomato cage transforms them from sprawlers into vertical powerhouses, saving space and making harvests easier.
By mid-summer, you’ll be snipping peppers straight from the plant, and the flavor? Nothing compares—fresh habaneros have a bright, fruity heat that store-bought versions can’t match.
The plants keep producing until frost, and a single plant can yield hundreds of peppers if you prune regularly and fertilize lightly every few weeks.
Even in small yards, balconies, or windowsills, these peppers deliver big rewards with minimal space. The trick is consistency—light, water, and a little patience—and you’ll have enough to share (or cry from the heat) all season long. Let’s get growing!
📚 In This Guide
- What you need
- Instructions
- Tips and common mistakes
- Wrapping up and next steps
What you need
- ● Small hot chili pepper seeds: Choose from varieties like Thai Bird’s Eye, Habanero, or Scotch Bonnet (3–5 seeds per plant for optimal yield).
- ● Well-draining potting mix: 10–12 liters (for containers) or garden soil amended with compost (for in-ground planting).
- ● Containers or garden bed: Containers: 5–7 gallon pots (1 per plant) with drainage holes.
- ● Garden bed: Full sun (6+ hours daily) and loose, fertile soil (pH 6.0–7.0).
- ● Organic fertilizer: Balanced 10-10-10 or a chili-specific blend (e.g., fish emulsion or worm castings).
- ○ Support system: Small stakes (12–18 inches tall) or trellis for pole training (optional but recommended for compact growth).
- ● Hand trowel or small shovel for transplanting.
- ● Watering can or hose with gentle spray nozzle (avoid soggy soil!).
- ● Pruning shears (sterilized with rubbing alcohol) for trimming.
- ○ Gloves (optional but handy—those peppers pack a punch! 😅).
- ● Spray bottle for misting seedlings.
- ● Grow lights for seedlings (if starting indoors before last frost).
- ● Mulch (straw or shredded leaves) to retain moisture.
- ● Compost tea or seaweed extract for a nutrient boost.
- ● Pest deterrents (neem oil or insect netting for aphids/spider mites).
Step-by-Step instructions for growing pole-trained chili peppers
Here’s how to turn a tiny garden into a fiery harvest using vertical space—no sprawling plants required.
🌱 Step 1: Select Compact Hot Pepper Varieties
Choose dwarf or bush varieties like 'Apache,' 'Jalapeño M,' or 'Thai Hot'—these stay under 2 feet tall when properly trained. Avoid standard types like 'Cayenne' or 'Habanero,' which sprawl and need more space. I always check the seed packet for "compact" or "bush" labels—this ensures your plants won’t outgrow their vertical support.
Start seeds indoors 8-10 weeks before the last frost for a head start. Use 4-inch pots to prevent root binding, and keep soil warm (75-85°F) for faster germination. You’ll see sprouts in 7-14 days—watch for the first true leaves (the second set after the initial cotyledons) to confirm successful germination.
☀️ Step 2: Set Up Vertical Support Structures
Install 5-6 foot tall bamboo stakes, trellis netting, or sturdy wire cages in your garden bed or containers. I prefer bamboo stakes for their natural look and stability—just pound them 6 inches deep into the soil or container base. For containers, use a 5-gallon fabric grow bag with built-in support or a DIY trellis made from PVC pipes and zip ties.
Position supports in full sun (6-8 hours daily) and space them 18-24 inches apart to allow airflow. Chili peppers hate soggy roots, so ensure containers have drainage holes. If using stakes, tie the main stem gently to the support with soft plant ties as the plant grows—never wrap too tightly, or you’ll restrict growth.
🌿 Step 3: Train and Prune for Vertical Growth
When seedlings are 6-8 inches tall, transplant them near their support structures. Pinch off the first few flowers that appear—this encourages the plant to focus on stem and leaf growth first. You’ll see new side shoots emerge from the leaf axils (the junction where leaves meet the stem) within 2-3 weeks.
Prune aggressively to shape the plant: remove all but the strongest 2-3 side branches per main stem. Let these branches grow vertically, tying them to the support as they reach upward. Once the plant hits the top of the pole (5-6 feet), pinch the terminal bud to stop upward growth and encourage fruit production on the lower branches. This technique maximizes yield in a small space.
💧 Step 4: Water and Fertilize for Maximum Heat
Water at the base of the plant deeply once a week, ensuring the soil dries slightly between waterings. Overhead watering can spread fungal diseases like powdery mildew, which thrives in humid conditions. You’ll know moisture is right when the top 1-2 inches of soil feel dry to touch but the lower soil stays damp.
Fertilize every 2-3 weeks with a balanced, 10-10-10 NPK fertilizer diluted to half strength. Chili peppers are heavy feeders, but too much nitrogen leads to leafy growth with few peppers. Switch to a 5-10-10 or 0-10-10 blend once flowers appear to boost fruit production. Watch for dark green, glossy leaves—they’re a sign your plant is happy and ready to bear heat.
⏰ Step 5: Harvest and Encourage Continuous Production
Pick peppers when they’re firm, glossy, and at their mature color (green, red, or whatever variety-specific shade). Regular harvesting stimulates the plant to produce more—don’t leave peppers on the vine until they’re overripe or they’ll stop flowering. Use clean pruning shears to snip stems just above a leaf node to encourage new growth.
As the season progresses, remove any suckers (small shoots that form in the leaf axils below a flower cluster). These divert energy from fruit production. If your plant starts to look leggy or flowers drop off, it’s time for a light trim—cut back the top 1/3 of the plant to redirect energy to the lower branches. With proper care, a single pole-trained chili pepper can produce 50+ peppers in a 5-foot space—that’s serious firepower for a tiny garden.
Tips & tricks for pole-trained chili peppers
Here's what nobody tells you about maximizing your fiery harvest in limited space.
Variety Selection: When choosing compact varieties like 'Apache' or 'Thai Hot,' pay special attention to the seed packet's maturity date. Earlier-maturing varieties (60-70 days) give you a longer harvest window in cooler climates. I've found that 'Jalapeño M' produces consistently under 2 feet tall when given proper support, while other "compact" varieties sometimes exceed this height—always measure your mature plants from previous years if possible.
Germination Hack: To speed up germination in Step 1, soak your seeds in warm water for 6-8 hours before planting. The soil temperature of 75-85°F is critical—if your home stays cooler, place pots on a seedling heat mat or near a sunny window with a clear plastic cover to trap warmth. Watch for those first true leaves (not the initial seed leaves) to confirm germination, which typically appears within 7-14 days.
Support System Strategy: For Step 2, consider using a combination of bamboo stakes and trellis netting for extra stability. I've had success with a 3-stake triangle arrangement for each plant—pound them 6 inches deep at 12-inch intervals around the plant base. This creates a natural windbreak while providing multiple tie points for the main stem. The 6-8 hours of daily sun requirement is non-negotiable for heat production, so position your supports where they won't cast shadows on neighboring plants.
Pruning Precision: In Step 3, when you're pinching off those first flowers, be ruthless but strategic. Remove any flowers that appear below the first 6-8 inches of growth—they'll divert energy from establishing a strong vertical structure. The 2-3 weeks it takes for side shoots to appear is your window to create that perfect branching framework. I've seen plants with 50+ peppers by focusing on just 2-3 main branches, each with its own vertical growth pattern tied to the support.
Pro Tips for Small Hot Chili Pepper
- Here's what nobody tells you about maximizing your fiery harvest in limited space.
- Variety Selection: When choosing compact varieties like 'Apache' or 'Thai Hot,' pay special attention to the seed pac...
- Germination Hack: To speed up germination in Step 1, soak your seeds in warm water for 6-8 hours before planting. The...
Frequently asked questions
Got questions about growing and using small hot chili peppers? You’re not alone! Here are answers to some of the most common queries—from spice lovers and gardeners alike.
Can I grow small hot chili peppers in containers?
Many compact varieties like Thai Bird’s Eye or Jalapeño thrive in pots (5+ gallons) with good drainage. Just ensure they get 6–8 hours of sunlight daily and use a well-draining potting mix. Containers also let you control soil quality and mobility—perfect for small spaces or urban gardens!
How long does it take for small chili peppers to produce fruit?
Patience is key! Most small hot peppers take 60–90 days from transplanting to harvest, depending on the variety and growing conditions. Early blooms (like those on Habanero) may appear in 4–6 weeks, but full maturity takes longer. Warmth (70–85°F) and consistent watering speed up the process.
Are all small chili peppers equally spicy?
Not even close! Size ≠ heat. For example, Pepper X (a tiny Thai chili) packs 100,000+ Scoville units, while a Jalapeño (slightly larger) sits at 2,500–8,000. Always check labels or research varieties before handling. Wear gloves if you’re sensitive—trust us!
What’s the best way to store harvested small chili peppers?
For freshness, store unwashed peppers in a paper bag in the fridge (up to 2 weeks). To dry them, tie stems in small bundles and hang in a dark, well-ventilated spot (1–2 weeks). For long-term storage, freeze whole peppers in oil or blend into sauces. Pro tip: Remove seeds first if you want milder heat!
Why aren’t my small chili peppers fruiting?
Common culprits include lack of sunlight (move to a sunnier spot), overwatering (let soil dry slightly between waterings), or nutrient deficiencies (add compost or a balanced fertilizer). Pollination issues? Gently shake plants or hand-pollinate with a paintbrush. If flowers drop, it’s often a sign of stress—check for pests or temperature swings.
Can I save seeds from small chili peppers for next year?
Yes! Clean seeds thoroughly, dry them on a paper towel for 2–3 days, then store in an airtight container in a cool, dark place. Label varieties (seeds from hybrids may not breed true). For extra safety, test a few seeds indoors before planting outdoors. Happy seed-saving!
Wrapping up and next steps
Small hot chili peppers pack a serious punch in a tiny package—perfect for urban gardens, balconies, or even windowsills! Whether you're a spice enthusiast or a space-conscious grower, these fiery friends deliver big flavor and heat with minimal effort.
From selecting the right varieties to mastering care, you now have the tools to cultivate your own mini firepower.
Ready to spice up your harvest? Start with one or two plants this season and experiment with flavors—your taste buds (and neighbors!) will thank you. 🌶️🔥