
Shrubs
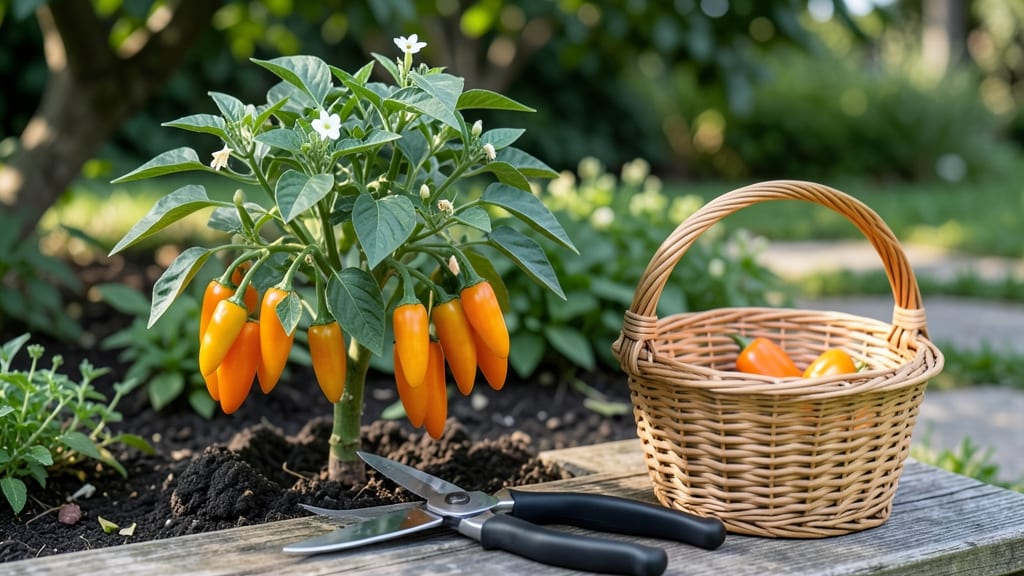
Growing small orange spicy peppers like 'Orange Chili' delivers zesty heat in just 12 square feet—perfect for containers or tiny gardens. 🌶️ I’ve grown these fiery beauties in 5-gallon pots on my balcony, and they produce enough peppers to dry, pickle, or share by mid-summer.
The secret? Mimicking their tropical roots with warmth, consistent moisture, and bright light, whether from sun or grow lights.
These peppers thrive in well-draining soil with a pH of 6.0–6.8, and they love warmth—plant after your last frost when soil hits 70°F. Varieties like 'Thai Orange Pepper' pack 30,000–50,000 Scoville units, so handle with gloves if you’re sensitive to heat.
Feed them every 2–3 weeks with a balanced fertilizer (10-10-10) once flowers appear to boost fruit production.
By late summer, you’ll harvest bright orange peppers bursting with citrusy heat—ideal for sauces, salsas, or drying. The plants stay compact (18–24 inches tall), making them perfect for small spaces. Just watch for aphids or spider mites; a neem oil spray keeps pests at bay without harming pollinators.
Whether you’re growing in pots or garden beds, these peppers deliver bold flavor and heat with minimal space. Start seeds indoors 8–10 weeks before transplanting, and you’ll be snipping peppers by July. Pro tip: Prune leggy stems to encourage bushier growth and more fruit.
📚 In This Guide
- What you need
- Instructions
- Tips and common mistakes
- Wrapping up and next steps
What you need
- ● Seeds or seedlings: 1–3 small orange spicy pepper seeds (or young plants, if available). Look for varieties like Orange habanero or Orange ghost pepper for that signature zing!
- ● Container or garden plot: Containers: 5–10 gallon pots (with drainage holes) for each plant. Pro tip: Use lightweight fabric pots to prevent root circling! 💡
- ● Garden bed: A sunny spot (6+ hours of light daily) with well-draining soil.
- ● Potting mix: 1 bag of high-quality, well-draining cactus/succulent mix (or amend regular soil with perlite/vermiculite for aeration).
- ● Fertilizer: Balanced, water-soluble fertilizer (e.g., 10-10-10) or organic options like compost or worm castings.
- ○ Basic tools: Trowel, gloves (optional but recommended—those peppers pack a punch! 🌶️), and pruning shears.
- ○ Support (optional): Small stakes or cages for taller varieties.
- ○ Mulch (optional): Straw or shredded leaves to retain moisture.
- ○ Spray bottle (optional): For misting seedlings if humidity is low.
- ● Patience! Peppers take 70–90 days to mature from seed (longer if starting indoors).
- ● Warmth: Peppers love 70–90°F soil temps. Wait until after the last frost or use a heat mat for indoor starts. 🌡️
- ● Sunlight: Commit to a sunny spot—no shade allowed!
Step-by-step guide to growing small orange spicy peppers in containers
Here's how to cultivate vibrant, heat-packed orange peppers in limited space—perfect for balconies and small gardens.
🌱 Step 1: Select the Right Variety and Prepare Containers
Choose a compact variety like 'Lunchbox' or 'Apache'—both produce 2-3 inch long peppers packed with heat. You'll need 5-gallon containers with drainage holes for each plant, since peppers hate soggy roots. I use terra cotta pots because they wick away excess moisture naturally.
Fill each container with 2/3 potting mix and 1/3 perlite for excellent drainage. The mix should feel like a damp sponge—not wet or dry. Tap the pot gently to settle the soil without compacting it. This loose structure prevents root rot, which is deadly for peppers.
🌱 Step 2: Plant Seeds or Transplants at the Right Time
Start seeds indoors 8-10 weeks before your last frost date, or buy sturdy transplants from a nursery. If sowing seeds, plant 2 per cell in a seed tray at 1/4 inch depth. Thin to the strongest seedling when first true leaves appear—usually within 10-14 days.
Transplant outdoors after all danger of frost has passed, when soil temperatures reach 65°F or warmer. Bury the stem slightly deeper than it was in the pot—this encourages stronger root growth. Water immediately after transplanting to settle the soil around roots.
☀️ Step 3: Provide Full Sun and Consistent Care
Place your containers in a spot with 6-8 hours of direct sunlight daily. South-facing windows or balconies work best. If growing indoors, supplement with a grow light 6 inches above the plants for 14 hours daily. You'll know your peppers are getting enough light when leaves stay dark green and stems stay sturdy.
Water when the top inch of soil feels dry, typically 2-3 times weekly. Peppers are drought-tolerant once established, but they need consistent moisture during fruiting. Use a watering can with a narrow spout to direct water at the base—avoid wetting leaves to prevent disease.
💧 Step 4: Fertilize and Prune for Maximum Heat
Feed plants with a balanced fertilizer (10-10-10) every 4-6 weeks starting when flowers appear. Too much nitrogen makes plants leafy but fruitless. I also sprinkle 1 tablespoon of compost around the base monthly for natural nutrients.
Prune suckers (the small shoots that form in the leaf axils) to direct energy toward fruit production. Remove any yellow or diseased leaves immediately—they spread problems fast. When peppers turn orange, stop fertilizing to let them ripen fully on the vine.
⏰ Step 5: Harvest and Enjoy the Bite-Sized Heat
Harvest peppers when they're fully orange and firm, usually 60-75 days after transplanting. Use pruning shears to cut stems cleanly—this encourages more flowers to form. Store harvested peppers in a cool, dark place for up to 2 weeks or freeze them for later use.
Here's the thing—these tiny peppers pack serious heat. I like to dry them for homemade flakes or freeze them whole for quick pickling. Watch for new flowers forming after harvest; with proper care, you'll get a second harvest before frost.
Tips & tricks for perfect container-grown spicy peppers
A few simple strategies will help you coax maximum heat and flavor from your compact pepper plants—without the space or time constraints.
Soil Mix Matters: The 2/3 potting mix to 1/3 perlite ratio is non-negotiable for these heat-lovers. I've found that adding a handful of worm castings to the mix boosts early growth—just mix it in before planting. This gives your peppers a nutrient head start while maintaining that critical drainage. The key is keeping that "damp sponge" texture; if it feels like a wrung-out washcloth, you're overwatering.
Lighting Secrets: Those 6-8 hours of sunlight are absolute, but here's what nobody tells you: rotate your containers every few days. Peppers grow toward the light, and consistent rotation prevents them from leaning awkwardly. For indoor growers, position your grow light so it's just 4-5 inches above the plants during their 14-hour daily session—the extra inch gives you better control over intensity without burning delicate leaves.
Fertilizer Timing: The 4-6 week feeding schedule works, but here's the pro move: switch to a low-nitrogen fertilizer (like 5-10-10) when flowers appear. This redirects energy from leaf growth to fruit production. I also discovered that a foliar spray of diluted fish emulsion (1 tablespoon per gallon) every other week during fruiting gives an instant flavor boost to developing peppers.
Harvest Hack: Those 60-75 days to harvest can feel like forever, but here's how to speed things up: pinch off any new flowers after your first harvest. This forces the plant to focus all its energy on ripening existing peppers rather than producing new ones. You'll get fewer peppers, but they'll mature faster and pack more intense heat. It's a trade-off I always make for quicker rewards.
Pro Tips for Small Orange Spicy Pepper
- A few simple strategies will help you coax maximum heat and flavor from your compact pepper plants—without the space or time constraints.
- Soil Mix Matters: The 2/3 potting mix to 1/3 perlite ratio is non-negotiable for these heat-lovers.
- Lighting Secrets: Those 6-8 hours of sunlight are absolute, but here's what nobody tells you: rotate your containers every few days.
Frequently asked questions
Got questions about growing or using small orange spicy peppers? You’re not alone! Here are some of the most common queries—and their answers—to help you spice up your garden or kitchen with confidence.
What’s the best way to grow small orange spicy peppers in containers?
These peppers thrive in containers with at least 5-gallon pots and well-draining soil. Use a mix of potting soil and compost, and place them in a spot with 6–8 hours of sunlight daily. Ensure pots have drainage holes to prevent root rot. Pro tip: Add a slow-release fertilizer at planting time for extra flavor and heat!
How hot are small orange spicy peppers, and how can I adjust the heat level?
They typically range from 30,000–50,000 Scoville Heat Units (SHU)—think mild to medium heat, like a jalapeño with a fruity twist. To mellow the heat, remove the seeds and membranes (where most capsaicin lives) before using. For extra heat, leave them whole or dry and crush them into powders!
When is the best time to harvest small orange spicy peppers?
Harvest when peppers turn bright orange and firm, usually 70–90 days after planting. For milder flavor, pick them green. Use sharp scissors or pruners to avoid damaging the plant. Pro tip: Harvest in the morning when heat levels are lowest for the freshest taste!
What are the best ways to use small orange spicy peppers in cooking?
These peppers shine in salsas, hot sauces, stir-fries, or pickled as a tangy kick. Try roasting them for smoky depth or stuffing with cheese for a spicy snack. Their sweet-spicy balance pairs well with tomatoes, garlic, and citrus. Warning: Wear gloves when handling if you’re sensitive to capsaicin!
Can I grow small orange spicy peppers from store-bought peppers?
Yes! Save seeds from organic, heirloom peppers (avoid hybrids). Rinse seeds, dry them, and store in a cool, dark place until spring. However, flavor and heat may vary slightly from the original. For consistency, start with seeds from a reputable supplier.
What pests should I watch for, and how do I treat them?
Common pests include aphids, spider mites, and whiteflies. Treat with neem oil or insecticidal soap for mild infestations. For severe cases, introduce beneficial insects like ladybugs or use a horticultural oil spray. Prevention tip: Keep plants healthy with regular watering and pruning to deter pests!
Wrapping up and next steps
Growing your own small orange spicy pepper is a rewarding way to add a burst of flavor and heat to your dishes—whether you’re a container gardener or just starting out! 🌱 From selecting the right seeds to troubleshooting common issues, you now have all the tools to cultivate these fiery little gems.
Whether you’re using them fresh in salsas, drying them for spice blends, or even gifting them to fellow foodies, these peppers bring big flavor in tiny packages.
Ready to take the next step? Start with just one plant—experiment with different varieties, and soon you’ll be the go-to source for that perfect kick in every recipe. Happy gardening (and spicing up)! 🌶️✨