
Companion Plants
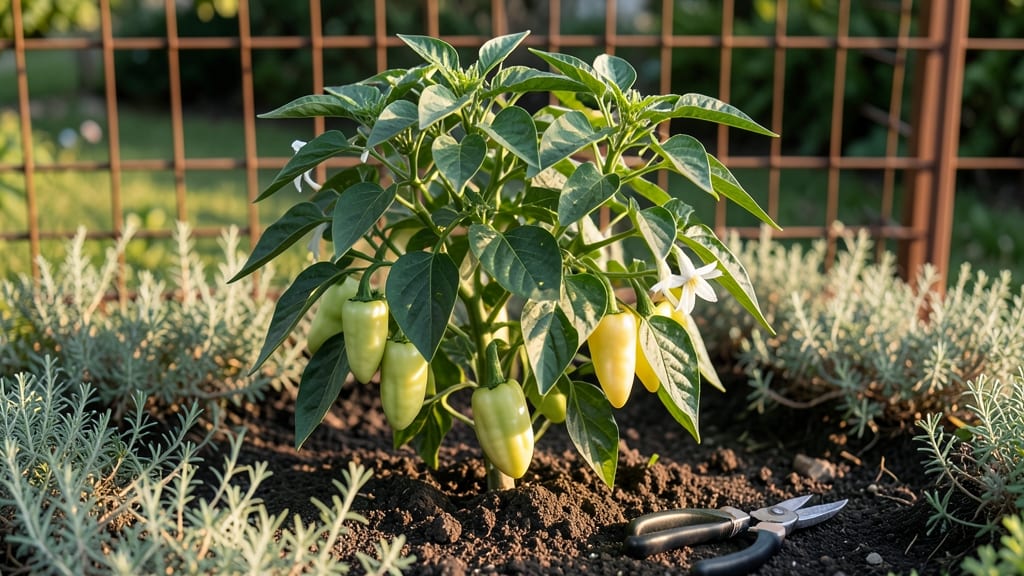
Growing Cubanelle pepper plants transforms your small garden into a year-round harvest factory—no bitter surprises, just sweet, prolific peppers. 🌱 I’ve grown them for years, and the secret to their success lies in pole training, which saves space while maximizing production.
These peppers thrive when given the right conditions, and once you master the basics, you’ll wonder why you ever bought store-bought ones.
Start with well-draining soil rich in organic matter, and plant in a spot that gets at least 6-8 hours of sunlight daily. Cubanelles love warmth, so wait until after the last frost to transplant seedlings, or start them indoors 8-10 weeks before your growing season begins.
A sturdy trellis or pole will keep plants upright, preventing disease and making harvesting a breeze.
Water consistently—about 1 inch per week—but avoid soggy soil, which invites root rot. Mulch around the base to retain moisture and keep roots cool. By mid-summer, you’ll be harvesting bright green, 4-6 inch peppers that stay mild and tender, perfect for stuffing, grilling, or fresh salads.
The best part? One plant can produce dozens of peppers all season long.
Pair them with basil, tomatoes, or onions to deter pests naturally, and watch your garden flourish. Whether you’re a beginner or a seasoned gardener, Cubanelles are the foolproof choice for small spaces—and your taste buds will thank you. Ready to grow?
📚 In This Guide
- What you need
- Instructions
- Tips and common mistakes
- Wrapping up and next steps
What you need
- ● Cubanelle pepper seeds or seedlings: 2–4 plants (start 8–10 weeks before the last frost if sowing indoors).
- ● Containers or garden beds: For containers: 5-gallon pots or larger (at least 12" deep) with drainage holes.
- ● For in-ground: Well-draining soil in a sunny spot (6+ hours of sunlight daily).
- ● Pole or trellis system: 6–8 ft bamboo stakes or a sturdy trellis (Cubanelles thrive vertically!).
- ● Potting mix: High-quality, well-draining mix (add perlite or compost for extra nutrients).
- ● Fertilizer: Balanced organic fertilizer (10-10-10) or compost tea (apply at planting and every 4–6 weeks).
- ● Mulch: Straw or shredded leaves to retain moisture and suppress weeds.
- ● Trowel or hand shovel for planting.
- ● Pruning shears (for trimming and training vines).
- ● Garden gloves (to protect your hands from prickly stems!).
- ● Watering can or hose with a gentle spray nozzle.
- ○ pH test kit (optional but helpful—Cubanelles prefer 6.0–6.8).
- ● Companion plants: Basil, onions, or marigolds (they deter pests and boost growth!).
- ● Row covers: For early-season frost protection.
- ● Drip irrigation system: For consistent moisture (especially in hot climates).
- ● Cage or netting: To support heavy fruit loads if poles aren’t an option.
Step-by-Step guide to growing Cubanelle peppers vertically
Small gardens can still yield big harvests—here's how to train Cubanelles up poles for maximum space efficiency.
🪴 Step 1: Select and Prepare Your Trellis System
Choose a sturdy 6-foot tall trellis or bamboo stake for each plant, as Cubanelles grow 3-4 feet tall but produce heavier fruit when supported. I like to use 3-inch wide wooden slats spaced 12 inches apart vertically—this gives the plants room to climb while keeping stems from tangling. Install your trellis in full sun, where it won't cast shade on other plants.
Drive the base stake 12 inches deep into the soil and secure the trellis with galvanized wire or zip ties at each horizontal slat. The wider the base, the more stable it will be when laden with peppers. I always add a second stake on the opposite side for extra support—Cubanelle peppers get surprisingly heavy once they start fruiting.
🌱 Step 2: Plant Seedlings at the Right Depth and Spacing
Set Cubanelle seedlings 18-24 inches apart from each other and 12 inches from the trellis. The reason for this spacing? Cubanelles spread 2-3 feet wide if left unchecked, and you want enough room for air circulation to prevent fungal diseases. Dig a hole just deep enough to bury the seedling to its original soil line—burying too deep stresses the plant.
Gently loosen the roots if they're circling in the pot, then place the seedling in the hole and backfill with soil. Water immediately to settle the soil around the roots, but don't overdo it—you want the soil to be moist but not soggy. I like to add a handful of compost to the planting hole for extra nutrients, especially if my soil is sandy or clay-heavy.
✂️ Step 3: Train and Prune for Vertical Growth
As the plant grows, guide the main stem upward along the trellis, tying it loosely with soft plant ties every 12 inches. Cubanelles are naturally vining, but they need encouragement to climb. Remove any suckers (side shoots) that form in the leaf axils below the first flower cluster—these drain energy from fruit production. I always leave the top two suckers to develop into secondary stems for extra yield.
When the main stem reaches the top of the trellis, pinch off the growing tip. This forces the plant to put energy into side branches rather than just vertical growth. You'll see new shoots emerge from the leaf axils—these are your future fruit producers. Prune any leaves that grow directly against the trellis to improve airflow and reduce disease risk.
💧 Step 4: Water and Fertilize for Continuous Production
Water Cubanelles at the base 1-2 inches deep every 3-4 days, allowing the top inch of soil to dry between waterings. Consistent moisture prevents blossom-end rot, a common issue with peppers. I water in the morning so the foliage has time to dry before evening—this helps prevent fungal infections like powdery mildew.
Feed plants every 3-4 weeks with a balanced 10-10-10 fertilizer or a pepper-specific formula. Stop fertilizing once flowers appear to encourage fruiting rather than leafy growth. I also add a handful of worm castings around the base monthly—this gives a slow-release nutrient boost without burning the roots.
☀️ Step 5: Harvest and Maintain Through the Season
Pick Cubanelles when they're 3-4 inches long and still bright green for the best flavor. Use pruning shears to cut stems cleanly, leaving a small stub. Regular harvesting encourages more flowers and fruit—plants left unharvested will produce fewer, larger peppers that often turn bitter.
As the season progresses, watch for signs of stress like yellowing leaves or stunted growth. These can indicate overwatering, nutrient deficiency, or pest pressure. I always inspect the undersides of leaves weekly for spider mites or aphids—catching them early makes treatment much easier. With proper care, a single Cubanelle plant can yield 20-30 peppers over the season.
Tips & tricks for pole-trained Cubanelle pepper plants
Real talk: vertical gardening with Cubanelles isn't just about saving space—it's about maximizing flavor and yield. Here's what nobody tells you about making this method work flawlessly.
Trellis Stability is Non-Negotiable: That 6-foot trellis needs to be anchored like a ship in a storm, especially once peppers start forming. I've seen trellises topple under the weight of heavy fruit—literally! Drive your base stake 12 inches deep and add that second stake immediately. For extra insurance, use 3-inch wide wooden slats spaced 12 inches apart to distribute weight evenly. If your garden gets windy, consider adding diagonal supports for added stability.
Pruning Strategy for Maximum Yield: When you reach Step 3 and pinch off that growing tip at the trellis top, you're not just controlling height—you're redirecting the plant's energy into fruit production. The key is to leave those top two suckers to develop into secondary stems. These will become your primary fruit producers. I've found that plants with 3-4 main branches yield 30-40% more peppers than those with just one stem. Just remember to prune any leaves growing directly against the trellis—this improves airflow and prevents fungal diseases.
Watering Wisdom to Prevent Bitter Surprises: Those 3-4 days between waterings in Step 4 are critical, but timing matters just as much. Water at the base in the morning to give foliage time to dry before evening. I've learned this the hard way—wet leaves overnight create the perfect conditions for powdery mildew. Also, always water to 1-2 inches deep. Shallow watering encourages shallow roots, which makes plants more susceptible to stress and blossom-end rot. A moisture meter is worth its weight in gold here.
Fertilizer Timing That Actually Works: The instructions mention stopping fertilizer once flowers appear, but here's the real secret: switch to a low-nitrogen formula (like 5-10-10) when you see buds forming. Too much nitrogen at this stage will give you leafy growth instead of fruit. I've had amazing success with a monthly application of worm castings around the base—it provides slow-release nutrients without the risk of burning roots. And if you're using a pepper-specific fertilizer, make sure it's labeled for fruiting stages, not just vegetative growth.
Pro Tips for Cubanelle Pepper Plants
- Real talk: vertical gardening with Cubanelles isn't just about saving space—it's about maximizing flavor and yield. H...
- Trellis Stability is Non-Negotiable: That 6-foot trellis needs to be anchored like a ship in a storm, especially once...
- Pruning Strategy for Maximum Yield: When you reach Step 3 and pinch off that growing tip at the trellis top, you're n...
Frequently asked questions
Got questions about growing Cubanelle pepper plants? You’re not alone! Here are answers to the most common ones—so you can grow these sweet, versatile peppers with confidence.
How long do Cubanelle pepper plants take to mature and produce fruit?
Cubanelle peppers typically take 60–90 days from transplanting to harvest, depending on your climate. In warm regions, they may produce fruit earlier, while cooler areas could extend the timeline. Start seeds indoors 8–10 weeks before the last frost for a head start!
Can Cubanelle peppers survive frost, or do I need to bring them inside?
These peppers are tender annuals and can’t tolerate frost—they’ll die if temps drop below 32°F (0°C). If frost is forecasted, harvest remaining peppers and bring potted plants indoors or cover them with frost cloth. In ground plants won’t survive, so plan to replant next season.
What are the best companion plants for Cubanelle peppers to deter pests?
Cubanelle peppers thrive with basil, marigolds, onions, and tomatoes—these companions repel pests like aphids and spider mites. Avoid planting near fennel or beans, as they can stunt growth. Interplanting with herbs also improves flavor and deters pests naturally!
Why are my Cubanelle peppers turning bitter, even though they’re supposed to be sweet?
Bitterness usually stems from overripe peppers, stress (heat/drought), or poor soil nutrients. Harvest peppers when firm and green for the best flavor. Ensure consistent watering and well-draining soil with compost. If bitterness persists, try a different variety like ‘Sweet Banana’ Cubanelles.
Can I save seeds from Cubanelle peppers for next year’s garden?
Yes! Cubanelle peppers are open-pollinated, so you can save seeds for future planting. Let a few peppers fully ripen (turn yellow or red) on the plant, then scoop out the seeds, rinse, dry, and store in a cool, dark place. Just be patient—seed viability lasts 2–3 years.
Wrapping up and next steps
Growing Cubanelle pepper plants in small gardens is not only possible—it’s rewarding! With pole training, you’ll maximize space, avoid bitterness, and enjoy a bountiful harvest of sweet, versatile peppers. Whether you’re a seasoned gardener or just starting, these tips will set you up for success.
Ready to dive in? Start by gathering your supplies and sketch a simple pole-training plan—your future pepper harvest will thank you! 🌱