
Picking
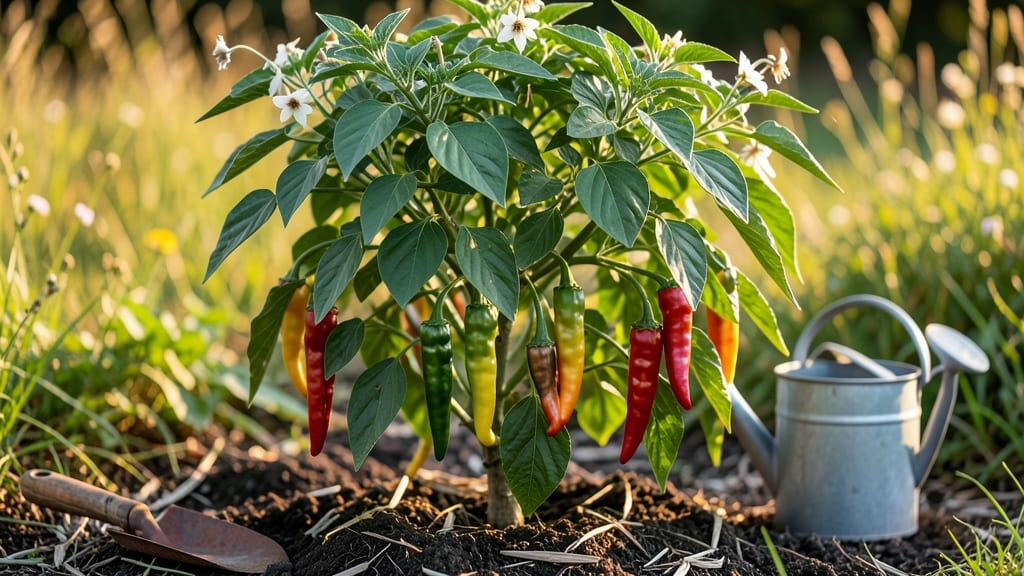
Growing goat horn peppers transforms your garden into a 55-day sweetness factory—long, curved pods packed with mild heat that’s perfect for fresh eating or drying. 🌱 I’ve grown them for years, and the key to avoiding bitter surprises lies in the soil, sunlight, and training method.
These peppers thrive when treated like vining plants, not bushy ones, and they reward patience with a harvest that lasts from midsummer through fall. The secret starts with well-draining soil mixed with compost and a sunny spot (at least 6-8 hours of direct light daily).
Water consistently—about 1 inch per week—but avoid soggy roots, which trigger bitterness. Stake or trellis them early to encourage upward growth, and pinch off early flowers if you want thicker pods later in the season. Most gardeners miss this step and end up with smaller, more bitter peppers.
By late summer, you’ll be snipping 12-18-inch pods that taste sweeter when harvested young. The flavor mellows as they ripen, making them ideal for stuffing, drying, or fresh salsas.
Unlike hotter varieties, goat horns stay mild and productive even in heat waves, as long as you keep the soil moist and mulched. Common challenges? Aphids and powdery mildew can appear if humidity spikes. Spray with neem oil or introduce ladybugs to keep pests at bay.
With the right care, you’ll harvest pounds of peppers—enough to share with neighbors or preserve for winter. Here’s how to set it up right from seed to harvest.
📚 In This Guide
- What you need
- Instructions
- Tips and common mistakes
- Wrapping up and next steps
What you need
- ● Goat Horn Pepper Seeds: 5–10 high-quality, disease-resistant seeds (look for organic or heirloom varieties for best results).
- ● Growing Containers: 5–10 5–7 gallon fabric pots, plastic grow bags, or wood barrels (with drainage holes).
- ● OR a well-draining raised bed (if planting directly in the ground).
- ● Potting Mix: 10–15 gallons of well-draining, organic potting soil (mix with perlite or coconut coir for aeration).
- ● Support Structure: A 6–8 foot tall bamboo stake, trellis, or tomato cage (for pole training).
- ● Twine or soft plant ties (1–2 rolls, 50–100 feet total).
- ● Fertilizer: Balanced 10-10-10 or 5-5-5 organic fertilizer (follow package instructions for dilution).
- ● Compost or worm castings (for nutrient boosts).
- ● Watering Supplies: A watering can with a fine rose or drip irrigation kit.
- ● pH testing kit (to keep soil between 6.0–7.0).
- ● Pruning Tools: A sharp pair of pruning shears (sterilized with rubbing alcohol).
- ● Garden gloves (to protect from thorns).
- ● Grow Lights: LED or fluorescent lights (if starting indoors before last frost).
- ● Mulch: Straw or shredded leaves (to retain moisture and suppress weeds).
- ● Pest Control: Neem oil or insecticidal soap (for aphids/spider mites).
- ● Row covers (to protect from early pests).
- ● Harvesting Tools: A small knife or pruning scissors (for clean cuts).
- ● Food-grade storage bags (to keep peppers fresh post-harvest).
How to grow goat Horn peppers on a trellis for sweet, bountiful harvests
Here's how I grow these sweet, banana-shaped peppers vertically—no bitter surprises, just steady production.
🌱 Step 1: Start Seeds Indoors 8-10 Weeks Before Last Frost
Fill 2-inch deep seed trays with moistened seed-starting mix and plant 2 seeds per cell at ¼-inch depth. Goat Horn peppers need warmth to germinate, so place trays on a heat mat set to 75-80°F. Keep soil consistently moist but never soggy—these seeds rot easily if overwatered.
Cover the tray with plastic wrap to retain humidity, then place under grow lights (or a sunny windowsill) for 12-14 hours daily. You'll see sprouts in 7-14 days, depending on your home's warmth. Once seedlings emerge, remove the plastic immediately to prevent damping-off disease.
🪴 Step 2: Transplant Seedlings to Individual Pots at 4-5 Leaves
When seedlings have 4-5 true leaves (not the initial seed leaves), gently transplant them into 4-inch pots filled with well-draining potting mix. Handle stems carefully—Goat Horn peppers develop shallow roots and bruise easily. Bury them just deep enough to cover the base of the stem, but no deeper.
Water lightly after transplanting to settle the soil, then place pots in a sunny location. Harden off seedlings by gradually increasing outdoor exposure over 7-10 days before planting outside. I like to start this process when nighttime temperatures stay above 55°F—these peppers won't tolerate frost.
☀️ Step 3: Install Trellis and Train Plants Vertically
Plant your hardened-off seedlings 18-24 inches apart in full sun, then install a 6-foot tall trellis beside each plant. Goat Horn peppers grow long and vine-like, so they thrive when supported. As plants grow, gently tie the main stem to the trellis with soft plant ties, leaving 6-8 inches of stem between ties.
Prune side shoots (suckers) that form in the leaf axils to encourage upward growth. You'll see the first flowers appear in 4-6 weeks after transplanting—these will develop into your sweet, banana-shaped peppers. Keep the trellis sturdy; a heavy harvest can bend weak supports.
💧 Step 4: Water and Fertilize for Sweet, Bitter-Free Fruit
Water deeply 1-2 times per week, ensuring the soil stays moist but not waterlogged. Goat Horn peppers need consistent moisture to develop their signature sweetness—irregular watering leads to bitter flavors. Mulch around the base with 2-3 inches of straw to retain moisture and suppress weeds.
Fertilize every 2-3 weeks with a balanced, water-soluble fertilizer (10-10-10) diluted to half strength. Too much nitrogen makes plants lush but fruitless, while too little causes poor development. You'll know you're on track when peppers grow steadily and turn a vibrant yellow-green color.
✂️ Step 5: Harvest and Prune for Continuous Production
Pick peppers when they reach 4-6 inches long for the best flavor—waiting too long makes them tough and less sweet. Use pruning shears to cut the stem just above the fruit to avoid damaging the plant. Regular harvesting encourages more flowers and fruit to develop.
As the season progresses, continue pruning side shoots and deadheading spent flowers. With proper care, a single Goat Horn pepper plant can produce 10-15 peppers per season, and the trellis keeps the harvest organized and accessible. Store freshly picked peppers in the fridge for up to 1 week or freeze them for longer storage.
Tips & tricks for perfect pole-trained goat Horn peppers
These simple strategies will help you avoid common pitfalls and get the sweetest, most productive harvest from your trellised Goat Horn peppers.
Heat Mat Hack: If you don't have a heat mat, place your seed trays on top of your refrigerator during germination. The warmth from the motor will help maintain that 75-80°F range without needing special equipment. Just make sure to remove plastic wrap immediately when sprouts appear to prevent damping-off disease.
Transplanting Tip: When moving seedlings to 4-inch pots in Step 2, use a pencil to gently loosen the soil around the roots before lifting. Goat Horn peppers have delicate roots that can break easily—this simple step helps them establish faster. I also like to water the pots before transplanting so the soil stays moist during the move.
Trellis Training: For the 6-foot trellis in Step 3, use soft plant ties made from old T-shirts or fabric strips instead of plastic ties. Plastic can girdle the stems as they grow, while fabric stretches with the plant. I also recommend installing the trellis before planting—it's much easier to work with than trying to set it up later when plants are established.
Sweetness Secret: The 1-2 times per week watering schedule in Step 4 is crucial for flavor. Use a rain gauge to measure exactly 1 inch of water per week—this consistency is what prevents bitterness. I also add a handful of compost to the mulch to give the plants a slow-release nutrient boost between fertilizing sessions.
Pro Tips for Goat Horn Pepper
- These simple strategies will help you avoid common pitfalls and get the sweetest, most productive harvest from your trellised Goat Horn peppers.
- Heat Mat Hack: If you don't have a heat mat, place your seed trays on top of your refrigerator during germination.
- Transplanting Tip: When moving seedlings to 4-inch pots in Step 2, use a pencil to gently loosen the soil around the roots before lifting.
Frequently asked questions
Got questions about growing goat horn peppers? You’re not alone! Here are some of the most common queries—plus straightforward answers to help you avoid bitter surprises and grow sweet, pole-worthy peppers in just 55 days.
How do I know if my goat horn pepper is ready to pick?
Look for smooth, glossy skin and a deep red or orange hue (depending on the variety). They should feel firm but yield slightly to gentle pressure—like a ripe tomato. Avoid picking when they’re still green or hard; wait until they’re fully colored and plump. Pro tip: Twist gently to detach; if it snaps off cleanly, it’s ready!
Why is my goat horn pepper turning bitter?
Bitter flavors usually mean overripe or stress (like extreme heat or drought). Harvest them before full ripeness if your climate is hot, or prune nearby plants to reduce competition. If bitterness lingers, try soaking slices in saltwater (1 tsp per cup) for 10 minutes before cooking—it mutes the heat!
Can I grow goat horn peppers in containers or small spaces?
These peppers thrive in 5-gallon pots or deeper containers with good drainage. Use a lightweight potting mix and train vines upward with trellises or stakes. Just ensure they get 6+ hours of sun daily and fertilize every 2–3 weeks with a balanced formula. Bonus: Containers warm up faster in spring, giving you a head start!
How do I store harvested goat horn peppers long-term?
Fresh peppers last 1–2 weeks in the fridge (whole or sliced). For longer storage, freeze them (blanch whole for 3 mins first) or dry slices at 135°F (57°C) for 4–6 hours. Avoid canning unless you’re experienced—goat horn peppers have a high moisture content that can risk botulism if mishandled.
What’s the best companion plant for goat horn peppers?
Pair them with basil, onions, or marigolds to deter pests like aphids and spider mites. Avoid planting near fennel or dill, which can stunt growth. If space is tight, interplant with bush beans—they fix nitrogen in the soil, boosting pepper productivity! Pro tip: Rotate crops yearly to prevent disease buildup.
Wrapping up and next steps
Growing your own goat horn pepper is a rewarding journey that blends patience with delicious results! 🌱 With the right pole-training techniques and a little care, you’ll enjoy sweet, homegrown peppers in just 55 days—no bitter surprises here.
Whether you’re a seasoned gardener or a curious beginner, this method makes it simple to cultivate flavor-packed peppers year after year.
Ready to taste the fruits of your labor? Start with a single plant this season, experiment with your setup, and soon you’ll be sharing your harvest with friends—or even expanding your garden. Happy growing! 🌿