
Container Gardens
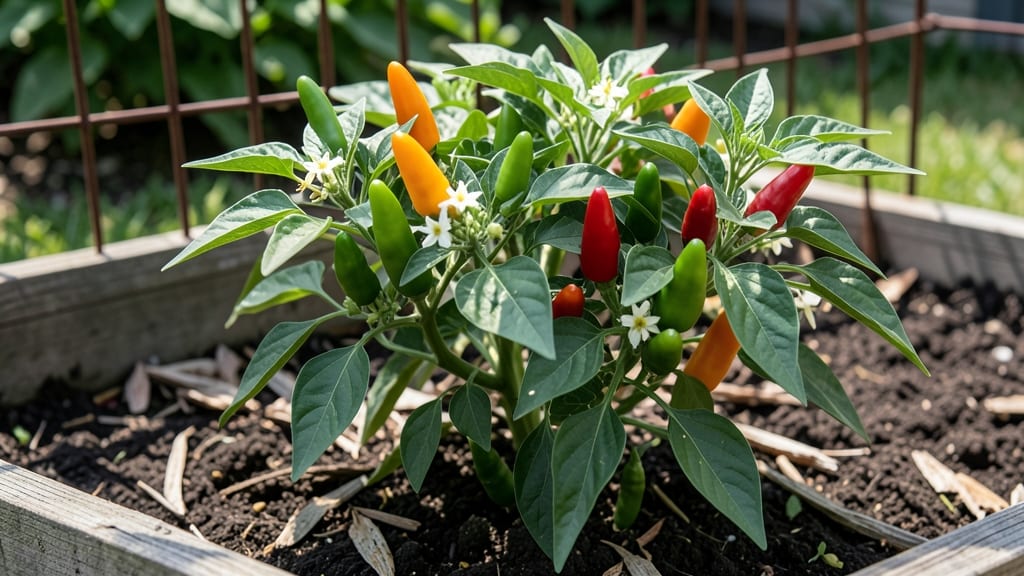
Growing Anaheim chili peppers from seed to harvest is like unlocking a secret spice cabinet in your backyard. 🌱 I learned the hard way that these mild but flavorful peppers need warmth, patience, and just the right growing conditions—or they’ll bolt before you even get a chance to taste them.
The key is starting them early indoors, giving them plenty of sunlight, and training them up a sturdy pole to save space while maximizing those sweet, elongated pods.
You’ll need a sunny spot with at least 6-8 hours of direct sunlight daily, well-draining soil rich in organic matter, and a 5-6 foot tall pole or trellis for vertical growth. Anaheims thrive in warm weather—plant them after the last frost when soil temperatures hit 70°F or higher.
Water consistently but avoid soggy soil, and fertilize lightly with a balanced organic fertilizer every 4-6 weeks to encourage steady growth without overpowering the mild flavor.
By midsummer, you’ll watch those first peppers form—long, tapered, and turning from green to red as they ripen.
The real magic happens when you start harvesting: snip them when they’re still green for a milder taste (like in salsa verde) or let them turn red for a sweeter, slightly smoky flavor.
One plant can yield 20-30 peppers, enough to fill your kitchen with homemade sauces, stuffings, and more.
Here’s the secret to success: don’t rush them. Anaheims take their time—sometimes up to 90 days to mature—and they reward that patience with a harvest that lasts well into fall.
Just watch for pests like aphids or spider mites, and keep those plants happy with consistent care. Ready to grow your own? Let’s get those seeds started!
📚 In This Guide
- What you need
- Instructions
- Tips and common mistakes
- Wrapping up and next steps
What you need
- ● Anaheim chili pepper seeds or seedlings: Choose a variety like NuMex Big Jim or Luna (2–4 plants per container).
- ● Container: A 5-gallon pot or larger (minimum 12" deep) with drainage holes. Opt for lightweight materials like fabric or plastic.
- ● High-quality potting mix: A well-draining blend (e.g., 60% peat/compost, 30% perlite, 10% vermiculite). Avoid garden soil.
- ● Fertilizer: Balanced liquid fertilizer (10-10-10 or 5-5-5): Dilute to half-strength and apply every 2–3 weeks.
- ● Organic options: Compost tea or worm castings (mix 1 cup per gallon of water).
- ● Support structure: Trellis or tomato cage: At least 4–5 feet tall to support pole growth.
- ● Soft ties: Garden twine or Velcro plant ties (avoid wire).
- ● Mulch: Straw or shredded leaves to retain moisture and suppress weeds.
- ● Hand trowel or small shovel: For transplanting and soil amendments.
- ● Watering can or hose with gentle spray nozzle: Anaheims need 1–1.5 inches of water weekly (more in heat).
- ● Pruning shears: To trim suckers and encourage bushier growth.
- ● Spray bottle: For misting seedlings during germination.
- ○ Row cover or shade cloth (optional): Protect young plants from frost (below 50°F) or intense afternoon sun.
- ○ Calcium supplement (optional): Epsom salt (1 tbsp/gallon) if leaves show signs of blossom end rot.
- ● Sunlight: 6–8 hours of full sun daily (south-facing windows or outdoor space).
- ● Temperature: Germination: 70–85°F (use a heat mat if indoors).
- ● Growing season: 60–90°F (avoid planting until after last frost).
- ● pH level: Aim for 6.0–7.0 (test soil with a kit if needed).
Step-by-step instructions for growing Anaheim chili peppers
Here's how to coax sweet, productive Anaheim peppers from seed to harvest using space-saving pole training.
🌱 Step 1: Start Seeds Indoors 8-10 Weeks Before Last Frost
Fill 2-3 inch deep seed trays with sterile seed-starting mix and press it down lightly. Anaheim seeds germinate best at 75-85°F, so place the tray on a seedling heat mat if your home runs cooler. Plant seeds ¼ inch deep—any deeper and they'll struggle to reach the surface. I like to use a toothpick to make small holes for precision.
Cover the tray with plastic wrap to retain moisture and warmth, then place it in indirect light. Check daily for condensation—remove the wrap once you see the first sprouts, usually within 7-14 days. You'll know germination is working when you spot tiny green hooks breaking through the soil surface.
☀️ Step 2: Provide Strong Light and Train for Poles
Move seedlings to a sunny windowsill or under grow lights 2-4 inches above the plants once they develop their first true leaves. Anaheims need 12-14 hours of light daily to avoid leggy growth—you'll spot this as thin, stretched stems reaching toward the light source. I keep my lights on a timer to maintain consistent exposure.
When seedlings are 4-5 inches tall (about 3-4 weeks after sprouting), introduce a 5-6 foot bamboo stake or trellis into each pot. Gently tie the main stem to the pole with soft plant ties, leaving 12-18 inches of stem above the soil. This encourages upward growth and prevents sprawling.
🪴 Step 3: Transplant and Support Vertical Growth
Wait until nighttime temperatures stay above 55°F before transplanting. Choose a location with full sun 6+ hours daily—Anaheims produce more sweet peppers when they get plenty of light. Dig holes twice as wide as the root ball to encourage root spread, then place the plant and stake together in the hole. Fill with soil, water deeply, and secure the plant to the stake with another tie.
Remove any suckers (side shoots) that form in the leaf axils—these divert energy from fruit production. Instead, focus on pruning only the top set of leaves when the plant reaches 3 feet tall to redirect growth to the main stem. You'll see new leaves forming below the pruned area within a week.
💧 Step 4: Water and Fertilize for Maximum Yield
Water at the base of the plant 1-2 inches per week, keeping the soil consistently moist but not soggy. Anaheims are drought-tolerant once established, but they reward steady moisture with larger peppers. I water in the morning so foliage dries quickly, reducing disease risk. You'll know your watering is right when the top inch of soil feels dry to the touch.
Feed with a balanced 10-10-10 fertilizer every 3-4 weeks starting when flowers appear. Too much nitrogen makes plants leafy but fruitless—look for dark green leaves with few blooms as a sign to reduce fertilizer. When peppers form, switch to a 5-10-10 formula to boost fruiting.
✂️ Step 5: Harvest and Encourage Continuous Production
Pick peppers when they're 6-8 inches long and still green for the sweetest flavor. Use pruning shears to cut stems cleanly above the next leaf node—this prevents disease entry and encourages more fruit to form. Anaheims continue producing as long as conditions are right, so harvest regularly to stimulate new growth.
As the season progresses, you may notice older leaves yellowing. This is normal—remove them to improve air circulation and redirect energy to new growth. If your plant outgrows its stake, add a second support or gently weave the main stem around a larger trellis. With proper care, a single Anaheim plant can yield 20+ peppers per season.
Tips & tricks for perfect pole-trained Anaheim peppers
These little tricks will help you grow sweet, productive Anaheim peppers that thrive in compact spaces.
Germination Hack: The 75-85°F heat range is critical for those first sprouts, but I've found that placing the seed tray on top of the fridge (where it's naturally warmer) works just as well as a heat mat. Just make sure the top isn't too hot—you want condensation, not steam. If your home stays below 70°F at night, consider using a small space heater near the tray for consistent warmth.
Lighting Secret: Those 12-14 hours of daily light are non-negotiable, but I've discovered a clever workaround for small spaces: use a single LED grow light on a timer that moves automatically. Position it so it passes over seedlings for 12 hours, then moves away for darkness. This mimics natural sunlight cycles perfectly and prevents leggy growth without taking up much space.
Transplanting Timing: Waiting for nighttime temps above 55°F is smart, but don't wait too long—once your seedlings reach 4-5 inches, they're ready to go. I've found that transplanting when they're slightly on the smaller side (around 3-4 inches) actually gives them more time to establish roots before the heat of summer arrives. Just be extra gentle with the roots to avoid shock.
Fertilizer Transition: The switch from 10-10-10 to 5-10-10 when peppers form is crucial, but here's what nobody tells you: mix your new fertilizer with water first, then apply it to the soil. This prevents chemical burn on young plants. I also like to add a handful of compost to the soil at this stage—it gives the plants a gentle nutrient boost without overwhelming them.
Pro Tips for Growing Anaheim Chili Peppers
- These little tricks will help you grow sweet, productive Anaheim peppers that thrive in compact spaces.
- Germination Hack: The 75-85°F heat range is critical for those first sprouts, but I've found that placing the seed tr...
- Lighting Secret: Those 12-14 hours of daily light are non-negotiable, but I've discovered a clever workaround for sma...
Frequently asked questions
Got questions about growing Anaheim chili peppers?
You’re not alone! Here are answers to the most common concerns—from timing to troubleshooting—so you can grow these sweet, versatile peppers with confidence.
How long does it take for Anaheim peppers to mature and produce fruit?
Anaheim peppers typically take 70–90 days from transplanting to harvest, depending on your climate. Start seeds indoors 8–10 weeks before the last frost, and expect the first peppers to ripen in mid-to-late summer. Pole-training can slightly delay fruiting but boosts yield—patience pays off with long, sweet pods!
Can Anaheim peppers survive frost, or should I bring them inside?
Anaheim peppers are tender annuals and die in frost (below 32°F/0°C). If frost threatens, harvest before temperatures drop—peppers won’t regrow. For container growers, move pots indoors near a sunny window or under grow lights. If you miss the harvest window, save seeds for next season!
What can I do if my Anaheim peppers turn bitter or lose their sweetness?
Bitterness often stems from overripe fruit, heat stress, or poor pollination. Harvest peppers green or light green for maximum sweetness, and avoid letting them turn red. Ensure plants get full sun (6–8 hours/day) and consistent water (1–1.5 inches/week). Hand-pollinate flowers with a soft brush if needed—gentle encouragement helps!
Are Anaheim peppers easy to grow in containers, or do they need a garden bed?
Anaheim peppers thrive in 5-gallon containers or larger, making them perfect for balconies or small spaces. Use a well-draining potting mix and support vines with a trellis or cage. Just ensure containers have drainage holes to prevent root rot. Pole-training saves space and improves air circulation—ideal for container gardens!
Can I save seeds from store-bought Anaheim peppers for next year?
Store-bought peppers are often hybrids (F1 varieties), so saved seeds may not produce true-to-type peppers. For reliable results, buy heirloom or open-pollinated seeds from seed companies. If you’re experimenting, try saving seeds anyway—you might discover a tasty surprise! Just let peppers fully ripen (turn red) before harvesting seeds.
Wrapping up and next steps
Growing Anaheim chili peppers in containers is a rewarding way to bring bold, sweet flavors to your compact garden—even if you’re working with limited space! 🌱 With the right soil, sunlight, and a little patience, you’ll soon be harvesting peppers perfect for salsas, stuffing, or roasting.
Start small, experiment with care, and watch your pole-trained plants thrive.
Ready to take the next step? Plant your seeds or seedlings this season and enjoy the satisfaction of homegrown heat (or sweetness!) on your plate. Happy growing! 🌶️✨