
Tools
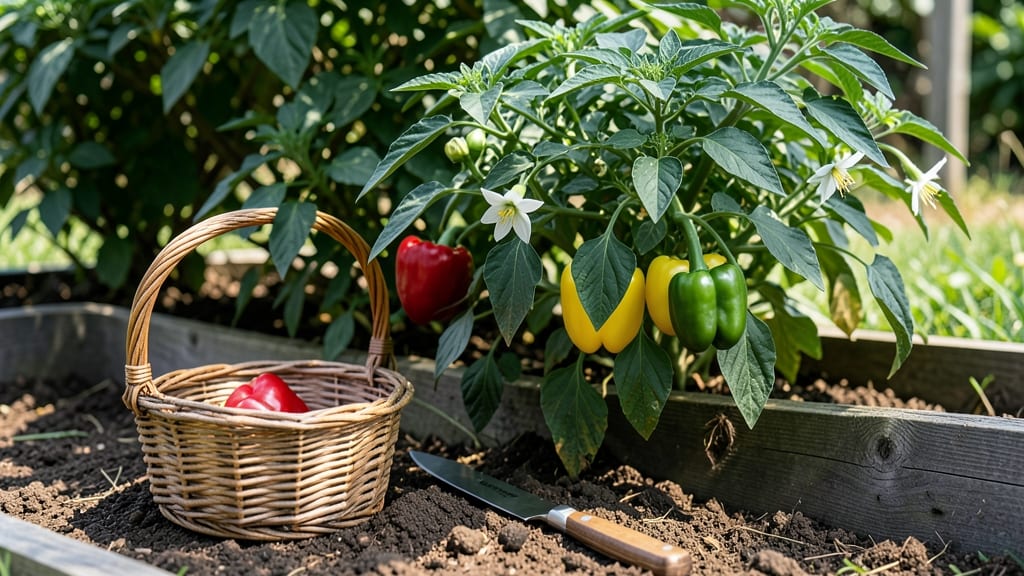
Freezing garden bell peppers saves you from summer's end waste—and keeps that fresh-from-the-vine crunch all winter. 🌱 I used to toss half my harvest, but blanching and freezing changed everything. Now I pull out vibrant peppers for stir-fries, soups, and stuffed peppers whenever I want, with zero spoilage.
The secret lies in quick blanching (just 3 minutes) before freezing, which locks in color and texture. Whole peppers take up less space, but sliced or roasted versions are perfect for meal prep.
I like using freezer bags with all the air squeezed out—they fit neatly in my chest freezer and last up to 12 months without losing quality. You'll end up with peppers that thaw just as bright and crisp as the day you picked them.
The process takes under 30 minutes of hands-on time, and you'll cut your grocery bill by avoiding store-bought frozen peppers that often lose flavor. Works for any bell pepper variety—green, red, yellow, or purple—and adapts to both small batches and garden-sized harvests. Let's get those peppers preserved!
📚 In This Guide
- What you need
- Instructions
- Tips and common mistakes
- Wrapping up and next steps
What you need
- ● Fresh bell peppers – Any variety (red, green, yellow, or orange), ideally ripe but firm (avoid overripe or soft spots). Aim for 3–5 lbs for a manageable batch.
- ● Water – For blanching (about 2–3 gallons, depending on pepper quantity).
- ● Ice water bath – A large bowl or sink filled with ice and cold water (enough to submerge peppers).
- ● Freezer-safe bags or containers – Opt for: Heavy-duty ziplock freezer bags (gallon-sized, 1–2 per batch), or
- ● Rigid freezer-safe containers (with airtight lids, 1–2 quart-sized).
- ● Paper towels or clean kitchen towels – For drying peppers (1–2 rolls).
- ● Sharp knife – A chef’s knife or paring knife for cutting peppers.
- ● Cutting board – Large enough to handle 3–5 peppers at once.
- ● Large pot – A 6–8 quart pot for blanching (deep enough to submerge peppers).
- ● Slotted spoon or tongs – For transferring peppers in/out of boiling water.
- ● Timer – To track blanching time (2–5 minutes, depending on pepper size).
- ○ Optional: Vacuum sealer – Extends shelf life by removing air (great for long-term storage!).
- ● 🌡️ Thermometer – Ensures water reaches 160–180°F for proper blanching.
- ● ✨ Labeling supplies – Masking tape + marker to label bags/containers with date and pepper type.
- ● 🍽️ Cutting preference – Decide ahead: whole, halved, sliced, or diced—this affects prep time!
Step-by-step instructions for freezing homegrown bell peppers
Here’s the foolproof method I use every harvest season to lock in color, texture, and flavor.
🌿 Step 1: Harvest and Prep Peppers for Freezing
Pick bell peppers when fully colored and firm—no soft spots or wrinkles. Rinse them under cool water to remove dirt, then pat completely dry with a clean towel. This step is critical: any moisture left on the peppers will create ice crystals that ruin texture.
Cut peppers into your preferred shapes: whole, halves, strips, or dice. For even freezing, aim for ½-inch thick slices or ¼-inch dice. Remove seeds and membranes if you prefer milder flavor. Spread the pieces on a baking sheet lined with parchment paper—this prevents them from sticking together during the initial freeze.
💧 Step 2: Blanch for Optimal Texture and Color Retention
Blanching stops enzyme activity that causes color fading and texture breakdown. Bring a large pot of water to a rolling boil, then prepare an ice bath in a separate bowl filled with equal parts ice and cold water. Working in batches, blanch pepper pieces for 2-3 minutes—just until they turn slightly softer but still hold shape.
Use a slotted spoon to transfer peppers immediately to the ice bath. Let them cool for 2-3 minutes until fully chilled. This rapid cooling preserves vibrant colors. Drain well on a clean kitchen towel or paper towels before proceeding—excess moisture leads to freezer burn.
⏰ Step 3: Package and Freeze Properly
Portion blanched peppers into freezer-safe containers or heavy-duty freezer bags. For bags, lay flat to remove air before sealing—this prevents freezer burn. Label each package with the date and pepper type (e.g., "Green Bell Pepper Strips – 10/2023").
Freeze immediately at 0°F or below. Peppers will keep quality for up to 12 months when properly stored. For best results, use within 6-8 months for peak texture and flavor. I like to vacuum-seal larger batches for long-term storage, but even standard freezer bags work well.
🌱 Step 4: Thaw and Use Like Fresh Peppers
Thaw peppers in the refrigerator overnight or use directly from frozen in cooked dishes—no thawing required. For raw applications like salads, soak frozen peppers in cold water for 10-15 minutes to restore some crunch. They’ll be slightly softer than fresh but still packed with flavor.
Frozen peppers work perfectly in stir-fries, soups, sauces, and even stuffed dishes. I often toss them straight from the freezer into sizzling oil for quick-cooking recipes. The blanching step ensures they cook evenly and retain their vibrant color—no need to worry about mushy textures.
Tips & tricks for freezing garden bell peppers
These simple strategies will help you preserve that just-picked flavor and texture for months to come.
Selection Tip: Harvest peppers when they're fully colored and firm to the touch—this is when their flavor and texture are at peak. I always check for any soft spots or wrinkles before freezing, as these can lead to uneven cooking later. The thicker the pepper slice (up to ½-inch), the better they maintain their shape during freezing. Thin slices tend to get mushy faster, so stick with the ½-inch guideline from Step 1.
Blanching Secret: That 2-3 minute blanch in boiling water is non-negotiable for color retention. I've learned the hard way that skipping this step leads to dull, sad-looking peppers after freezing. For best results, use a timer and watch closely—the moment they turn slightly softer but still hold shape, they're ready. The ice bath cooling for 2-3 minutes is just as important as the blanching itself, so don't skip it either!
Storage Wisdom: When packaging your blanched peppers, remove as much air as possible from freezer bags. I like to press the bags flat between sheets of wax paper before sealing to create a larger surface area for freezing. This prevents freezer burn and keeps your peppers tasting fresh for up to 12 months. Labeling with the date and pepper type is a game-changer when you're digging through the freezer months later.
Thawing Hack: For raw applications like salads, that 10-15 minute cold water soak works wonders to restore some crunch. I've found that adding a pinch of salt to the water helps maintain texture even better. For cooked dishes, you can use frozen peppers straight from the freezer—no thawing required. The blanching step we did earlier ensures they'll cook evenly without getting mushy.
Pro Tips for Freeze Bell Peppers From The Garden
- These simple strategies will help you preserve that just-picked flavor and texture for months to come.
- Selection Tip: Harvest peppers when they're fully colored and firm to the touch—this is when their flavor and texture...
- Blanching Secret: That 2-3 minute blanch in boiling water is non-negotiable for color retention. I've learned the har...
Frequently asked questions
Got questions about freezing your homegrown bell peppers?
You’re not alone! Here are answers to the most common concerns to help you preserve that garden-fresh flavor like a pro.
Can I freeze bell peppers with the skin on?
Yes, but with a catch! The skin stays intact during freezing, but it can become tough and less appealing after thawing. For best texture, blanch them first (dip in boiling water for 2-3 minutes, then ice bath) to soften the skin slightly. If you prefer, peel them before freezing for a smoother texture in cooked dishes.
How long do frozen bell peppers last?
Frozen bell peppers retain quality for 8–12 months when stored properly in airtight containers or freezer bags. After that, they may lose flavor or texture. For peak freshness, label bags with the date and aim to use them within 6–9 months for the best taste and crunch.
Are frozen bell peppers good for raw dishes?
Not ideal! Freezing softens the texture, making them mushy when thawed. Use frozen bell peppers for cooked dishes like stir-fries, soups, or sauces. For raw applications (e.g., salads or snacking), freeze only if you’re okay with a slightly softer bite—or opt for pickling instead!
Why do my frozen bell peppers turn gray or brown?
Oxidation causes that color change, but it’s safe to eat! To prevent it, blanch peppers before freezing (as mentioned above) or store them in airtight containers with as little air as possible. Adding a splash of lemon juice to the freezer bag can also slow discoloration.
Can I freeze other garden veggies the same way?
Many veggies freeze well, but methods vary! Blanching works for leafy greens (spinach, kale) and root veggies (carrots, potatoes), while raw freezing suits onions, garlic, and herbs. Bell peppers, tomatoes, and zucchini benefit most from blanching. Always research the best prep for your specific veggie—some (like cucumbers) freeze poorly.
Wrapping up and next steps
Freezing bell peppers from your garden is a simple way to lock in flavor, nutrients, and that fresh-from-the-vine crunch for months—no fancy equipment required! Whether you’re prepping for winter meals, reducing food waste, or just love the convenience, this method keeps your peppers ready for soups, stir-fries, or snacks.
Now that you’ve mastered the steps, go ahead and stock your freezer with homegrown goodness!
👉 Next step: Try freezing a batch of your garden’s freshest peppers this weekend—your future self (and taste buds) will thank you! 🌱❄️