
Planting
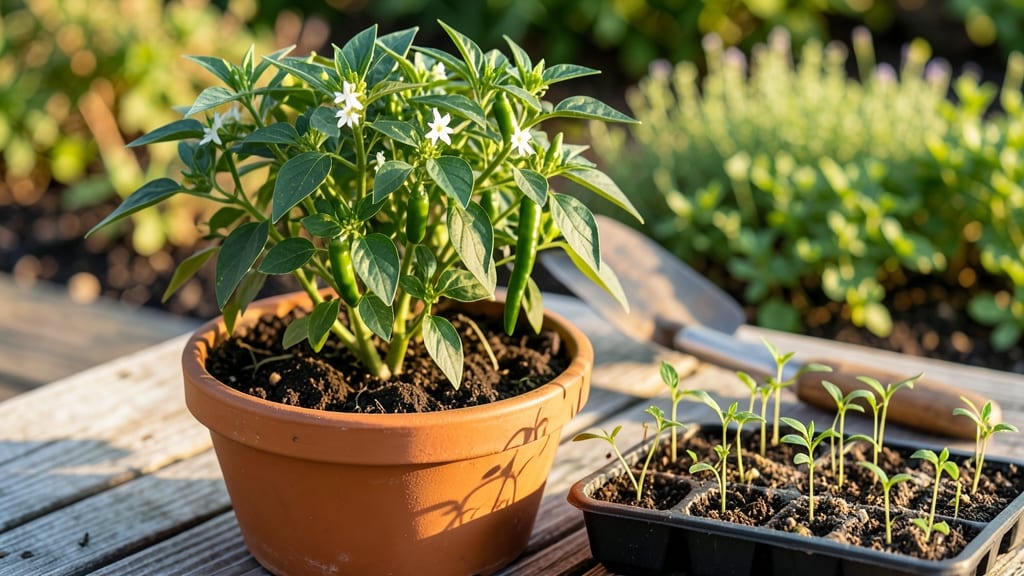
Planting Thai chili peppers from seed is where the real flavor adventure begins. 🌱 The key to fiery success starts with the right timing—wait until after your last frost when soil warms to at least 70°F, or start indoors 8-10 weeks before transplanting.
I learned the hard way that rushing leads to weak plants, but patience pays off with plants that produce 3-5 times more peppers than store-bought seedlings.
You’ll need well-draining soil mix (equal parts potting soil and perlite), small seed-starting pots, and a sunny spot that gets 6-8 hours of direct light daily. Thai chilies hate soggy roots, so containers with drainage holes are a must—even in-ground planting needs raised beds or mounds to prevent waterlogging.
The first real leaves appear in 2-3 weeks, but don’t rush transplanting until nighttime temps stay above 55°F.
What you end up with is a compact, bushy plant covered in bright red or green peppers that pack serious heat—perfect for fresh eating, cooking, or drying. The secret to avoiding leggy seedlings? Keep lights or windowsills within 6 inches of the plants and rotate them weekly for even growth.
I’ve grown mine in both containers and garden beds, and the flavor difference is night and day.
Here’s where it gets interesting—Thai chilies thrive in heat but struggle with humidity. If you’re in a damp climate, space plants 18-24 inches apart to improve airflow, and watch for powdery mildew on the leaves.
The first harvest comes 90-120 days after planting, and each plant keeps producing until frost. Now, let’s get those seeds in the ground!
📚 In This Guide
- What you need
- Instructions
- Tips and common mistakes
- Wrapping up and next steps
What you need
- ● Thai chili seeds: 5–10 seeds (choose varieties like Prik Kee Noo or Bird’s Eye for classic heat).
- ● Seed-starting mix: 1–2 gallons of sterile, well-draining potting soil (avoid garden soil—it’s too dense!).
- ● Containers: 2–4 small pots (3–4 inches deep) with drainage holes, or biodegradable peat pots.
- ● Spray bottle: For gentle watering (avoids disturbing seeds).
- ● Grow lights or sunny windowsill: A minimum of 6–8 hours of light daily (south-facing windows or LED grow lights work best).
- ● Fertilizer: Balanced liquid fertilizer (5-5-5 or 10-10-10, diluted to half-strength).
- ● Humidity dome or plastic wrap: To retain moisture while seeds germinate.
- ● Heat mat: Keeps soil warm (70–85°F) for faster germination.
- ● pH test kit: Thai chilies prefer soil pH 6.0–6.8 (adjust with lime or sulfur if needed).
- ● Trellis or stakes: For bushier growth (especially if growing Prik Kee Noo varieties).
- ● Organic mulch: Straw or shredded leaves to retain soil moisture.
- ● Pruning shears: For shaping plants and encouraging more peppers.
Step-by-step instructions for planting Thai chili peppers
Here's how I turn fiery seeds into a thriving, heat-packed harvest—no shortcuts, just proven results.
🌱 Step 1: Start Seeds Indoors for Early Growth
Thai chili seeds need warmth to germinate, so begin indoors 6-8 weeks before your last frost date. Fill 2-3 inch deep seed trays with sterile seed-starting mix (never garden soil—it's too dense). I like to use biodegradable pots because they eliminate transplant shock later. Moisten the mix until it's damp like a wrung-out sponge.
Plant 2-3 seeds per cell at a depth of ¼ inch, just below the surface. Cover lightly with a thin layer of mix and mist gently with water. Place the tray in a warm spot—75-85°F is ideal. A seedling heat mat speeds germination, but even a sunny windowsill works if you're patient. Keep the soil consistently moist until sprouts appear in 7-14 days (yes, some seeds take longer—don't rush it).
☀️ Step 2: Provide Bright Light and Prevent Leggy Growth
The moment seedlings emerge, move them under 14-16 hours of light daily. A south-facing window won’t cut it—Thai chilies stretch like teenagers toward weak light. I use a full-spectrum LED grow light just 2-4 inches above the plants. Raise it as they grow to maintain that distance. Without enough light, seedlings grow leggy (tall, spindly stems) and weak, which means fewer peppers later.
Watch for first true leaves (the second set after the initial cotyledons)—that’s when you can thin to one strong seedling per cell. Use clean scissors to snip the weaker stems at soil level. Water from the bottom now to avoid fungal issues, and keep the soil evenly moist but not soggy. Overwatering here causes damping-off, which kills seedlings overnight.
🪴 Step 3: Harden Off and Transplant Outdoors
Two weeks before your last frost, start hardening off the seedlings. Place them outside in a sheltered spot for 1-2 hours the first day, gradually increasing time over 10-14 days. This toughens their skin so they don’t wilt when moved to the garden. Choose a spot with full sun (6+ hours daily)—Thai chilies crave heat and light to develop their signature fire.
Transplant after all danger of frost has passed. Dig holes twice as wide as the root ball but no deeper. Space plants 12-18 inches apart in rows 18-24 inches apart—crowding leads to poor airflow and disease. Bury the stem slightly deeper than it was in the pot to encourage stronger roots. Water deeply right after planting to settle the soil and remove the trays or pots entirely.
💧 Step 4: Maintain Soil and Water for Maximum Heat
Thai chilies thrive in well-draining, slightly acidic soil (pH 6.0-6.8). Mix 2-3 inches of compost into the top 6 inches of soil before planting for nutrients. Water deeply once a week, aiming for 1 inch of water per week. Let the soil dry slightly between waterings—chilies hate soggy roots. Mulch with 2-3 inches of straw to retain moisture and keep roots cool in scorching weather.
Fertilize lightly every 3-4 weeks with a balanced organic fertilizer (10-10-10). Too much nitrogen makes plants leafy but pepper-less. Watch for yellowing leaves—that’s a sign of overwatering or nutrient deficiency. Prune suckers (the little shoots in the leaf axils) to direct energy to peppers, not extra foliage. Harvest when peppers turn bright red or green (depending on the variety) and reach 2-4 inches long for peak heat.
Tips & tricks for growing fiery Thai chili peppers
Here's what nobody tells you about turning those tiny seeds into a spicy harvest that'll make your neighbors jealous.
Germination Warmth: If you don't have a seedling heat mat, try placing your seed trays on top of your refrigerator or in a warm corner of your kitchen. The ideal 75-85°F range is crucial—thai chili seeds won't germinate properly in cooler conditions. I've had success using a simple incandescent bulb (not LED) placed 6 inches above the trays for extra warmth. Just be patient—some seeds take up to 14 days to sprout, and that's perfectly normal.
Lighting Strategy: For those 14-16 hours of light daily in Step 2, I recommend setting a timer on your grow light to automatically turn on and off. This prevents leggy growth and ensures consistent light exposure. If you're using natural light, rotate your seedlings daily so all sides get equal exposure—chilies grow toward the light, and uneven growth leads to weaker plants. The 2-4 inch distance from light is critical: too close burns leaves, too far stretches seedlings.
Transplanting Hack: When transplanting outdoors, I add a handful of compost to each planting hole along with the seedling. This gives them an immediate nutrient boost right when they need it most. Also, water the hole thoroughly before placing the seedling in—this helps settle the soil and eliminates air pockets around the roots. After transplanting, I always give the plants a 1 inch watering to help them establish quickly in their new home.
Heat Management: Thai chilies love heat, but their roots can't handle scorching temperatures. That's why mulching with 2-3 inches of straw is a game-changer—it keeps roots cool while retaining moisture. In particularly hot climates, I even add a second layer of mulch after the initial watering to protect against heat stress. Watch for wilting leaves during heatwaves: this is your plant's way of saying "I need more water," but don't overdo it—chilies hate soggy roots just as much as they love heat.
Pro Tips for Plant Thai Chili Peppers
- Here's what nobody tells you about turning those tiny seeds into a spicy harvest that'll make your neighbors jealous.
- Germination Warmth: If you don't have a seedling heat mat, try placing your seed trays on top of your refrigerator or...
- Lighting Strategy: For those 14-16 hours of light daily in Step 2, I recommend setting a timer on your grow light to ...
Frequently asked questions
Got questions about growing Thai chili peppers? You’re not alone! Here are answers to the most common concerns—from timing to troubleshooting—so you can grow fiery, flavorful peppers with confidence.
When is the best time to plant Thai chili seeds?
Start seeds indoors 8–10 weeks before your last frost date (typically February–March in most climates). Thai chilies thrive in warm soil (above 70°F/21°C), so transplant seedlings outdoors only after all frost risk has passed—usually late spring or early summer. If you’re in a tropical zone, direct-sow seeds in spring once soil warms up.
How long does it take for Thai chili peppers to grow?
From seed to harvest, expect 3–4 months. Seedlings sprout in 7–14 days, and peppers may appear 60–90 days after transplanting, depending on variety and growing conditions. Patience pays off—some heat-loving varieties (like Prik Kee Noo) take a little longer but pack extra punch!
Can I grow Thai chilies in containers or small spaces?
Thai chilies are perfect for containers—use pots at least 12–18 inches deep with drainage holes. Place them in a sunny spot (6+ hours of light daily) and fertilize lightly every 2–3 weeks. Just avoid overcrowding; space plants 12–18 inches apart to prevent disease and encourage bushier growth.
Why aren’t my Thai chili plants producing peppers?
Common culprits include insufficient light (move to sunnier spot), overwatering (let soil dry slightly between waterings), or lack of nutrients (use a balanced fertilizer like 10-10-10). Also, ensure temps stay above 60°F (15°C)—chilies hate cold drafts! If flowers drop without fruiting, hand-pollinate with a soft brush to boost fruit set.
Are Thai chili peppers hard to grow for beginners?
Not at all! They’re forgiving and fast-growing compared to other peppers. Just mimic their native tropical climate: plenty of sun, warm soil, and consistent moisture. If you can grow tomatoes, you can grow Thai chilies! Start with easier varieties like Prik Thai or Bird’s Eye for a smoother learning curve.
Wrapping up and next steps
Growing Thai chili peppers is a rewarding journey that brings bold, fiery flavors to your kitchen—and your confidence as a gardener! 🌱 With the right seeds, soil, and care, you’ll soon be harvesting vibrant, heat-packed peppers to spice up your favorite dishes.
Whether you’re a beginner or a seasoned gardener, every small step—from planting to harvesting—brings you closer to that first taste of homegrown heat.
Now that you’re armed with knowledge, why not take the next step? Start your seeds indoors today, or grab a few plants from a local nursery.
Before you know it, your garden (or windowsill!) will be bursting with Thai chili peppers—ready to turn your meals into a flavor explosion. Happy planting! 🌶️✨