
Picking
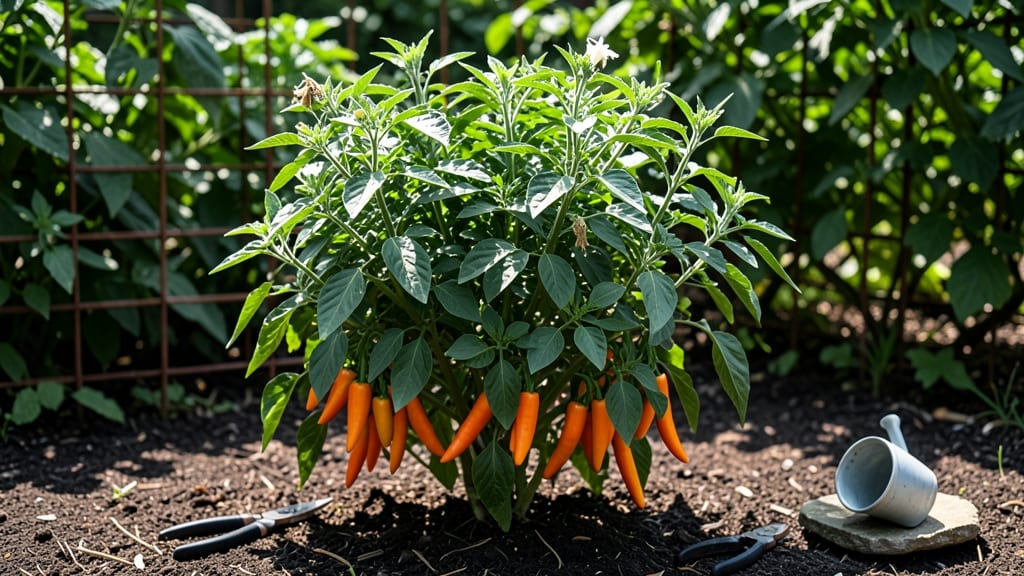
Growing orange chilli peppers that blaze with color and heat is my favorite summer project—🌶️ nothing beats the moment they turn from green to fiery orange. These peppers aren’t just beautiful; they’re packed with sun-dried intensity that lasts all year when you preserve them properly.
The secret lies in giving them exactly what they crave: hot, sunny days, well-draining soil, and just enough water to keep them thriving without drowning their roots.
Start with seeds or transplants in late spring after the last frost, when soil temperatures hit at least 70°F. Space them 18-24 inches apart in full sun—these peppers are sun-worshippers that reward you with bold, glossy fruit when they get 6+ hours of direct light daily.
A balanced fertilizer every 4-6 weeks keeps them producing, but don’t overdo it—they’re sensitive to too much nitrogen, which makes them leafy and lazy.
Harvest begins when peppers turn bright orange and firm to the touch, usually 75-90 days after planting. The longer they stay on the vine, the sweeter and more complex their flavor becomes.
Once picked, you can dry them in the sun or a dehydrator for year-round heat—just imagine the spice blends you’ll create with these vibrant, fiery treasures.
Watch for common pests like aphids or spider mites, which love stressed plants. A strong spray of water or neem oil usually does the trick. And if your peppers start cracking? That’s usually a sign they need more consistent watering—keep the soil evenly moist but not soggy.
With the right care, you’ll end up with a bumper crop of sun-kissed, heat-packed peppers that turn every meal into a flavor adventure.
📚 In This Guide
- What you need
- Instructions
- Tips and common mistakes
- Wrapping up and next steps
What you need
- ● Fresh orange chilli peppers – 1–2 lbs (450–900g), ideally firm, vibrant, and unblemished. Look for varieties like Padrón, Fresno, or Thai orange chillies for a balanced kick.
- ● Sharp knife or pruning shears – For clean cuts without bruising the peppers.
- ● Cutting board – A sturdy, food-safe surface to prep your peppers.
- ● Drying rack or mesh screen – 2–3 ft (60–90 cm) wide, with good airflow. A dehydrator tray or even a clean window screen (for sun-drying) works!
- ● String or clothespins – If hanging peppers to dry (e.g., for a drying line method).
- ● Food-grade plastic bags or airtight containers – For storage once dried (quart-sized jars or resealable bags with oxygen absorbers are ideal).
- ● Dehydrator – Set to 135°F (57°C) for even drying (6–12 hours).
- ● Thermometer – To monitor drying temps, especially for sun-drying.
- ● Paper towels – For blotting excess moisture before drying.
- ● Labeling supplies – Masking tape + marker to tag jars with the date and pepper type.
- ● Ventilation – Ensure your drying area is well-ventilated to prevent mold (especially for sun-drying).
- ● Food safety knowledge – Dried peppers should be bone-dry (no moisture) to avoid spoilage. Test by bending a pepper—if it snaps, it’s ready!
- ● Sunny weather (for outdoor drying) – 3–5 days of direct sunlight, with temps above 80°F (27°C) for optimal results.
Step-by-step guide to sun-drying orange chili peppers
Turn your homegrown heat into preserved flavor with this foolproof sun-drying method.
🌱 Step 1: Select and Prepare the Peppers
Choose fully mature, firm orange chili peppers with vibrant color and no soft spots. I always pick them in the morning when moisture levels are lowest—this prevents mold during drying. Handle them gently to avoid bruising, which invites rot.
Wash the peppers briefly under cool water to remove dirt, then pat them completely dry with a clean towel. Any remaining moisture will slow drying and create a perfect environment for bacteria. Arrange them in a single layer on a clean kitchen towel to air-dry for 30 minutes before moving to the drying process.
☀️ Step 2: Choose Your Drying Method
For true sun-dried flavor, place peppers on a clean, food-safe drying rack or mesh screen in direct sunlight. I prefer a location with 6+ hours of full sun daily and good airflow—like a covered porch or balcony. Cover the peppers loosely with cheesecloth or fine mesh to protect them from insects while allowing airflow.
If you're drying indoors, use a food dehydrator set to 135°F with the fan on high. Arrange peppers cut-side up (if sliced) or whole with stems intact. They're ready when they're completely dry to the touch and brittle enough to snap when bent.
⏰ Step 3: Monitor and Rotate Daily
Check peppers every 4-6 hours during the day. Rotate them to ensure even drying—uneven exposure creates soft spots. You'll know they're ready when the skin wrinkles and the stems pull away cleanly. This typically takes 3-5 days in good conditions, but humidity can extend this to 7-10 days.
Store dried peppers in an airtight container away from light. They'll keep for 6-12 months if completely dry. If any peppers develop mold (fuzzy spots), remove them immediately—they can spoil the whole batch.
🌿 Step 4: Rehydrate and Use
To restore the peppers, soak them in warm water for 15-30 minutes until pliable. They'll lose some of their intense heat but regain their vibrant color. I like to use them whole in stews or finely chop them for spice blends—just 1-2 dried peppers per dish delivers serious flavor.
For powdered chili, grind dried peppers in a clean spice grinder or mortar and pestle. Store the powder in a sealed jar in a cool, dark place. It'll keep for up to a year and adds depth to everything from marinades to baked goods.
Tips & tricks for perfect sun-dried orange chili peppers
Here's what nobody tells you about getting the most vibrant, flavorful dried peppers from your harvest.
Selection Tip: The quality of your dried peppers starts with selection. Look for peppers that are completely firm with no soft spots or wrinkles—these will dry more evenly and retain their shape. I've found that peppers picked in the morning have lower moisture content, which dramatically reduces the risk of mold during drying. If you're working with a large batch, sort them by size before drying to ensure even exposure to sunlight or heat.
Pre-Drying Preparation: That 30-minute air-drying step before the main drying process is non-negotiable. It removes surface moisture that would otherwise create a perfect breeding ground for bacteria. Use a clean kitchen towel and pat them thoroughly—don't just wipe them. For extra insurance, you can place them in a single layer on a wire rack for 10 minutes in front of a fan to speed up this initial drying. This step alone can cut your total drying time by nearly 20%.
Sunlight Strategy: For the most authentic flavor, aim for that 6+ hours of direct sunlight daily, but don't be discouraged if you can't get it all at once. You can split the exposure—morning sun followed by afternoon sun works just as well. If you're using a dehydrator at 135°F, remember that the fan setting matters just as much as the temperature. Set it to high to ensure consistent airflow around each pepper, which prevents uneven drying and potential mold spots.
Drying Time Troubleshooting: The 3-5 day range assumes moderate humidity and good airflow. If you're in a particularly damp climate, you might need to extend this to 7-10 days. Watch for the telltale signs: skin that wrinkles when touched and stems that pull away cleanly. If you're unsure, do the bend test—completely dry peppers should snap when bent, not bend back into shape. This visual cue is more reliable than any time estimate.
Pro Tips for Orange Chilli Peppers
- Here's what nobody tells you about getting the most vibrant, flavorful dried peppers from your harvest.
- Selection Tip: The quality of your dried peppers starts with selection. Look for peppers that are completely firm wit...
- Pre-Drying Preparation: That 30-minute air-drying step before the main drying process is non-negotiable. It removes s...
Frequently asked questions
Got questions about working with orange chilli peppers? You’re not alone! Whether you’re drying them for storage or experimenting with flavors, here are some common queries—and expert answers—to keep your spice game on fire.
How long do orange chilli peppers take to dry properly?
With proper airflow (60–70°F, low humidity), whole orange chillies typically dry in 1–3 weeks. Check for readiness by testing a pepper’s stem—it should snap easily, not bend. For faster results, use a dehydrator (2–4 hours at 135°F). Pro tip: Hang them in small bundles to avoid mold!
Can I speed up drying without a dehydrator?
Try these methods:
- Oven method: Place peppers on a baking sheet at 170°F (77°C) with the door cracked open. Rotate every 30 minutes (2–3 hours total).
- Sun drying: Use a mesh screen in direct sunlight (2–5 days, depending on climate). Cover at night to protect from pests.
- Food dehydrator: Set to 135°F (57°C) for 2–4 hours, flipping halfway.
What’s the best way to store dried orange chillies?
Keep them fresh and potent by storing in airtight containers (glass jars or vacuum-sealed bags) in a cool, dark place (like a pantry). Label with the drying date—they’ll stay flavorful for 6–12 months. For extra longevity, freeze them! Pro tip: Add a bay leaf to the jar for subtle aroma.
Can I substitute orange chillies for other dried peppers?
Yes! Orange chillies add sweet, fruity heat, so they’re great in:
- Mild swaps: Replace half the red chilli powder in recipes with ground orange chillies for depth.
- Bold flavors: Use them whole in salsas, curries, or marinades for a vibrant pop.
- Spice blends: Mix with smoked paprika or cumin for a Moroccan-inspired kick.
Why did my dried orange chillies turn moldy?
Mold thrives in moisture and warmth. To prevent it:
- Ensure peppers are fully dry (no flexibility in stems).
- Avoid storing in humid areas (like basements).
- Check for pests (like weevils) before drying—freeze peppers for 48 hours first if needed.
Wrapping up and next steps
From sun-ripened harvests to perfectly preserved heat, orange chilli peppers are a game-changer for spice lovers! 🌶️✨ Whether you’re drying them for bold flavor or stocking up for winter, mastering this process ensures you’ll always have fiery goodness at your fingertips.
Ready to elevate your dishes? Start small—try drying a handful this season—and let your taste buds thank you later!
💡 Pro Tip: Label your jars with the date and heat level (mild, medium, or fiery!) to track your stash like a pro.