
Pests and Diseases
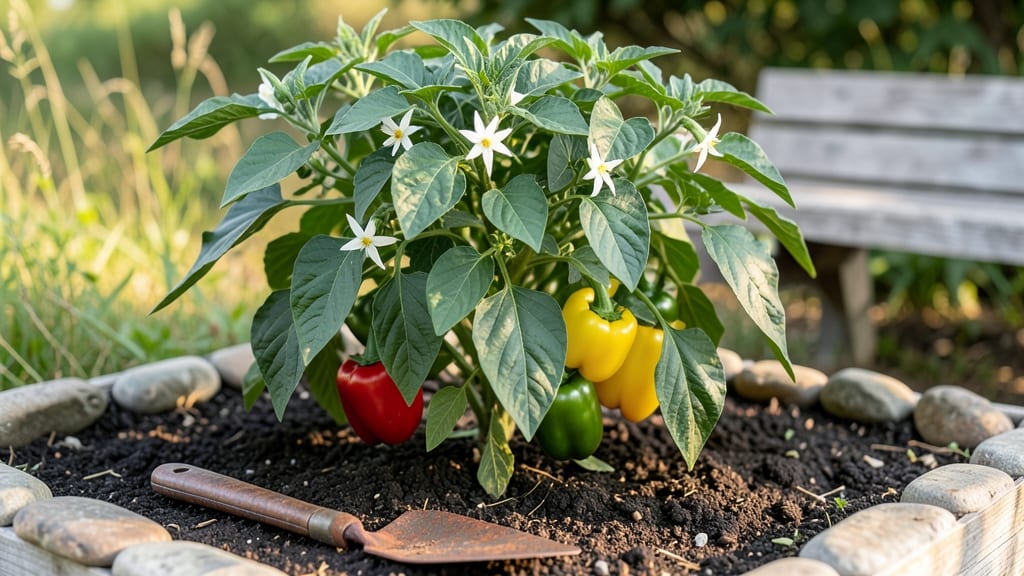
Here are my pepper gardening tips—growing peppers from seed to harvest feels like unlocking a spice cabinet you never knew you had. 🌿 I’ve turned my backyard into a year-round pepper powerhouse by mastering the basics—soil that drains like a dream, sunlight that keeps them happy, and a few sneaky tricks to outsmart pests before they even show up.
The secret isn’t just patience—it’s paying attention to what peppers really need. Too much water? Blossom end rot ruins your harvest. Not enough heat? They’ll bolt before fruiting. But get it right, and you’ll be snipping ripe peppers straight from the vine for months, even in cooler climates.
My jalapeños went from sad seedlings to prolific producers in just 90 days last year.
You’ll learn how to feed them just enough fertilizer (no, more isn’t better), when to prune for bigger yields, and the one simple trick that keeps aphids off my plants without chemicals. The best part? These methods work for bell peppers, chiles, and everything in between—no fancy equipment required.
Whether you’re fighting off spider mites or just trying to coax your first pepper to fruit, this guide cuts through the guesswork. Let’s get those plants thriving—and your kitchen stocked with homegrown heat.
📚 In This Guide
- What you need
- Instructions
- Tips and common mistakes
- Wrapping up and next steps
What you need
- ● Pepper plants: Start with seedlings (buy from nurseries or grow from seeds) or seeds (choose disease-resistant varieties like Jalapeño, Bell, or Cayenne). Quantity: 3–6 plants per person (or more if you love spice!).
- ● Containers or garden bed: Containers: 5–10 gallon pots (minimum 12" deep) with drainage holes. Material: Plastic, fabric, or terracotta.
- ● Garden bed: Well-draining soil in full sun (6+ hours/day). Size: 18" apart for spacing.
- ● High-quality potting mix: Type: Lightweight, organic mix with perlite or vermiculite (avoid garden soil—it compacts!). Quantity: 1–2 bags per 3–4 plants.
- ● Fertilizer: Balanced fertilizer: 10-10-10 or 5-5-5 (organic options like fish emulsion or composted manure work too!). Application: Mix into soil or use liquid feed every 2–3 weeks.
- ○ Calcium source (optional but helpful): Crushed eggshells or lime to prevent blossom-end rot.
- ● Mulch: Straw or shredded leaves to retain moisture and suppress weeds. Quantity: 2–3 inches thick.
- ● Watering can or hose with nozzle: For gentle, deep watering (avoid wetting leaves to prevent disease).
- ● Pest control: Neem oil or insecticidal soap: For aphids, spider mites, or whiteflies.
- ● Row covers or netting: To protect from pests like flea beetles.
- ● Sticky traps: Yellow or blue traps for monitoring flying insects.
- ● Pruning shears: Sharp, clean scissors for trimming (sterilize with rubbing alcohol between uses!).
- ● Grow lights: If starting seeds indoors (LED or fluorescent, 12–16 hours/day).
- ● Soil moisture meter: To check water levels without over/under-watering.
- ● Support stakes or cages: For tall varieties like Banana peppers (3–4 ft stakes).
- ● Compost bin: To recycle kitchen scraps into nutrient-rich food for your peppers.
- ● Harvesting basket or scissors: For easy, clean picking (avoid tearing plants!).
Step-by-step instructions for growing thriving peppers year-round
Here's how to cultivate peppers that produce abundantly while keeping pests at bay—no matter the season.
🌱 Step 1: Start Seeds Indoors at the Right Time
Peppers need a long growing season, so begin seeds indoors 8-10 weeks before your last frost date. Use biodegradable pots (like peat or coconut fiber) to avoid disturbing roots later. Fill them with sterile seed-starting mix, not garden soil, because it can harbor diseases that weaken seedlings.
Plant seeds ¼ inch deep—any deeper and they struggle to reach the surface. Mist the soil lightly with water, then cover the pots with plastic wrap to retain warmth and moisture. Place them in a warm spot (75-85°F) like on top of the fridge or near a heat mat. You'll see sprouts in 7-14 days—watch for the first tiny leaves to appear, signaling it's time to remove the plastic.
☀️ Step 2: Provide Bright Light and Prevent Leggy Growth
Peppers crave 14-16 hours of light daily, and a sunny windowsill won’t cut it. Use a grow light (LED or fluorescent) positioned 2-4 inches above the seedlings. Raise it as they grow to maintain that distance. Without enough light, seedlings stretch toward the source, becoming weak and prone to falling over.
You’ll know your light setup is right when seedlings have thick stems and dark green leaves spaced close together. If they look pale and stretched, move the light closer. Once seedlings have 4-6 true leaves, they’re ready to harden off—gradually introduce them to outdoor conditions over 7-10 days before transplanting.
🪴 Step 3: Transplant to Containers or Garden Beds
Peppers thrive in well-draining soil with a pH of 6.0-6.8. If planting in containers, use pots at least 12 inches deep and wide enough to accommodate mature plants. Amend garden soil with compost or aged manure to boost fertility. Transplant seedlings in the late afternoon to reduce stress, and water deeply right after to settle the roots.
Space plants 18-24 inches apart—crowding leads to poor air circulation, which invites fungal diseases. Mulch around the base with 2-3 inches of organic mulch (like straw or shredded leaves) to retain moisture and suppress weeds. This also keeps soil temperatures stable, which peppers love.
💧 Step 4: Water and Fertilize for Maximum Yield
Peppers hate soggy roots, so water deeply 1-2 times per week, letting the top 1-2 inches of soil dry out between waterings. Use a drip irrigation system or water at the base to avoid wetting leaves, which reduces disease risk. Overhead watering in the evening can lead to fungal issues like blight.
Feed plants every 2-3 weeks with a balanced fertilizer (like 10-10-10) once they start flowering. You’ll notice buds forming at the leaf junctions—this is your cue to switch to a low-nitrogen, high-phosphorus fertilizer (like 5-10-10) to encourage fruiting. Stop fertilizing once peppers begin to ripen to avoid reducing flavor.
✂️ Step 5: Prune and Protect for Pest-Free Harvests
Prune suckers (the small shoots that form in the leaf axils) to direct energy toward fruit production. Use clean, sharp scissors to snip them off at the base—never tear them, or you risk damaging the plant. Also, remove any yellow or diseased leaves immediately to prevent pests from moving in.
To deter pests like aphids and spider mites, spray plants with neem oil or insecticidal soap every 2 weeks as a preventative measure. You’ll know pests are a problem if you see sticky residue (aphid honeydew) or tiny webs on the undersides of leaves. Act fast—once pests take hold, they multiply quickly.
🌿 Step 6: Harvest and Extend the Season
Peppers are ready to harvest when they reach full color and firmness. For sweet peppers, pick when they’re deep green, red, yellow, or orange, depending on the variety. For hot peppers, harvest when they’re fully colored but still slightly firm—this ensures maximum heat and flavor.
To extend the season, bring potted peppers indoors before the first frost. Place them in a sunny window or under grow lights and reduce watering slightly. You can also succession plant every 2-3 weeks in warm climates to enjoy peppers year-round. Store harvested peppers in a cool, dark place for up to 2 weeks to preserve freshness.
Tips & tricks for year-round pepper gardening success
Between us, these small adjustments can mean the difference between a mediocre harvest and a garden bursting with peppers. Let me share what I've learned from years of trial and error.
The Heat Factor: That 75-85°F warmth for seed starting is non-negotiable—pepper seeds need consistent heat to germinate reliably. I use a seedling heat mat under my biodegradable pots, which keeps the soil perfectly warm without needing to monitor a thermometer constantly. If your kitchen runs cool, place pots on top of the fridge or near a sunny window with a clear plastic cover to trap heat. The moment you see those first tiny leaves, remove the plastic immediately to prevent fungal growth.
Lighting Secret: Those 14-16 hours of daily light are crucial for preventing leggy seedlings. I've ruined batches by assuming my grow lights were sufficient—turns out, the distance matters just as much as the duration. Keep your LED or fluorescent light just 2-4 inches above the seedlings and adjust as they grow. You'll know you've got it right when the seedlings develop thick stems and dark green leaves that stay close together. If they start stretching toward the light, move it closer immediately.
Soil Science: That 6.0-6.8 pH range isn't just a suggestion—it's where peppers thrive. I test my soil before planting and adjust with lime if needed. For container gardening, mix in compost or aged manure at the bottom of your 12-inch pots before adding your planting mix. This creates a nutrient-rich zone that encourages strong root development right from the start. And remember, well-draining soil is non-negotiable—peppers hate soggy roots.
Pest Prevention: The 2-week neem oil schedule is your best defense against aphids and spider mites. I start spraying preventatively as soon as I transplant seedlings outdoors. Look for those telltale signs—sticky residue on leaves or tiny webs—and act immediately. Once pests take hold, they multiply faster than you can say "blight." A quick spray with insecticidal soap every two weeks keeps them at bay without harming your plants or the environment.
Pro Tips for Pepper Gardening Tips
- Between us, these small adjustments can mean the difference between a mediocre harvest and a garden bursting with peppers.
- The Heat Factor: That 75-85°F warmth for seed starting is non-negotiable—pepper seeds need consistent heat to germinate reliably.
- Lighting Secret: Those 14-16 hours of daily light are crucial for preventing leggy seedlings.
Frequently asked questions
Got questions about growing peppers like a pro?
You’re not alone! Whether you’re a beginner or a seasoned gardener, these pepper gardening tips will help you troubleshoot common challenges and keep your plants thriving year-round.
When is the best time to plant peppers?
Peppers thrive in warm soil—plant them after the last frost when temperatures stay above 55°F (13°C). Start seeds indoors 8–10 weeks before transplanting for an early harvest. In warmer climates, you can direct-sow as early as February or March. Pro tip: Use black plastic mulch to warm the soil faster!
How do I keep pests like aphids and spider mites off my peppers?
Pests are pesky, but prevention is key! Spray neem oil or insecticidal soap weekly as a deterrent. Encourage beneficial insects like ladybugs and lacewings by planting basil, marigolds, or dill nearby. For severe infestations, remove affected leaves and isolate the plant. Pro tip: Prune plants for better airflow to discourage mites!
Why are my pepper plants flowering but not fruiting?
If your peppers bloom but don’t set fruit, it’s often due to temperature stress (below 60°F/15°C or above 90°F/32°C), lack of pollinators, or over-fertilizing with nitrogen. Hand-pollinate by gently shaking plants or using a small brush. Pro tip: Ensure consistent watering and balanced fertilizer (like 10-10-10) to encourage fruiting!
Can I grow peppers in containers, and what’s the best setup?
Peppers do well in containers as long as the pot is at least 12–18 inches deep with drainage holes. Use a lightweight, well-draining potting mix and place the container in full sun (6+ hours/day). Dwarf varieties like ‘Jalapeño M’ or ‘Shishito’ are perfect for pots. Pro tip: Rotate containers weekly for even growth!
What should I do if my pepper plants get fungal diseases like powdery mildew?
Fungal diseases thrive in humid, poorly ventilated conditions. Prevent them by spacing plants 18–24 inches apart, avoiding overhead watering, and ensuring good airflow. If infected, remove diseased leaves and treat with copper fungicide or a baking soda spray (1 tsp baking soda + 1 quart water + a drop of soap). Pro tip: Water in the morning so foliage dries quickly!
Still stumped? Drop your pepper-growing woes in the comments—we’ve got you covered!
Wrapping up and next steps
Growing peppers is a rewarding journey that blends patience, creativity, and a little know-how—especially when it comes to keeping pests at bay! 🌱 Whether you’re a seasoned gardener or just starting, the key is consistent care, smart prevention, and quick action.
With the right techniques—like companion planting, organic sprays, and vigilant monitoring—your pepper plants can thrive year-round, delivering a bountiful harvest of spicy, sweet, or smoky flavors.
Now that you’re armed with these pest-proof pepper gardening tips, it’s time to roll up your sleeves! Start small—try one or two techniques this season and build from there. Before you know it, you’ll be the proud pepper-growing hero of your neighborhood. Happy gardening! 🌶️✨