
Planting
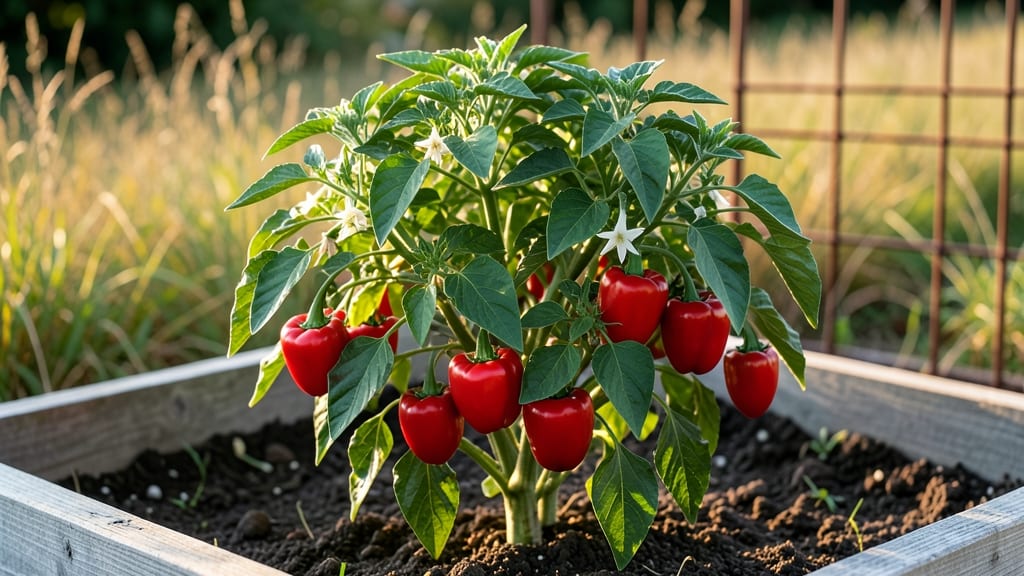
Growing red bell pepper plants transformed my small balcony into a spice factory. 🌱 These vibrant plants pack bold flavor into every bite—and they thrive vertically, saving space while delivering 20+ peppers per plant when cared for right.
The secret lies in warm soil, consistent moisture, and a sturdy trellis or tower system. Unlike finicky heirlooms, red bell peppers reward patience with thick walls and deep color. Start seeds indoors 8-10 weeks before last frost, or buy sturdy transplants in spring when nights stay above 55°F.
By midsummer, you'll be harvesting glossy red peppers that outshine store-bought in both flavor and texture. The key? Regular pruning to focus energy on fruit production and a balanced fertilizer routine that keeps leaves lush but doesn't overpower the peppers.
Works in containers, raised beds, or vertical pockets—even in partial shade if you choose heat-tolerant varieties like 'Carmen' or 'Jupiter'. The payoff? Fresh peppers for salsas, stir-fries, or snacking straight from the vine all season long.
📚 In This Guide
- What you need
- Instructions
- Tips and common mistakes
- Wrapping up and next steps
What you need
- ● Red Bell Pepper Seeds or Seedlings: Choose disease-resistant varieties like ‘Carmen’, ‘Gypsy’, or ‘Luna’ for vertical growing.
- ● Quantity: 3–5 plants per vertical structure (if starting from seed, sow 10–12 seeds for better success rates).
- ● Vertical Garden Structure: Options: Trellis, tower garden, wall-mounted pockets, or a DIY pallet planter (at least 2–3 feet tall).
- ● Material: Durable, weather-resistant (e.g., cedar, plastic, or metal).
- ● Potting Mix: Well-draining, nutrient-rich mix (e.g., 50% peat moss, 30% perlite, 20% compost).
- ● Quantity: 1–2 cubic feet per plant (or follow structure guidelines).
- ● Containers or Grow Bags: If using pockets or individual pots, opt for 5–7 gallon capacity with drainage holes.
- ● Fertilizer: Balanced organic fertilizer (e.g., 10-10-10 or compost tea) for planting.
- ● Slow-release granules or liquid feed (e.g., fish emulsion) for ongoing growth.
- ● Support System: Soft ties or plant clips to secure peppers to the vertical structure as they grow.
- ● Watering Can or Drip Irrigation: Self-watering systems (like wicking beds) are ideal for vertical gardens.
- ● Pruning Shears: Sterilized shears for trimming excess foliage or dead leaves.
- ● Mulch (straw or shredded leaves) to retain moisture and suppress weeds.
- ● Shade cloth (30–50%) for hot climates to protect young plants.
- ● Growth regulators (e.g., seaweed extract) to boost plant resilience.
- ● LED grow lights (if indoors or low-light conditions).
- ● Pest deterrents (e.g., neem oil, row covers, or companion plants like basil).
Step-by-step instructions for growing red bell peppers vertically
Here's how to maximize your harvest in limited space with sturdy, productive pepper plants.
🪴 Step 1: Select and Prepare Your Vertical Growing System
Choose a trellis, tower garden, or sturdy wire cage that's at least 3-4 feet tall—red bell peppers need vertical support to prevent sprawling. I prefer 5-gallon fabric grow bags with built-in trellises because they're lightweight and provide excellent drainage. Fill your container with a well-draining potting mix (avoid garden soil—it compacts and stunts root growth).
For a 4-plant setup, divide the mix evenly between containers, leaving 1-2 inches of space at the top for watering. Tap the containers gently to eliminate air pockets while keeping the mix loose. The goal is a fluffy texture that lets roots spread easily. Add a slow-release fertilizer (like 10-10-10) at planting time to give your peppers a nutrient boost right when they need it.
🌱 Step 2: Plant Seedlings at the Right Depth and Spacing
Transplant 4-week-old seedlings (they should have 3-4 true leaves) into their containers, spacing them 12-18 inches apart. Dig a hole twice as deep as the root ball but no deeper—peppers hate having their crowns buried. Gently loosen the roots if they're circling in the nursery pot, then place the seedling in and firm the soil around it.
Water deeply right after planting to settle the soil and eliminate air gaps. You'll see the soil surface sink slightly as it compacts. Avoid wetting the leaves—direct water to the base instead. This prevents fungal diseases that thrive in damp foliage. I like to use a drip irrigation system or watering can with a narrow spout to keep moisture where it belongs.
☀️ Step 3: Provide Warmth, Light, and Support for Strong Growth
Red bell peppers thrive in full sun (6-8 hours daily) and warm soil (70-85°F). If you're growing in a cooler climate, use black plastic mulch to warm the soil and retain moisture. Install your vertical support immediately—peppers grow fast, and a leggy plant is hard to train later. Tie the main stem to the trellis with soft plant ties (never wire—it cuts into stems).
Watch for first flower clusters appearing about 6-8 weeks after transplanting. This is your cue to switch to a low-nitrogen, high-phosphorus fertilizer (like 5-10-10) to encourage fruiting. Prune suckers (the shoots that form in the leaf axils) regularly—they drain energy from fruit production. You'll know you're doing it right when the plant focuses its energy on bold, upright stems and heavy pepper development rather than bushy foliage.
💧 Step 4: Water and Feed for Maximum Yield
Water deeply 1-2 times per week, aiming for 1-1.5 inches of moisture per session. Let the top 2-3 inches of soil dry between waterings—peppers hate soggy roots but also suffer from inconsistent moisture. I test this by sticking my finger in the soil; if it feels dry at that depth, it's time to water. Mulch heavily with straw or shredded leaves to retain moisture and keep roots cool.
Fertilize every 2-3 weeks with a balanced liquid fertilizer (like fish emulsion) during the growing season. When peppers start coloring, switch to a potassium-rich feed (like 0-10-10) to sweeten the fruit and improve texture. You'll notice the difference in shinier leaves and faster fruit maturation—this is your plant telling you it's happy and productive.
✂️ Step 5: Prune and Harvest for Continuous Production
Prune yellow or diseased leaves immediately to keep airflow circulating. Remove side shoots that form below the first flower cluster—they compete with fruit for energy. When peppers reach 6-8 inches long, harvest them by twisting gently (don't cut) to avoid damaging the stem. This encourages the plant to produce more flowers and fruit in their place.
For red bell peppers, wait until they're fully colored and firm before picking. Ripe peppers will feel heavy in your hand and snap slightly when bent. If left on the plant too long, they'll turn soft and mealy. I harvest mine in the early morning when flavors are most concentrated. Store them in the fridge for up to 2 weeks or preserve them by freezing, canning, or drying.
Tips & tricks for growing red bell peppers vertically
Transforming your limited garden space into a pepper powerhouse starts with these game-changing strategies.
Vertical Support Setup: Install your trellis or support structure immediately after planting—don't wait until the seedlings get leggy. I've seen plants that grew 2 feet tall before I could even attach a trellis, making them nearly impossible to train properly. Use soft plant ties (like Velcro strips) to gently secure the main stem without damaging it, and adjust as the plant grows. The goal is to encourage upward growth rather than sprawling, which maximizes fruit production in vertical space.
Soil Temperature Secret: Maintaining soil temperatures between 70-85°F is non-negotiable for red bell peppers. If your climate dips below this range, create a microclimate by using black plastic mulch or even a simple cloche to trap heat. I once grew peppers in a cooler spring by placing containers on a raised bed with dark mulch—the soil stayed consistently warm, and my plants produced fruit weeks earlier than neighbors who didn't use this trick.
Pruning Strategy: The 6-8 week mark when flower clusters appear is your first major pruning cue. Remove any suckers (those little shoots forming in the leaf axils) immediately—they're energy vampires that steal nutrients from your developing peppers. Focus your pruning efforts on keeping the plant's energy directed toward the main stem and fruit development. You'll notice a dramatic difference in pepper size and quantity when you consistently follow this approach.
Harvest Timing: Early morning harvests make all the difference in flavor and texture. Peppers picked at dawn have the highest sugar content and firmest texture. I've found that harvesting when the peppers are still slightly cool from the night air prevents them from becoming soft and mealy later in the day. Store them in the fridge immediately after picking to maintain their freshness for up to 2 weeks.
Pro Tips for Red Bell Pepper Plant
- Transforming your limited garden space into a pepper powerhouse starts with these game-changing strategies.
- Vertical Support Setup: Install your trellis or support structure immediately after planting—don't wait until the seedlings get leggy.
- Soil Temperature Secret: Maintaining soil temperatures between 70-85°F is non-negotiable for red bell peppers.
Frequently asked questions
Got questions about growing your own red bell pepper plant? You’re in the right place! Here are some of the most common queries—plus quick, actionable answers to help you grow like a pro.
How long does it take for a red bell pepper plant to produce fruit?
A red bell pepper plant typically takes 60–90 days from transplanting to harvest, but the full journey starts much earlier! Seedlings need 8–12 weeks indoors before hardening off, and the plants themselves mature in 60–75 days from transplant. Patience pays off—bright red peppers are worth the wait!
What’s the best temperature for growing red bell peppers?
Red bell peppers thrive in warmth, with ideal daytime temps between 70–85°F (21–29°C) and nighttime temps above 55°F (13°C). They’re frost-sensitive, so wait until after the last frost to plant outdoors. If you’re growing in containers, place them in a sunny spot where temps stay consistent.
What are the most common pests or diseases for red bell pepper plants?
Watch out for aphids, spider mites, and hornworms—they love munching on pepper leaves! Diseases like powdery mildew or bacterial spot can also strike if humidity is high. Prevent issues by:
- Spraying neem oil for pests
- Ensuring good airflow
- Removing infected leaves immediately
Can I grow red bell peppers in containers, and what size pot do I need?
Red bell peppers adapt well to containers, but size matters. Aim for a pot at least 12–18 inches deep with drainage holes to prevent root rot. Use a lightweight, well-draining potting mix and fertilize every 2–3 weeks for bigger yields. Just ensure the pot gets 6–8 hours of sunlight daily.
Why are my red bell peppers turning yellow or staying green instead of red?
Yellowing peppers often signal overwatering, nutrient deficiency (like nitrogen), or fungal issues. If peppers stay green, they may need more sunlight, warmth, or time—red bell peppers ripen slowly! Check for:
- Even watering (let soil dry slightly between waterings)
- Balanced fertilizer (high in phosphorus for fruiting)
- Full sun exposure (6+ hours daily)
Pro Tip:
For vertical gardening success, use trellises or hanging baskets to save space. Prune side shoots to direct energy to fruit production, and harvest peppers regularly to encourage more growth. Happy growing!
Wrapping up and next steps
Growing red bell pepper plants in a vertical garden isn’t just smart—it’s a game-changer for small spaces! With the right setup, you’ll enjoy fresh, vibrant peppers all season long while maximizing your garden’s potential.
Whether you’re a beginner or a seasoned gardener, these space-saving techniques make it easier than ever to cultivate a thriving harvest.
Ready to get started? Plant your seeds, monitor growth, and soon you’ll be reaping the rewards! 🌱✨ Check out our guide on maintaining your vertical garden for long-term success.