
Companion Plants
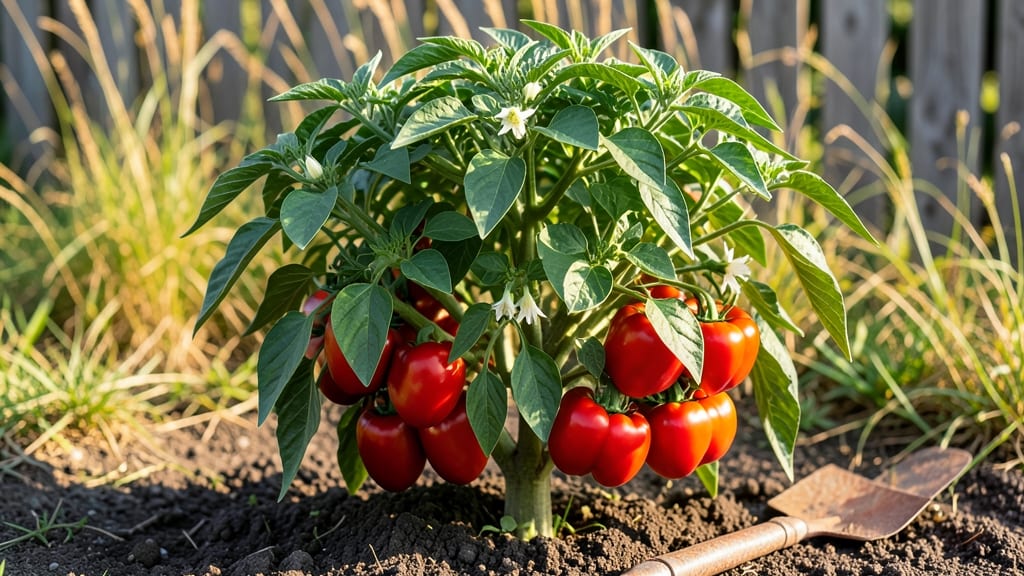
Growing red pepper plants vertically turns your small garden into a fireworks display of vibrant, sun-ripened peppers—and it’s easier than you’d think. 🌶️ I’ve trained mine up 6-foot poles this year, saving space while doubling my harvest compared to bush plants.
The key? Starting strong with the right soil, sunlight, and a little patience to let those peppers plump up on the vine.
You’ll need just a few things: sturdy 5-6 foot bamboo poles (or trellis netting), a well-draining potting mix, and full sun (6+ hours daily). Red peppers hate soggy roots, so raised beds or containers with drainage holes work best.
I swear by a balanced fertilizer every 4-6 weeks once flowers appear—nothing fancy, just consistent feeding. The real magic happens when you prune suckers (those little shoots in the leaf axils) to focus energy upward.
By midsummer, you’ll be harvesting glossy, heat-packed peppers that stay fresh on the vine longer than bush varieties. The pole-trained method also keeps fruits off the ground, reducing rot and pest damage. Plus, your neighbors will ask how you fit so many plants in that tiny patch—here’s your secret weapon.
Works for jalapeños, bell peppers, or habaneros—just adjust pole height to match your pepper’s mature size. The only downside? You’ll need to tie stems every few weeks as they grow. Worth it for that sunset-of-the-garden moment when peppers blush red in the afternoon light.
📚 In This Guide
- What you need
- Instructions
- Tips and common mistakes
- Wrapping up and next steps
What you need
- ● Red Pepper Seeds or Seedlings: Choose disease-resistant varieties like ‘Lipstick,’ ‘Cayenne,’ or ‘Jalapeño.’ Start with 3–5 plants for a small garden.
- ● Containers or Garden Bed: For containers: 5-gallon pots or larger (at least 12" deep) with drainage holes.
- ● For in-ground: A well-draining, sunny spot (6+ hours of sunlight daily) with loose, fertile soil (pH 6.0–6.8).
- ● Pole or Trellis System: Bamboo stakes (6–8 ft tall) or galvanized metal poles (1–2 per plant).
- ● Twine or soft plant ties (jute or plastic-free) to secure vines.
- ● Potting Mix or Soil Amendments: High-quality potting mix with compost (or add aged manure for nutrients).
- ● Slow-release fertilizer (e.g., 10-10-10) or organic options like fish emulsion.
- ● Watering Supplies: Watering can with a rose attachment (to avoid disturbing soil).
- ○ Drip irrigation kit (optional) for consistent moisture.
- ● Gloves & Pruning Shears: For handling plants and trimming excess foliage.
- ● Mulch (straw or shredded leaves): To retain moisture and suppress weeds.
- ● Shade Cloth (lightweight, 30–50% coverage): For hot climates to prevent sunscald.
- ● Plant Support Accessories: Trellis netting (for larger gardens).
- ● Clips or Velcro ties (gentler on stems than twine).
- ○ Companion Planting Add-Ons (Optional): Basil or marigolds (repel pests).
- ● Onion or garlic (deter aphids).
- ● Warmth: Red peppers thrive in 70–85°F (21–29°C) soil temps. Start seeds indoors 8–10 weeks before last frost or transplant seedlings after danger of frost.
- ● Space Planning: Ensure 18–24 inches of spacing between plants (or poles) for airflow.
- ● Pest Prevention: Inspect plants weekly for aphids, spider mites, or hornworms.
How to train red pepper plants vertically for maximum yield
Small gardens can still produce a bounty—here's how to coax your red peppers upward with minimal space.
🪴 Step 1: Choose the Right Support System
For four plants, I recommend a 5-foot bamboo stake or trellis for each, or a single 6-foot tall wire cage that accommodates all four. Avoid flimsy plastic stakes—they bend under pepper weight. If using individual supports, space them 12 inches apart in a square pattern to allow airflow between plants.
Drive stakes 6-8 inches deep into the soil so they don't topple when vines thicken. For wire cages, bury the base 4 inches to prevent wind rock. The key is stability—peppers get heavy when laden with fruit. I like to pound the stake until the top 1 inch wobbles when pushed, then firm the soil around it.
🌱 Step 2: Plant and Prune for Vertical Growth
Set transplants 12 inches from the stake so the main stem reaches it naturally. Bury the stem up to the first leaves—this encourages stronger root development. Water immediately after planting to settle the soil and remove any suckers (side shoots) that form in the first 2 weeks. These compete with fruit production.
When the main stem reaches 18 inches tall, tie it to the stake with soft plant ties (never wire—they cut into stems). I use 100% cotton ties because they stretch as the plant grows. Here's the thing—peppers grow 6-12 inches per week in ideal conditions, so check ties every 3-4 days to prevent binding.
☀️ Step 3: Train Vines Along the Support
Let the main stem grow until it reaches the top of your support, then pinch the growing tip to redirect energy into side branches. This is where the magic happens—peppers produce fruit on secondary stems. You'll see small leaf clusters forming where you pinched; these will develop into fruiting branches.
Guide the main stem in a spiral pattern up the stake, securing it every 12 inches with ties. Don't let it flop—peppers need support to bear fruit without breaking. Once side branches reach 6-8 inches long, they'll start setting flowers. Remove any that grow straight upward (they won't bear fruit) and keep only those growing outward or downward.
💧 Step 4: Water and Fertilize for Continuous Production
Water at the base only, never overhead after flowers appear—wet blossoms cause blossom-end rot. Aim for 1 inch of water per week, delivered in the morning so foliage dries quickly. You'll know you're doing it right when the soil feels damp 2 inches down but not soggy.
Feed every 2 weeks with a balanced 10-10-10 fertilizer (use half-strength) once flowers appear. I switch to a low-nitrogen, high-phosphorus formula (5-10-10) when fruit sets to boost sweetness. Stop fertilizing 4 weeks before first frost—peppers need time to mature fruit on the vine.
✂️ Step 5: Harvest and Maintain Through the Season
Pick peppers when they reach 75% of their mature size for continuous production. This prevents the plant from diverting energy to overripe fruit. Use clean pruners to snip stems ¼ inch above the fruit—never pull or twist. I harvest every 2-3 days during peak season to keep plants productive.
Remove any fruit that turns yellow or shriveled—these drain energy from healthy peppers. If a branch becomes overloaded, prune back half the fruit to let remaining peppers mature properly. In cool climates, protect plants with frost blankets at night once temperatures drop below 50°F—peppers keep producing until frost kills the plant.
Tips & tricks for pole-trained red pepper plants
Maximizing your small garden's potential starts with these game-changing techniques for vertical pepper cultivation.
Support System Stability: That 1-inch wobble test in Step 1 is crucial—it's the difference between a sturdy support and a snapped stake when your peppers reach full maturity. I've seen 5-foot bamboo stakes topple when planted only 4 inches deep, especially in windy conditions. For extra insurance, use two stakes per plant positioned 6 inches apart and tie the main stem to both. This creates a natural trellis effect that distributes weight more evenly across the plant's growth cycle.
Pruning Precision: When you pinch that growing tip in Step 3, look for the first set of three leaves below the tip—this is your pinch point. The side branches that emerge will develop into your fruiting stems. Here's what nobody tells you: those tiny leaf clusters you see after pinching? They're your future pepper producers. If you see any growing straight up (like little flags), snip them immediately—they'll never bear fruit. Focus on keeping branches angled outward or downward where sunlight can reach the blossoms.
Fertilizer Timing: The switch from 10-10-10 to 5-10-10 fertilizer in Step 4 is where flavor magic happens. That high-phosphorus formula (the middle number) encourages root development and flower production—the exact nutrients your peppers need when they start setting fruit. I've found that applying it in the morning gives roots several hours to absorb nutrients before evening watering. And remember that 4-week cutoff before frost? That's non-negotiable—peppers need time to move nutrients from leaves to fruit, and new growth won't mature before cold sets in.
Harvesting Strategy: That 75% size guideline in Step 5 might seem arbitrary, but it's based on pepper physiology. When peppers reach this stage, they've developed maximum sweetness and thickness while still having room to mature. I harvest mine at this point because it forces the plant to keep producing new flowers and fruit rather than putting all its energy into a few overripe peppers. Pro tip: Use a small marker to note harvest dates on each pepper—this helps you track growth patterns and adjust your 2-3 day harvesting schedule as the season progresses.
Pro Tips for Red Pepper Plants
- Maximizing your small garden's potential starts with these game-changing techniques for vertical pepper cultivation.
- Support System Stability: That 1-inch wobble test in Step 1 is crucial—it's the difference between a sturdy support and a snapped stake when your peppers reach full maturity.
- Pruning Precision: When you pinch that growing tip in Step 3, look for the first set of three leaves below the tip—this is your pinch point.
Frequently asked questions
Got questions about growing red pepper plants? You’re not alone! Here are some of the most common concerns—and their straightforward solutions—to help you cultivate a thriving, productive garden.
How long does it take for red pepper plants to bear fruit?
Red pepper plants typically take 60–90 days to produce fruit after transplanting, depending on the variety and growing conditions. Early varieties like ‘Early Jalapeño’ may fruit in as little as 60 days, while hotter peppers like ‘Habanero’ can take up to 120 days. Patience is key—consistent warmth and sunlight speed up the process!
Can red pepper plants survive cold weather?
Red peppers are tropical plants and thrive in temperatures between 70–85°F. They cannot tolerate frost—even a light freeze will kill them. If you live in a cooler climate, start seeds indoors 8–10 weeks before the last frost and transplant after all danger of frost has passed. Use row covers for extra protection if needed.
What are the best companion plants for red peppers?
Red peppers love companionship! Plant them near basil, marigolds, or onions to deter pests like aphids and spider mites. Avoid pairing them with fennel or beans, as these can stunt growth. Bush beans, however, make great neighbors—they fix nitrogen in the soil, benefiting pepper plants long-term.
Why are my red pepper plants dropping flowers or fruit?
Flower or fruit drop is often caused by stress, such as temperature swings, inconsistent watering, or poor pollination. Ensure your plants get at least 6–8 hours of sunlight daily and keep soil moisture even (not soggy or dry). For indoor growers, gently shake plants or use a small brush to aid pollination. Heat stress (above 90°F) can also cause drop—provide afternoon shade if needed.
Can I grow red peppers in containers? What’s the best pot size?
Red peppers adapt well to containers, but choose pots at least 12–18 inches deep and wide to accommodate their root systems. Dwarf varieties like ‘Shishito’ thrive in 5-gallon pots, while larger types need 10+ gallons. Ensure pots have drainage holes and use a lightweight, well-draining potting mix to prevent root rot.
Wrapping up and next steps
Growing red pepper plants with pole training is a game-changer for small gardens—maximizing space, boosting yields, and making harvests easier than ever! 🌱 Whether you’re a seasoned gardener or just starting, this method proves that big results don’t require big plots.
With the right companions, like basil or marigolds, and a little patience, you’ll be enjoying homegrown peppers in no time.
Ready to get started? Grab your poles, pick your peppers, and dive in—your future harvest (and taste buds!) will thank you. Happy gardening! 🌿