
Picking
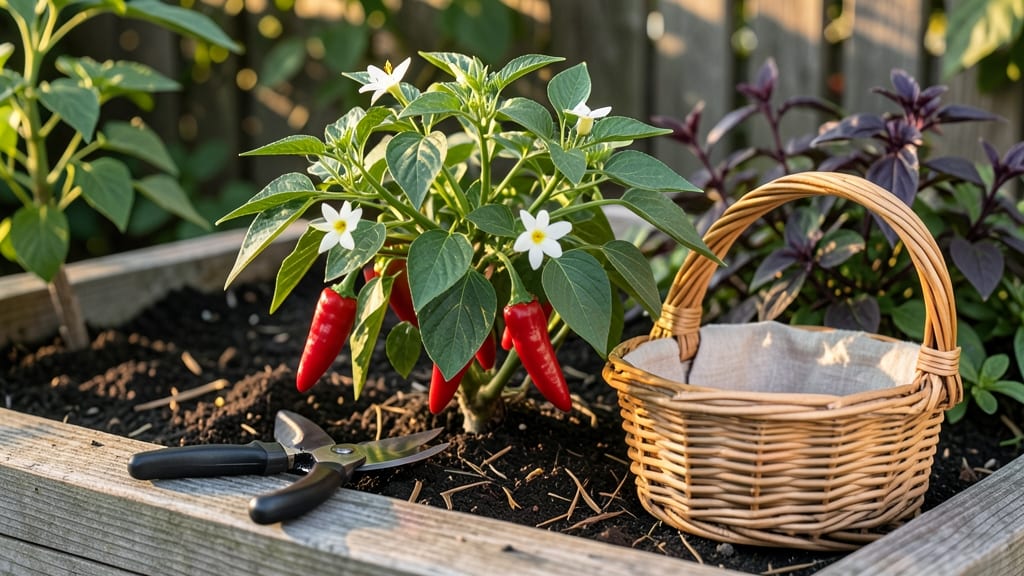
Growing spicy red peppers can turn your small balcony into a fireworks display of flavor. 🌶️ I learned the hard way that these heat-makers need just the right balance of sunlight, soil, and patience—or they’ll bolt before producing anything worth eating.
The secret? Start with the right varieties for your space and climate, and don’t let them dry out once they’re fruiting.
You’ll need well-draining soil, a sunny spot (at least 6 hours of direct light daily), and containers with drainage holes if growing in pots. Habaneros thrive in heat, jalapeños adapt to cooler climates, and cayennes are the easiest for beginners.
Most peppers need 12-16 inches of space between plants, but bush varieties like ‘Apache’ can squeeze into tighter spots.
By mid-summer, you’ll be harvesting peppers that pack serious heat—jalapeños turn red and spicy, habaneros glow orange with a kick, and cayennes stay slender and fiery. The first harvest is always the sweetest, especially when you’ve grown them yourself instead of buying bland store-bought ones.
Common mistakes? Overwatering (peppers hate soggy roots) and harvesting too late (wait until they’re fully colored). With the right care, you’ll end up with enough peppers to dry, freeze, or share—just don’t blame me if your neighbors start avoiding your cooking! 😉
📚 In This Guide
- What you need
- Instructions
- Tips and common mistakes
- Wrapping up and next steps
What you need
- ● Spicy red pepper seeds: Choose heat-loving varieties like Habanero, Ghost Pepper, Carolina Reaper, or Thai Chili (1–5 plants per variety, depending on space). Opt for heirloom or organic seeds for best results.
- ● Containers or garden beds: For containers: 5–10 gallon pots (minimum 12" deep) with drainage holes. Use lightweight, breathable fabric pots for better root aeration.
- ● For in-ground planting: Well-draining soil in a sunny, sheltered spot (6+ hours of sunlight daily). Raised beds work great for small spaces!
- ● High-quality potting mix: A well-draining, nutrient-rich blend (e.g., 60% potting soil, 30% compost, 10% perlite or vermiculite). Avoid garden soil—it can compact and suffocate roots!
- ● Fertilizer: Balanced fertilizer (10-10-10 or 5-5-5) at planting time.
- ● Organic options: Composted manure, worm castings, or a slow-release granular fertilizer (follow package instructions).
- ● Mulch: Straw, shredded leaves, or black plastic mulch (retains heat and suppresses weeds).
- ● Hand trowel or transplanting spade for planting.
- ● Watering can or hose with a gentle spray nozzle (peppers hate soggy roots!).
- ● Pruning shears (for trimming excess foliage or dead leaves).
- ○ Gloves (optional but highly recommended—those peppers pack a punch! 🌶️😵).
- ○ Support stakes or cages (optional for taller varieties like Ghost Peppers).
- ● Warmth: Peppers thrive in 70–90°F (21–32°C) soil temps. Start seeds indoors 8–12 weeks before last frost or use a seedling heat mat.
- ● Patience: Spicy varieties take 70–120 days to mature—plan accordingly!
- ● Sunlight: Confirm your space gets full sun (south-facing windows or outdoor spots work best).
Step-by-Step instructions for growing heat-intense red peppers
Here’s how I grow fiery red peppers in limited space—no greenhouse needed.
🌱 Step 1: Start Seeds Indoors for Early Heat
Begin seeds 8-10 weeks before your last frost date when indoor temps hover around 70-75°F. Fill 2-3 inch deep seed trays with sterile seed-starting mix (never garden soil—it’s too dense). Plant seeds ¼ inch deep, spacing them ½ inch apart in rows. A humidity dome keeps moisture consistent while seeds germinate.
Place trays under grow lights (14-16 hours daily) or in a south-facing window—peppers need light from day one. Germination takes 7-14 days, but don’t overwater. The soil should stay evenly moist, not soggy. Once sprouts appear, remove the dome to prevent damping-off.
☀️ Step 2: Harden Off and Transplant After Frost
After 4-6 weeks, seedlings should have 3-4 true leaves and be ready to harden off. Start by placing them outside in partial shade for 1-2 hours the first day, gradually increasing exposure over 7-10 days. This toughens stems and leaves for outdoor conditions.
Transplant after the last frost when soil reaches 60°F and stays above 55°F at night. Bury seedlings deeper than the root ball—peppers have strong stems that root along buried sections. Space plants 18-24 inches apart in full sun (6+ hours daily). A mulch layer (like straw) keeps roots cool and retains moisture.
💧 Step 3: Maintain Soil and Water Consistently
Peppers hate soggy roots but need deep, infrequent watering. Water at the base once a week, giving 1 inch total, and more during fruit set. Let the top 2 inches of soil dry between waterings—this prevents blossom-end rot. A 5-gallon container with drainage holes works well for small spaces.
Feed with balanced fertilizer (10-10-10) every 4-6 weeks after transplanting. Stop fertilizing 4-6 weeks before harvest to avoid bitter flavors. Prune suckers (side shoots) to direct energy to fruit production. Watch for aphids or spider mites—spray with neem oil if needed.
⏰ Step 4: Harvest and Store for Maximum Heat
Harvest when peppers reach full color and firmness—red for sweetness, green for early heat. Use pruning shears to avoid damaging stems. Store at 50-55°F for 2-3 weeks or freeze whole for later use. For extra heat, dry peppers in a dehydrator at 135°F for 4-6 hours until crisp.
Save seeds from the hottest peppers by fermenting in saltwater for 3-5 days, then drying. Label varieties—some, like Carolina Reaper, pack 2+ million Scoville units! Rotate crops yearly to prevent soil-borne diseases.
Tips & tricks for growing fiery red peppers
Real talk: Growing heat-packed red peppers isn't just about patience—it's about precision. Here's what I learned after growing Carolina Reapers and other heat monsters in tight spaces.
Light is Everything: Those 14-16 hours of daily light in Step 1 aren't optional—they're non-negotiable for heat development. If you don't have grow lights, supplement with a south-facing window and rotate trays daily for even exposure. I've seen seedlings stretch toward light and produce weak, bitter peppers when light was inconsistent.
Harden Off Gradually: The 1-2 hour start in Step 2 might seem short, but this gradual exposure is critical. I once rushed seedlings outside for 4 hours on day one and lost half to shock. Increase exposure by 30-60 minutes daily—peppers need time to adjust their stomata (those tiny pores) to prevent water loss.
Soil Temperature Matters: That 60°F soil temperature in Step 2 isn't just about frost—it's about root activity. Use a soil thermometer to verify temps, especially in containers. Cold soil slows germination and can lead to rot. I've seen peppers transplant beautifully but fail to thrive because the roots couldn't establish in chilly soil.
Pruning for Heat: The suckers mentioned in Step 3 aren't just extra growth—they're energy vampires. Remove them consistently to direct all resources to fruit production. I prune mine every 2 weeks, and my peppers develop that signature heat intensity faster. Just don't remove more than 1/3 of the plant at once, or you'll shock the system.
Pro Tips for Spicy Red Peppers
- Real talk: Growing heat-packed red peppers isn't just about patience—it's about precision.
- Light is Everything: Those 14-16 hours of daily light in Step 1 aren't optional—they're non-negotiable for heat development.
- Harden Off Gradually: The 1-2 hour start in Step 2 might seem short, but this gradual exposure is critical.
Frequently asked questions
Got questions about growing your own heat-packed red peppers? We’ve got answers! Whether you’re a first-time gardener or a spice enthusiast, here’s what you need to know before diving into your fiery harvest.
What are the spiciest red pepper varieties for small gardens?
For maximum heat in tight spaces, try Habanero (300,000–500,000 SHU), Scotch Bonnet (100,000–350,000 SHU), or Carolina Reaper (1,400,000–2,200,000 SHU). Dwarf varieties like Jalapeño ‘Mini Jalapeño’ also thrive in containers and pack a punch!
How long does it take for spicy red peppers to mature?
Most spicy red peppers need 70–120 days from transplant to harvest, depending on the variety. Start seeds indoors 8–10 weeks before your last frost, or buy young plants for a faster (but slightly later) harvest. Patience pays off—rushing can mean milder or smaller peppers!
Can I grow spicy red peppers in containers?
Use at least a 5-gallon pot for most varieties, with well-draining soil and full sun (6–8 hours daily). Dwarf or bush types like Thai Chili or ‘Apache’ Pepper are perfect for balconies or patios. Just ensure your container has drainage holes to avoid root rot.
Why are my red peppers losing heat or turning bland?
Heat fades when peppers mature too slowly (cool temps or low light) or lack proper care. Ensure consistent watering (but avoid soggy soil), fertilize with a balanced 10-10-10 mix every 3–4 weeks, and protect from pests like aphids. Harvest early for maximum spice—peppers often mellow as they ripen!
What can I do with extra spicy red peppers?
Preserve the heat! Dry or freeze peppers for later use, make hot sauces, or ferment them into salsas. Share with neighbors (carefully labeled!) or trade for other garden goodies. Just remember: wear gloves when handling—some varieties pack a serious sting!
Wrapping up and next steps
Growing your own spicy red peppers is a rewarding journey that brings bold flavors and fiery excitement to your kitchen—even in small spaces!
Whether you're a seasoned gardener or a beginner, these heat-packed varieties thrive with the right care, from sunny spots to proper watering. Now that you’re armed with tips and tricks, why not take the next step?
- 🌱 Start small: Pick one pepper variety to grow this season and experiment with flavors!
- 📝 Track progress: Jot down notes on what works (or doesn’t) for next year’s harvest.
- 🔥 Share the heat: Gift your homegrown peppers to friends or swap seeds with fellow gardeners!
Your tiny garden can pack a big punch—get ready to savor the fruits (and heat!) of your labor! 🌶️