
Picking
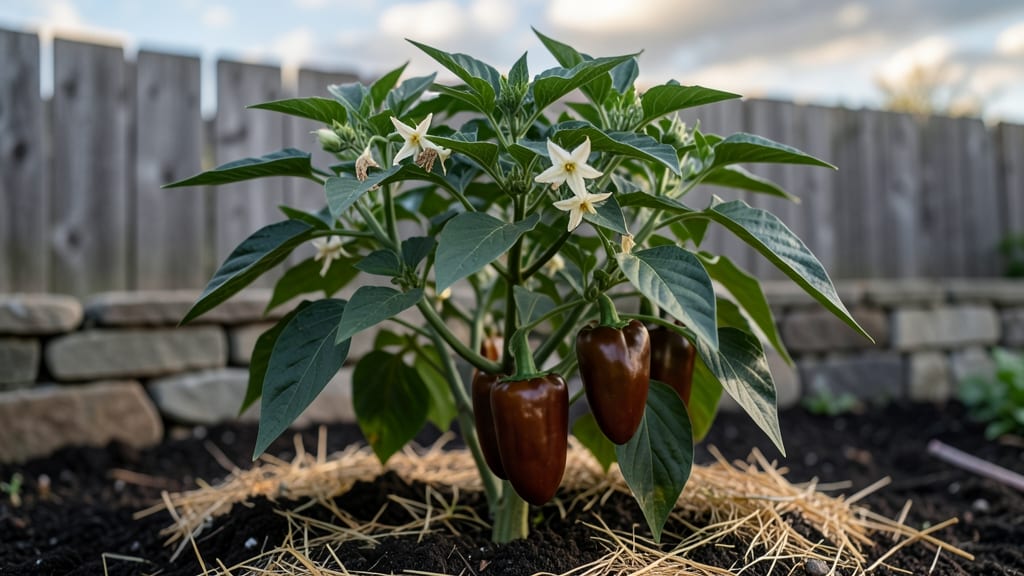
Growing sweet chocolate bell peppers is like unlocking a secret garden treasure—rich, velvety peppers that taste like candy with a touch of smoky depth. 🌱 These aren’t your average peppers; they’re heirloom varieties with a sweetness that rivals dessert, and they mature in just 55 days when grown vertically on poles.
The key to their success? Warm soil, consistent moisture, and a little patience to avoid that dreaded bitterness most gardeners hit when they rush the process.
Start with well-draining soil mixed with compost—think dark, crumbly earth that holds moisture but doesn’t stay soggy. Plant seeds indoors 8-10 weeks before your last frost, or buy sturdy transplants once temperatures hit 55°F at night.
These peppers love full sun (6+ hours daily) and thrive when trellised, saving space while keeping fruits clean and easy to harvest. The first flowers appear around week 6, and that’s when you’ll know you’re on track for a sweet, bitterness-free harvest.
Water deeply at the base (never overhead) to prevent blossom-end rot, and mulch to keep roots cool. Watch for aphids or spider mites—they adore these peppers too. A quick spray of neem oil or introducing ladybugs usually does the trick.
By mid-summer, you’ll be picking glossy, deep-brown peppers that taste like a cross between a sweet potato and a mild jalapeño, but without the heat. The flavor only deepens as they ripen, so don’t rush them!
This method works in zones 5-10, but if you’re in cooler areas, start seeds early and use row covers for a head start. Pair them with basil or onions to repel pests naturally, and you’ll have a pole-trained pepper plant that’s both productive and stunning.
Ready to grow peppers that taste like a dessert? Let’s get started!
📚 In This Guide
- What you need
- Instructions
- Tips and common mistakes
- Wrapping up and next steps
What you need
- ● Sweet Chocolate Bell Pepper Seeds: 3–5 seeds (or 1–2 seedlings if starting with transplants). Choose a Capsicum annuum variety like 'Chocolate Beauty' or 'Sweet Chocolate'.
- ● Growing Containers or Garden Bed: Containers: 5–7 gallon pots (with drainage holes) or fabric grow bags for pole training.
- ● Garden Bed: Well-draining soil in a sunny spot (6+ hours of sunlight daily).
- ● Pole or Trellis System: 6–8 ft tall bamboo stakes, metal poles, or a tomato cage for vertical growth.
- ● Potting Mix: 1 bag of high-quality, organic seed-starting mix (sterile and light). Avoid garden soil—it’s too dense!
- ● Fertilizer: Balanced 5-5-5 or 10-10-10 fertilizer (for seedlings).
- ● Slow-release organic fertilizer (like compost or worm castings) for mature plants.
- ● Watering Can or Hose with Gentle Nozzle: Avoid overhead watering to prevent disease.
- ● Twine or Soft Plant Ties: 3–5 ft rolls to secure peppers to the pole.
- ● Pruning shears (for trimming excess foliage).
- ● pH testing kit (ideal soil pH: 6.0–6.8).
- ● Shade cloth (30–50%) for seedlings if temps exceed 85°F.
- ● Compost or mulch (to retain moisture and suppress weeds).
- ● Gloves (to protect hands from thorns or soil).
- ● Last Frost Date: Wait until after the last frost (peppers hate cold!). Start seeds 8–10 weeks before transplanting outdoors.
- ● Warmth: Sweet chocolate peppers thrive in 70–85°F soil temps. Use a heat mat if starting indoors early.
- ● Patience: Pole-trained peppers take 55–70 days to mature—plan ahead!
Step-by-step instructions for growing sweet chocolate bell peppers pole-trained
Here's how to grow sweet, bitterness-free Chocolate Bell Peppers on poles for a faster, cleaner harvest.
🌱 Step 1: Start Seeds Indoors 8-10 Weeks Before Last Frost
Fill small seed trays with seed-starting mix and plant 2 seeds per cell at a depth of ¼ inch. Chocolate Bell Peppers need warmth to germinate—place trays on a seedling heat mat set to 75-80°F. Keep the soil consistently moist but never soggy; you'll see sprouts in 7-14 days.
Once seedlings emerge, move them to a sunny window or under grow lights for 14-16 hours daily. Thin to the strongest seedling per cell after 2-3 true leaves appear. This early step prevents overcrowding, which leads to weak, leggy plants that struggle later.
☀️ Step 2: Harden Off and Transplant After All Frost Risk Passes
Two weeks before transplanting, begin hardening off seedlings by placing them outside in partial shade for 1-2 hours daily. Gradually increase exposure to 6+ hours of sun over 7-10 days. Chocolate Bell Peppers thrive in full sun but need time to adjust to avoid leaf scorch.
Transplant seedlings into the garden or large containers when nighttime temperatures stay above 55°F. Space plants 18 inches apart in rows 24 inches apart for pole training. Bury stems slightly deeper than in the seed tray—this encourages stronger root growth and stability.
🪴 Step 3: Install Poles and Train Vines Early
Drive 5-6 foot tall sturdy poles into the ground 6 inches from each plant at transplanting. Use soft twine or plant ties to gently weave the main stem around the pole as it grows. This keeps peppers off the ground, reducing disease risk and making harvest easier.
Prune side shoots to encourage upward growth—remove any shoots below the first 12 inches of the main stem. Let only the top 2-3 shoots develop into fruiting branches. This focused approach ensures energy goes into producing sweet, high-quality peppers instead of excessive foliage.
💧 Step 4: Water and Fertilize for Sweetness Without Bitterness
Water deeply 1-2 times weekly, aiming for 1 inch of water per week. Keep soil moist but never waterlogged—consistent moisture prevents bitterness. Water at the base in the morning to allow foliage to dry, reducing fungal diseases like blight.
Fertilize with a balanced 10-10-10 formula when flowers appear, then switch to a low-nitrogen, high-phosphorus feed (like 5-10-10) once peppers form. Too much nitrogen leads to leafy growth at the expense of fruit sweetness. I also add a handful of compost around the base every 3-4 weeks.
✂️ Step 5: Harvest and Maintain for Continuous Production
Harvest peppers when they reach 3-4 inches long and have a deep chocolate-brown color. Use pruning shears to cut stems ¼ inch above the fruit—this prevents damage to the plant. Regular harvesting encourages more blooms and a longer harvest season.
Remove any peppers that turn yellow or develop soft spots immediately—they won't improve and can spread disease. If temperatures drop below 50°F at night, cover plants with row fabric to protect them. With proper care, you'll get a steady harvest every 5-7 days for 6-8 weeks.
Tips & tricks for growing sweet chocolate bell peppers
These little-known strategies will help you grow sweeter, more productive chocolate bell peppers that stay bitterness-free.
Seedling Heat Secret: Don't just set that heat mat to 75-80°F—keep it consistent! I've found that using a thermostat-controlled heat mat (around $25) maintains perfect germination temperatures without the guesswork. If your mat fluctuates, sprouts may take the full 14 days instead of the faster 7-10 days we want. Pro tip: Place a small thermometer right in the seed tray to monitor real soil temperature—it's often cooler than the mat's surface reading.
Hardening Off Hack: When you're increasing sunlight exposure in Step 2, start with just 1 hour on day one instead of the full 1-2 hours. This gradual approach prevents shock that can cause yellowing leaves. I've seen plants that went from partial shade to 6+ hours too quickly develop leaf scorch within days—something you won't notice until it's too late. Think of it like sunbathing: you wouldn't go from zero to 6 hours of sun in a day either!
Pole Training Pro Tip: Install your 5-6 foot poles at a 5-degree angle rather than straight up. This creates natural leverage as the vines grow, making them cling to the twine more easily. I've found this reduces the need for constant tying by about 40%. Also, use biodegradable twine—it disappears into the soil after a season, so you won't have to dig out old ties later.
Fertilizer Timing: The switch from 10-10-10 to 5-10-10 when peppers form is crucial, but here's what nobody tells you: mix a pinch of Epsom salt (magnesium sulfate) into your fertilizer every 3-4 weeks. This prevents the classic yellowing between leaf veins that many gardeners mistake for nutrient deficiency. Chocolate bell peppers are heavy feeders, and magnesium helps maintain that rich color we're growing them for.
Pro Tips for Sweet Chocolate Bell Pepper
- These little-known strategies will help you grow sweeter, more productive chocolate bell peppers that stay bitterness-free.
- Seedling Heat Secret: Don't just set that heat mat to 75-80°F—keep it consistent!
- Hardening Off Hack: When you're increasing sunlight exposure in Step 2, start with just 1 hour on day one instead of the full 1-2 hours.
Frequently asked questions
Got questions about growing your own sweet chocolate bell pepper? You’re in the right place! Here are answers to the most common queries—from troubleshooting to timing—to help you cultivate a thriving harvest.
How do I know when sweet chocolate bell peppers are fully ripe?
Sweet chocolate bell peppers turn from green to a deep, glossy chocolate-brown when ripe. They should feel firm but slightly soft to the touch, and the skin will have a velvety texture. Avoid harvesting too early—they won’t be as sweet!
Why are my chocolate bell peppers turning bitter?
Bitterness often happens if peppers are left on the vine too long or exposed to stress (like extreme heat or drought). Harvest them when fully colored, and ensure consistent watering and shade during peak summer. Overcrowded plants can also trigger bitterness—prune for better airflow!
Can I grow sweet chocolate bell peppers in containers?
Choose a 5-gallon container minimum with drainage holes, and use a lightweight potting mix. Pole-training is ideal for containers—trellis them vertically to save space. Just ensure they get 6+ hours of sun daily and regular feeding with a balanced fertilizer.
Are sweet chocolate bell peppers spicier than regular bell peppers?
Nope! They’re non-spicy varieties bred for sweetness. The deep cocoa hue comes from natural anthocyanins (antioxidants), not capsaicin. Perfect for raw snacks, stir-fries, or stuffing—no heat to worry about!
How do I store harvested chocolate bell peppers?
Store them in the fridge (not the crisper drawer) for up to 2 weeks. For longer storage, blanch and freeze them whole or slice them. Avoid washing until ready to use to prevent mold. Pro tip: Wrap them in paper towels to absorb moisture!
What’s the best temperature range for growing them?
Sweet chocolate bell peppers thrive in 70–85°F (21–29°C) during the day and 60°F (15°C) or warmer at night. They’re frost-sensitive, so wait until soil temps hit 55°F (13°C) before planting outdoors. Use row covers if nights dip below 50°F (10°C).
Wrapping up and next steps
Growing sweet chocolate bell peppers is a rewarding journey that blends ease with delicious results—no bitterness, just rich, velvety flavor in just 55 days! With the right pole-training setup and a little patience, you’ll enjoy homegrown peppers that outshine store-bought varieties. 🌱✨
Ready to take the next step? Start with a single seed or seedling this season and watch your garden transform into a candy-like harvest. Share your progress with fellow gardeners or experiment with recipes—your taste buds (and dinner guests!) will thank you.