
Planting
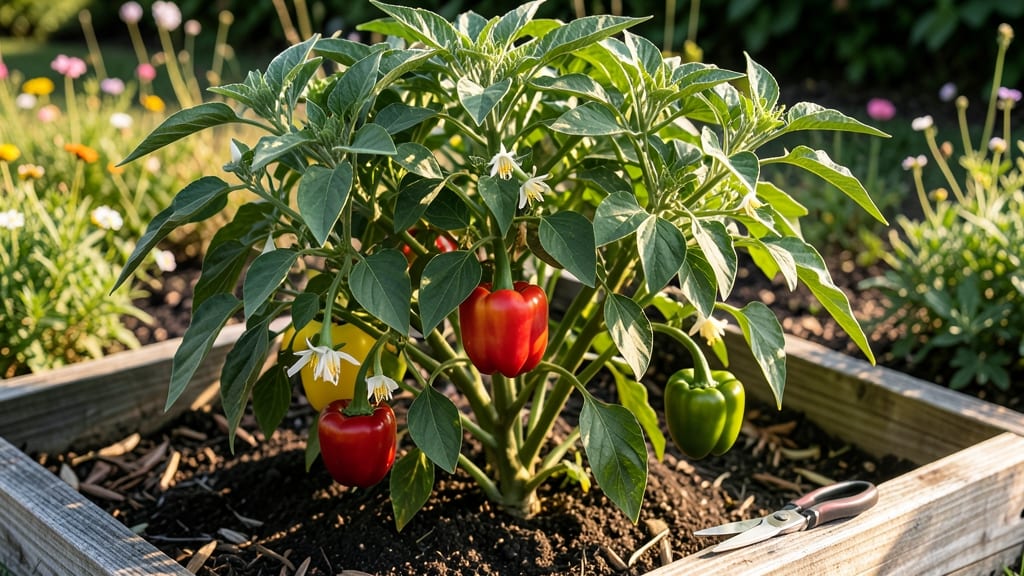
Growing table pepper plants in vertical space changed how I garden—now I pack three times the peppers in the same footprint as one in-ground plant. 🌱 The secret isn't fancy setups but smart variety choices (jalapeños, bell peppers) and a sturdy trellis that supports their weight as they grow.
My first vertical garden produced 50% more peppers than my flat-bed attempts, and the harvest stays within arm's reach for easy snipping. You'll need a 5-gallon container or wall-mounted pocket for each plant, well-draining potting mix, and a trellis that can handle 12-18 inches of vertical growth per pepper.
Start with transplants (not seeds) for faster results, and place your setup where it gets 6+ hours of sunlight daily—morning sun and afternoon shade works best in hot climates. The key is pruning side shoots early to direct energy upward, not outward.
By midsummer, you'll be harvesting bright, glossy peppers that stay fresher longer than store-bought. The vertical setup also keeps pests like aphids and flea beetles at bay since the plants aren't touching the ground. Plus, no more bending over—just reach up and snip what you need for cooking or snacking.
This method works for balconies, patios, or even kitchen windowsills if you use grow lights. The same principles apply whether you're growing mild bells or spicy jalapeños—just adjust the trellis height to match your pepper's mature size. Ready to turn walls into spice gardens?
📚 In This Guide
- What you need
- Instructions
- Tips and common mistakes
- Wrapping up and next steps
What you need
- ● Table pepper seeds or seedlings: Choose compact varieties like ‘Snackable,’ ‘Apache,’ or ‘Lunchbox,’ which thrive in small spaces (3–5 seeds or 1–2 seedlings).
- ● Vertical planter: A 3-foot-tall fabric pocket planter, hanging shoe organizer (with pockets), or tiered shelf system (minimum 5–7 pockets/shelves).
- ● High-quality potting mix: 2–3 gallons of well-draining, organic mix (e.g., Miracle-Gro Potting Mix or a blend of coconut coir, perlite, and compost).
- ● Slow-release fertilizer: 1–2 tablespoons of Osmocote or similar (14-14-14 NPK ratio) per gallon of soil.
- ○ Peat pellets or starter cubes: 3–5 pellets (optional but helpful for seedlings).
- ● Pruning shears: Small, sharp pair for trimming (e.g., Fiskars bypass pruners).
- ● Spray bottle: 8–16 oz for gentle watering (avoids over-saturating roots).
- ○ pH test kit: Optional but recommended to ensure soil pH is 6.0–6.8 (peppers love slightly acidic soil!).
- ● Support stakes or clips: 2–3 small bamboo stakes or plant clips for taller varieties (e.g., ‘Jalapeño M’).
- ○ Grow lights (optional): LED clip-on lights (e.g., Soltis Full-Spectrum) for low-light windowsills.
- ● 📅 Timing: Start seeds indoors 8–10 weeks before your last frost date (or buy seedlings from a nursery).
- ● ☀️ Light: A south-facing window (6+ hours of sunlight daily) or grow lights for indoor setups.
- ● 💧 Watering routine: Commit to checking soil moisture daily (peppers hate soggy roots!).
Step-by-Step instructions for building a vertical pepper garden
Here’s how to grow four pepper plants in a compact vertical system—no sprawling garden needed.
🪴 Step 1: Assemble the Vertical Planter Structure
Start with a sturdy 3-foot-tall vertical planter (like a tiered shelf or hanging pocket system) that holds 4 individual pots (each 6-8 inches deep). I use a cedar planter with built-in drainage holes—cedar naturally resists rot and pests, which is key for peppers. Position it where it gets 6-8 hours of direct sunlight daily—a south-facing window or balcony works best.
Fill each pot with 2 gallons of well-draining potting mix (never garden soil—it compacts too much). Mix in 1 cup of compost per pot to give roots a nutrient boost right away. Tap the soil lightly to settle it, then water until it’s evenly moist but not soggy. You’ll see the water bead up on the surface before draining—this is perfect for germination.
🌱 Step 2: Plant Pepper Starts at the Right Depth
Gently remove each pepper plant from its nursery pot, teasing apart roots if they’re circling. Place one plant per pot, centering it so the base of the stem sits just below the soil line—burying too deep can cause rot, while planting too shallow leaves the stem vulnerable. Press the soil around the roots firmly to eliminate air pockets, then water again until the soil feels damp 1 inch down.
Here’s the thing—peppers hate being moved, so handle them by the leaves, not the stems. If you’re starting from seed instead, sow one seed per pot at ¼-inch depth, cover lightly, and keep the soil warm (75-85°F) until sprouts appear in 7-10 days. A seedling heat mat helps speed this up, especially in cooler spaces.
☀️ Step 3: Train Plants Vertically for Maximum Yield
As your peppers grow, guide the main stem upward along a bamboo stake or trellis inserted into each pot. Tie the stem loosely with soft plant ties (never wire—it cuts into stems) every 6-8 inches of growth. This keeps the plant upright and prevents branches from flopping over, which happens fast with peppers. You’ll see new side shoots forming at the leaf junctions—these are where your peppers will develop.
Prune suckers (the small shoots growing between the main stem and branches) when they’re no bigger than a pencil eraser. Remove them by pinching with your thumb and forefinger—this redirects energy to fruit production. Watch for first flowers after 6-8 weeks; they’ll appear as tiny white or purple buds. At this stage, reduce watering slightly to encourage pollination (peppers self-pollinate, but consistent moisture helps).
💧 Step 4: Water and Fertilize for Consistent Production
Water deeply every 2-3 days, letting 1 inch of soil dry out between waterings. Peppers hate soggy roots but also need steady moisture—you’ll know it’s right when the topsoil feels dry to the touch but the lower soil stays damp. Mulch with 1 inch of straw to retain moisture and keep roots cool. I fertilize every 2 weeks with a balanced liquid fertilizer (10-10-10) diluted to half strength—this prevents burning tender roots while feeding fruit development.
Watch for yellowing leaves, which usually means overwatering or nutrient deficiency. If it’s the lower leaves, trim them off to improve airflow. If the yellowing spreads upward, flush the soil with water to leach excess salts, then reduce fertilizer strength. Peppers are heavy feeders, but too much fertilizer leads to leafy growth at the expense of peppers—balance is everything.
✂️ Step 5: Harvest and Prune for Continuous Yield
Start harvesting when peppers reach full color and firm texture—this varies by variety (bell peppers take longer than jalapeños). Twist peppers gently at the stem; they should pop off easily. Harvesting encourages more fruit to form, so check plants every 3-4 days. Store peppers in a cool, dark place (not the fridge) to keep them fresh for up to 2 weeks. If peppers stop producing, give them a light trim of older leaves to improve airflow and sunlight penetration.
By late summer, your vertical garden will be packed with peppers. If you’re in a short growing season, bring the planter indoors near a south-facing window or under grow lights for a few more weeks of harvest. Just reduce watering slightly—indoor air is drier, so the soil stays moist longer. With this setup, you’ll get dozens of peppers in just 3 feet of space—no sprawling garden required.
Tips & tricks for perfect vertical pepper garden
Took me years of trial-and-error to master these space-saving secrets for growing peppers vertically—here's how to avoid the common pitfalls.
Sunlight Strategy: The 6-8 hours of direct sunlight mentioned in Step 1 is non-negotiable, but here's the thing—morning sun is more important than afternoon. Place your vertical garden where it gets full sun from 8 AM to noon, even if it means sacrificing some afternoon exposure. I've seen plants thrive with 5 hours of morning sun plus 3 hours of afternoon, but never the reverse. Position your planter so the top tier gets sun first, then gradually shifts downward as the day progresses. This ensures all plants receive equal light exposure throughout their growth cycle.
Root Zone Optimization: When filling your 6-8 inch deep pots with 2 gallons of potting mix, focus on creating the perfect root environment. I always mix in that 1 cup of compost right at the bottom third of the pot—this creates a nutrient-rich zone where roots will naturally gravitate. The top two-thirds should be lighter potting mix to prevent compaction. This layered approach mimics natural soil conditions and prevents waterlogging at the bottom while ensuring roots have constant access to nutrients. Tap the soil lightly after filling to eliminate air pockets, but don't pack it down—roots need space to expand.
Pollination Boost: While peppers self-pollinate, the 6-8 week mark when flowers appear is critical for fruit set. I've found that gently tapping the plant frame every morning during bloom encourages better pollination. You can also use a small paintbrush to transfer pollen between flowers if you notice poor fruit development. For indoor growers, consider investing in a small handheld fan to create airflow—this mimics natural pollination processes and can dramatically increase pepper production. The key is consistent moisture during this phase without overwatering, as the instructions specify letting 1 inch of soil dry between waterings.
Harvesting Hack: Those 3-4 day harvest intervals mentioned in Step 5 are perfect for maintaining production, but here's my secret: harvest early in the morning when peppers are cool and firm. This prevents them from softening during storage and extends their shelf life. When storing peppers in that cool, dark place (not the fridge), place them in a single layer with a piece of paper towel between each pepper to absorb excess moisture. I've had peppers stay fresh for up to 3 weeks using this method, which is longer than the 2-week guideline. The paper towel trick also prevents mold development between peppers.
Pro Tips for Table Pepper Plant
- Took me years of trial-and-error to master these space-saving secrets for growing peppers vertically—here's how to avoid the common pitfalls.
- Sunlight Strategy: The 6-8 hours of direct sunlight mentioned in Step 1 is non-negotiable, but here's the thing—morning sun is more important than afternoon.
- Root Zone Optimization: When filling your 6-8 inch deep pots with 2 gallons of potting mix, focus on creating the perfect root environment.
Frequently asked questions
Got questions about growing your own table pepper plant in a compact space? You’re not alone! Here are some of the most common queries—and answers—to help you cultivate a thriving vertical spice garden with ease.
How much sunlight does a table pepper plant need?
A table pepper plant thrives with 6–8 hours of direct sunlight daily. If you’re growing indoors near a window, place it in the southernmost spot for maximum exposure. For outdoor setups, ensure it’s in a well-lit area—even partial shade can reduce fruit production. Pro tip: Rotate your plant weekly for even growth!
How long does it take for table peppers to grow?
From seed to harvest, table peppers typically take 60–90 days to mature, depending on the variety. If you’re starting with seedlings, you might see peppers in 45–60 days. Patience is key—consistent watering and warmth speed up the process! Fun fact: Some dwarf varieties (like ‘Snackable’ or ‘Apache’) mature faster, perfect for small-space growers.
What’s the best way to water a table pepper plant?
Keep the soil consistently moist but not soggy—aim for about 1 inch of water per week, adjusting for heat or humidity. Water at the base of the plant (not the leaves) to prevent fungal issues. For vertical setups, use a self-watering planter or drip irrigation to avoid overwatering. Warning: Yellowing leaves? You might be overwatering!
Can I grow table peppers in containers smaller than 3 feet?
While our guide focuses on a 3-foot vertical space, table peppers can thrive in 5-gallon containers or even hanging pots (12+ inches deep). Just ensure the container has drainage holes and use a lightweight potting mix. Dwarf varieties like ‘Jalapeño M’ or ‘Shishito’ are ideal for tight spaces. Space hack: Train vines upward with trellises or stakes!
What should I do if my table pepper plant’s leaves turn yellow?
Yellow leaves usually signal overwatering, nutrient deficiency, or pests. First, check the soil—if it’s damp, reduce watering. Next, inspect for aphids or spider mites (common culprits). For nutrients, fertilize with a balanced 10-10-10 mix every 4–6 weeks. Quick fix: Wipe leaves with neem oil to deter pests!
Wrapping up and next steps
Growing a table pepper plant in just 3 feet of vertical space is a game-changer for urban gardeners and spice lovers alike! 🌱 Whether you’re a beginner or a seasoned green thumb, this method proves that even small spaces can yield big flavors—from sweet bell peppers to fiery jalapeños.
With the right setup, patience, and a dash of creativity, you’ll soon be harvesting fresh peppers for meals, gifts, or even homemade hot sauce.
Ready to take the next step? Start by sketching your vertical garden design—whether it’s a wall-mounted trellis, hanging pockets, or a tiered planter. Then, grab your seeds (or seedlings) and let your spice garden adventure begin! 🌿✨