
Picking
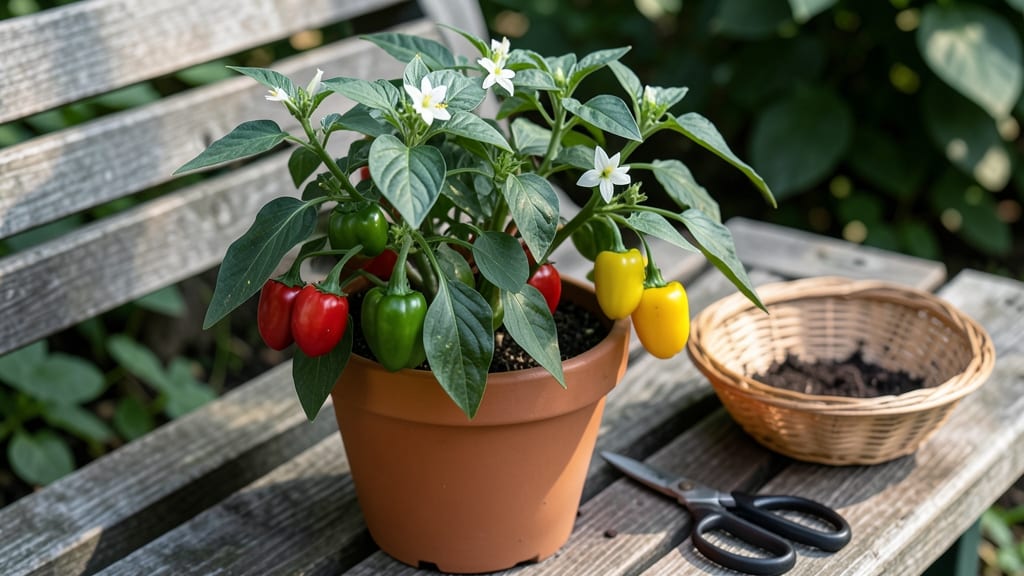
Growing tiny bell peppers is like having a mini pepper factory in your garden—except these bite-sized beauties pack all the flavor of their larger cousins. 🌱 I first tried them after seeing them at a farmers' market, and honestly, they changed how I grow peppers forever.
These little guys mature in just 60 days, produce hundreds of peppers per plant, and thrive in containers, making them perfect for small spaces or vertical gardens.
The secret to their success? They love warm soil (wait until after your last frost) and full sun (at least 6-8 hours daily). A well-draining potting mix with compost keeps them happy, and they need consistent moisture—but never soggy soil.
Unlike standard bell peppers, these stay compact, so you can grow 3-4 plants in a 5-gallon container or stack them vertically to save space. The flavor? Sweeter and more intense than regular bell peppers, with a satisfying crunch.
By mid-summer, you’ll be harvesting pepper after pepper, perfect for snacking, salads, or stuffing. They’re also disease-resistant, so you’ll spend less time fighting pests and more time enjoying the harvest.
Plus, their small size means faster ripening—no waiting months for a single pepper. The best part? You can keep them producing all season long with proper care.
Whether you're a balcony gardener or just love space-saving hacks, tiny bell peppers are a game-changer. They’re foolproof for beginners but rewarding for experienced growers too. Ready to turn your smallest corner into a pepper powerhouse? Let’s get those seeds in the ground!
📚 In This Guide
- What you need
- Instructions
- Tips and common mistakes
- Wrapping up and next steps
What you need
- ● Tiny bell pepper seeds: 5–10 seeds (choose varieties like ‘Snackable,’ ‘Lunchbox,’ or ‘Mini Bell’ for compact growth).
- ● Containers: 5–10 small pots (4–6 inches deep) or
- ● 1 vertical growing system (e.g., wall pockets, hanging planters, or a tiered shelf with 3–5 pockets).
- ● High-quality potting mix: 2–3 gallons (ensure it’s well-draining and rich in organic matter).
- ● Fertilizer: Balanced liquid fertilizer (e.g., 10-10-10) or organic options like compost tea or worm castings.
- ● Grow lights or sunny spot: 6+ hours of direct sunlight daily or a full-spectrum LED grow light (12–16 hours/day for indoor setups).
- ● Watering can or spray bottle: With a fine nozzle for gentle watering.
- ○ Support (optional but helpful): Mini tomato cages or stakes (3–4 inches tall) for taller varieties.
- ● Seed-starting trays for early germination.
- ● Self-watering planters to maintain moisture.
- ● Epsom salt (1 tbsp per gallon of water) for magnesium boosts.
- ● Mulch (straw or shredded leaves) to retain soil moisture.
- ● Pest deterrents like neem oil or companion plants (basil/marigolds).
Step-by-Step instructions for growing tiny bell peppers vertically
Here’s how I turn small spaces into pepper powerhouses—no sprawling vines, just upward growth and endless harvests.
🌱 Step 1: Start Seeds Indoors with Heat and Light
Sow seeds 6-8 weeks before your last frost date in biodegradable peat pots filled with seed-starting mix. Press each seed ¼ inch deep—any deeper and they’ll struggle to emerge. Keep the soil at 75-85°F using a seedling heat mat, since bell peppers need warmth to germinate. Place pots under a grow light (14-16 hours daily) within 2-4 inches of the seedlings.
Mist the soil daily until sprouts appear—usually 7-14 days. Once seedlings emerge, remove the heat mat but keep the light close. You’ll know they’re thriving when their first true leaves (the second set after the initial cotyledons) appear deep green and sturdy. This is the moment that matters: leggy, pale seedlings mean your light is too far away.
🪴 Step 2: Transplant into Vertical Grow Bags or Towers
When seedlings have 3-4 true leaves (about 4-6 weeks after sowing), transplant them into 5-gallon vertical grow bags or a tower garden system. Fill the bags with a mix of 50% potting soil and 50% compost, ensuring the soil is loose enough for roots to spread easily. Dig a hole twice as wide as the root ball and place the seedling so its first set of true leaves sits just above the soil line.
Water deeply after transplanting to settle the soil around the roots. The key here is to avoid disturbing the root system—gently press the soil around the base, but don’t pack it down. Place the grow bags in a location with 6-8 hours of direct sunlight or under a full-spectrum LED grow light if indoors. You’ll see new growth within 7-10 days if everything’s just right.
☀️ Step 3: Train Vines Upward with Support Structures
As your tiny bell peppers grow, install trellis netting or a cage support inside the grow bags. Gently weave the main stem through the netting as it grows, guiding it upward. Prune any side shoots that form below the first flower cluster—this redirects energy to the main stem and fruit production. You’ll want to keep the plant’s height manageable (about 3-4 feet tall) to avoid top-heavy instability.
Rotate the grow bags a quarter turn weekly to ensure even sun exposure. This prevents the plants from leaning toward the light and keeps them growing straight and strong. Watch for the first flower buds to form—these will develop into your mini bell peppers in 60-70 days. If you notice flowers dropping, it’s a sign of stress, likely from inconsistent watering or temperature swings.
💧 Step 4: Water and Fertilize for Consistent Production
Water the grow bags when the top inch of soil feels dry, typically 2-3 times per week depending on your climate. Use a drip irrigation system or water at the base of the plant to avoid wetting the leaves, which reduces the risk of disease. Add a balanced fertilizer (10-10-10) every 2-3 weeks once flowers appear to support fruit development. I like to mix in a compost tea monthly for extra nutrients without overloading the soil.
Here’s the thing—bell peppers are sensitive to moisture fluctuations. If the soil dries out completely, the flowers will drop, and you’ll lose potential fruit. Keep an eye on the soil moisture and adjust your watering schedule as needed. You’ll know you’re on track when the peppers start to swell and turn a vibrant green or red, depending on the variety.
✂️ Step 5: Harvest and Prune for Continuous Yields
Harvest peppers when they reach 2-3 inches in length for the sweetest flavor. Use clean pruning shears to snip the stem just above the fruit, leaving the flower cluster intact if you want more peppers to form. Prune any yellowing or diseased leaves immediately to keep the plant healthy. With proper care, your vertical pepper plants can produce fruit for 8-10 weeks or more.
Don’t skip the final pruning of the season. Once temperatures drop below 50°F at night, the plant will slow down. Cut back the main stem and remove any remaining fruit—this redirects energy to the roots, helping the plant store nutrients for next year. If you’re in a warm climate, you can extend the season by bringing the grow bags indoors under grow lights.
Tips & tricks for vertical bell pepper gardens
Transforming your limited space into a pepper paradise takes a few strategic moves—here's how to maximize every inch while avoiding common pitfalls that sabotage growth.
Light Distance is Everything: That 2-4 inch range for your grow light in Step 1 isn't arbitrary—it's the sweet spot where seedlings get enough light without overheating. I learned this the hard way when my first batch turned leggy from lights that were too far away. Use a ruler to measure the distance daily, especially as seedlings grow. If you notice leaves stretching toward the light, lower it immediately. A simple LED clip light on a adjustable arm works perfectly for this precision.
Soil Mix Matters More Than You Think: The 50-50 blend of potting soil and compost in Step 2 creates ideal drainage while retaining moisture, but here's the secret: add a handful of perlite to that mix. This prevents compaction in your vertical grow bags and mimics the airy texture bell pepper roots crave. I've seen roots grow twice as vigorously when using this enhanced mix—it's worth the extra 5 minutes of mixing time. The loose soil also helps prevent root rot in the confined space of grow bags.
Pruning Strategy for Maximum Yield: When training your plants in Step 3, focus on removing only side shoots that form BELOW the first flower cluster. These shoots steal energy from fruit production. I developed a quick system: use your thumb and forefinger to gently pinch off unwanted shoots while leaving the main stem and flower clusters intact. This method keeps your plants at that ideal 3-4 foot height while maximizing harvest potential. Remember, every time you prune, you're redirecting energy to where it counts—those delicious mini peppers.
Harvest Timing is Critical: Those 2-3 inches in Step 5 are crucial for sweetness, but here's what nobody tells you: harvest in the morning when peppers contain the most moisture and flavor compounds. Use clean pruning shears to avoid disease transmission, and always cut just above the fruit's stem. I've found that harvesting every 3-4 days prevents overcrowding and encourages continuous production. The key is consistency—once you establish this rhythm, your plants will reward you with a steady supply of sweet peppers all season long.
Pro Tips for Tiny Bell Peppers
- Transforming your limited space into a pepper paradise takes a few strategic moves—here's how to maximize every inch while avoiding common pitfalls that sabotage growth.
- Light Distance is Everything: That 2-4 inch range for your grow light in Step 1 isn't arbitrary—it's the sweet spot where seedlings get enough light without overheating.
- Soil Mix Matters More Than You Think: The 50-50 blend of potting soil and compost in Step 2 creates ideal drainage while retaining moisture, but here's the secret: add a handful of perlite to that mix.
Frequently asked questions
Got questions about tiny bell peppers?
You’re not alone! Whether you’re a first-time gardener or a space-saving pro, these answers will help you grow a thriving harvest—even in small areas.
How long does it take for tiny bell peppers to grow from seed?
Tiny bell peppers typically take 60–90 days to mature from seed, depending on the variety and growing conditions. Start seeds indoors 8–10 weeks before the last frost, or buy transplants for a head start. With vertical gardening, you’ll see peppers forming 4–6 weeks after transplanting if conditions are ideal.
Can I grow tiny bell peppers in containers or hanging baskets?
Tiny bell peppers thrive in 5-gallon containers or hanging baskets with at least 12–18 inches of depth. Use a lightweight potting mix with good drainage, and add trellises or cages to support their vines. Just ensure they get 6–8 hours of sunlight daily—containers dry out faster than ground soil.
Why aren’t my tiny bell peppers producing fruit?
Lack of fruit can stem from insufficient sunlight, poor pollination, or nutrient deficiencies. Hand-pollinate flowers with a small brush if bees are scarce. Ensure plants get full sun (6+ hours) and balanced fertilizer (high in phosphorus). Also, check for pests like aphids, which can stress plants.
Can I harvest tiny bell peppers at any size, or do they need to ripen fully?
Yes! Tiny bell peppers can be harvested at any stage—green, yellow, orange, or red. For milder flavor, pick them when 2–3 inches long. Larger peppers develop sweeter, thicker walls but take longer to mature. Snip with scissors or twist gently to avoid damaging the plant.
What’s the best companion plant for tiny bell peppers in vertical gardens?
Pair tiny bell peppers with basil, marigolds, or onions to deter pests and improve growth. Avoid planting near fennel or brassicas (like cabbage), which can stunt their development. In vertical setups, use fast-growing herbs (like parsley or cilantro) as fillers to maximize space efficiently.
Wrapping up and next steps
Tiny bell peppers are a game-changer for small spaces—packed with flavor, easy to grow, and perfect for vertical gardening!
Whether you’re a beginner or a seasoned green thumb, these little powerhouses prove that big harvests don’t need big yards. 🌱 Start small, experiment with your setup, and soon you’ll be enjoying fresh, homegrown peppers year-round.
Ready to dive in? Grab your supplies, pick a sunny spot, and let your tiny bell peppers take center stage—your taste buds (and Instagram feed) will thank you! 🌟