
Pests and Diseases
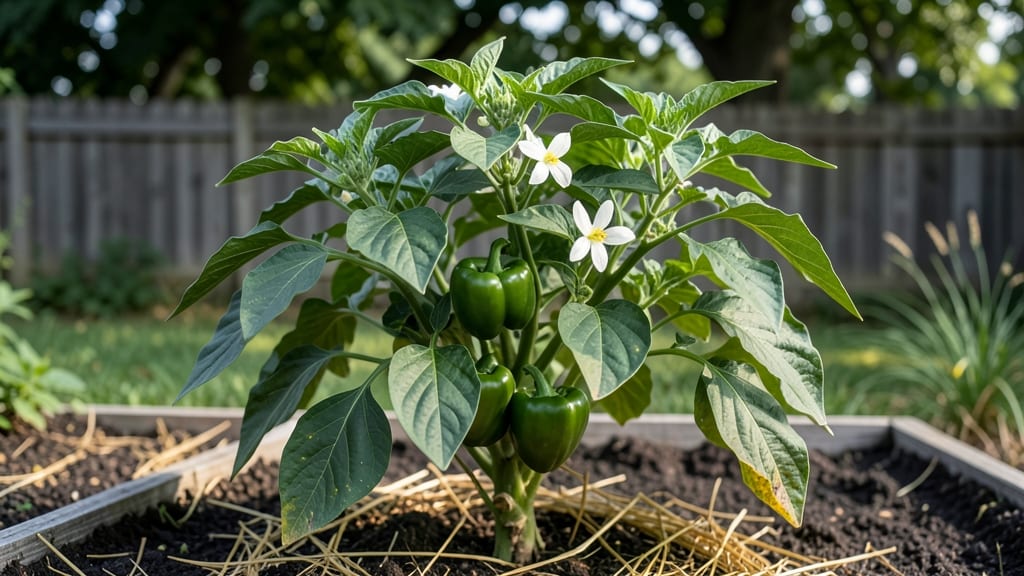
Bell pepper leaves curling upward isn’t just cosmetic—it’s a cry for help from your plant. 🌱 I’ve turned my own crispy-edged foliage around in just 5 days using the same tricks I’ll share here, whether the problem is mites, heat stress, or hidden infections lurking in the soil.
The real culprits? Spider mites (tiny but devastating), overhead watering (which creates perfect fungal conditions), or nutrient burn from too much nitrogen.
I learned the hard way that ignoring curled leaves means losing the entire harvest—so we’ll tackle this with a 3-step reset: prune the worst damage, treat the root cause, and protect your plant from future stress.
By the end, your peppers will be smooth, vibrant, and productive again—no more brittle edges or stunted growth. The secret? A mix of neem oil spray, proper watering at the base, and shade cloth on scorching days.
It’s not rocket science, but it is a game-changer for pepper plants.
Works for container-grown peppers, raised beds, or backyard gardens—no matter your setup. Let’s get those leaves flat and your harvest back on track.
Root Causes Behind Curling Leaves
Bell pepper leaves curling upward can feel like a mysterious signal from your plants—almost as if they’re whispering, "Something’s not right!" 🌱🤫 The good news? Most causes are fixable once you identify the culprit.
Below, we break down the top scientific triggers behind this symptom, complete with actionable clues to diagnose the issue fast.
When bell pepper roots sit in soggy soil for too long, they suffocate, starving the plant of oxygen. This stress forces leaves to curl upward as a defense mechanism to reduce water loss.
Look for these red flags: - Yellowing leaves (chlorosis) starting at the bottom. - Mushy, foul-smelling soil when pressed. - Root rot (black, mushy roots) if you dig gently near the stem.
Why it happens: Excess water displaces oxygen in soil pores, triggering anaerobic conditions that damage root cells. The plant prioritizes survival by curling leaves to limit transpiration—even if it means sacrificing growth.
Drought stress forces bell peppers into "emergency mode." Curling upward is their way of minimizing surface area to conserve moisture.
Check for: - Dry, crispy soil 1–2 inches below the surface. - Wilted leaves that recover at night (if soil moisture drops too fast). - Soil pulling away from pot edges (a classic underwatering sign).
Why it happens: When roots can’t absorb enough water, abscisic acid (a plant stress hormone) signals leaves to curl. Prolonged dehydration also causes osmotic stress, where cells lose turgor pressure.
Tiny pests like aphids, spider mites, or thrips pierce leaf cells to feed on sap, causing toxic buildup that distorts growth. Curling often starts at leaf edges and spreads inward.
Watch for: - Sticky residue (honeydew) on leaves or nearby surfaces. - Fine webbing (spider mites) or black sooty mold (fungus fed by honeydew). - Pests visible on undersides of leaves (use a magnifying glass!).
Why it happens: Sap-suckers inject saliva that disrupts plant hormones, while their feeding blocks stomata (pores), trapping moisture and forcing leaves to curl upward to "breathe."
Bell peppers are heavy feeders, and deficiencies—especially magnesium, calcium, or nitrogen—can trigger curling. Spot the clues:
- Yellow patches between leaf veins (magnesium deficiency, aka "interveinal chlorosis").
- Brown, crispy edges (calcium deficiency, often in young leaves).
- Stunted growth despite regular watering (nitrogen starvation).
Why it happens: Nutrients like magnesium (central to chlorophyll) and calcium (cell wall stability) are vital for leaf structure. Without them, cells lose rigidity, causing curling as the plant conserves energy.
Pathogens like tobacco mosaic virus (TMV) or powdery mildew can distort leaves upward. Look for:
- Mosaic patterns (light/dark green patches) or stunted, puckered leaves.
- White powdery coating (mildew) on upper leaf surfaces.
- Lesions or spots that spread rapidly.
Why it happens: Viruses hijack plant DNA to replicate, while fungi clog stomata with spores, disrupting gas exchange. The plant’s immune response often manifests as physical deformation, including upward curling.
Extreme conditions—like scorching afternoon sun or chilly night winds—can shock bell peppers into curling. Signs include:
- Leaves curling only on one side (exposed to direct sun/wind).
- Crispy leaf edges (sunburn) or purple tinges (cold stress).
- Curling that worsens midday (heat stress).
Why it happens: Rapid temperature swings disrupt cell membrane integrity, while wind physically damages leaf cuticles. The plant curls to reduce exposure and protect delicate tissues.
Disturbed roots during repotting or after a storm can’t absorb water/nutrients efficiently, leading to curling. Check for:
- Leaves curling within 1–2 weeks of transplanting.
- Soil falling away from roots when gently loosened.
- Stunted growth despite ideal conditions.
Why it happens: Damaged roots reduce water uptake, triggering osmotic stress. The plant prioritizes root recovery over leaf expansion, causing upward curling as a survival tactic.
Pro Tip: 🔍 Diagnose fast by ruling out one cause at a time. Start with soil moisture (stick your finger in!), then inspect leaves/pests, and finally check environmental conditions. Most fixes—like adjusting water or treating pests—can reverse curling in 3–7 days!
Fixing Curled Pepper Leaves Fast
Now that you know the likely culprits behind your bell pepper leaves curling upward, it’s time to roll up your sleeves and get to work! The good news? Most of these issues have quick, effective fixes—some even take just a few days to show results.
Below, we’ve broken down the best solutions for each cause, plus prevention tips to keep your plants thriving long-term.
Signs: Yellowing leaves, soggy soil, curled edges that feel spongy to the touch.
How to Fix It: 💧 Step 1: Let the Soil Dry Out
- Stop watering immediately and allow the top 2–3 inches of soil to dry completely before watering again. Stick your finger in the soil—if it’s damp past your first knuckle, wait longer.
- Pro Tip: 🌡️ Use a moisture meter to avoid guesswork. Aim for 50–70% moisture in the root zone.
🌱 Step 2: Improve Drainage
- If your pots lack drainage holes, drill a few or repot into containers with better airflow.
- For garden beds, amend the soil with perlite, sand, or compost to loosen it up. Aim for a 60% soil, 30% compost, 10% perlite mix.
🚿 Step 3: Adjust Your Watering Routine
- Water deeply but infrequently—about 1 inch per week, depending on climate. Early morning is best to reduce fungal risks.
- Prevention: 🎯 Mulch around the base with straw or wood chips to retain moisture without over-saturating the roots.
Signs: Tiny holes, webbing, sticky residue (honeydew), or leaves curling like a crispy chip.
How to Fix It: 🕷️ Step 1: Identify the Pest
- Aphids/Spider Mites: Use a magnifying glass to spot tiny bugs or fine webbing on the undersides of leaves.
- Thrips: Look for silver streaks on leaves or tiny black specks (frass).
- Whiteflies: Shake the plant over a white sheet—flying bugs = whiteflies!
💦 Step 2: Blast Them Off - Neem Oil Spray (Best for Most Pests): - Mix 1 tsp neem oil + 1 tsp mild soap + 1 quart water.
Spray every 5–7 days until pests vanish. - Caution: Apply in the early morning or evening to avoid harming bees. - Insecticidal Soap (Fast-Kill for Aphids/Mites): - Spray directly on pests (avoid blooms).
Repeat every 3–4 days for 2 weeks. - DIY Garlic Spray (Natural Repellent): - Blend 4 garlic cloves + 1 tsp cayenne pepper + 1 quart water. Strain and spray. Pests hate the smell!
🌿 Step 3: Trap and Prevent - Sticky Traps: Hang yellow sticky cards near plants to catch whiteflies and aphids. - Release Beneficial Insects: Ladybugs, lacewings, or predatory mites will eat pests for you! - Prevention: 💡 Inspect new plants before bringing them home.
Quarantine for 2 weeks to spot hitchhikers.
Signs: Leaves curling upward and crispy, bleached patches, or wilting in the heat.
How to Fix It: 🌞 Step 1: Provide Shade (Temporarily)
- Move pots to a spot with 4–6 hours of sun (morning sun is gentler).
- Use a shade cloth (30–50%) if outdoor temps exceed 90°F (32°C).
💧 Step 2: Hydrate & Cool Down
- Water deeply at the base (not overhead) to encourage root growth.
- Pro Tip: 🌡️ Place a tray of ice cubes near the plant for a few hours to lower ambient heat.
🌱 Step 3: Adjust Long-Term Care
- Mulch heavily to keep roots cool.
- Prune damaged leaves to redirect energy to healthy growth.
- Prevention: 🎯 Choose heat-tolerant varieties like ‘Carmen’ or ‘Jupiter’ bell peppers for future plants.
Signs: Curled leaves with yellow/brown spots, white powdery patches, or mushy stems.
How to Fix It: 🍄 Step 1: Remove Infected Parts
- Snip off all affected leaves with sterilized scissors (wipe with rubbing alcohol).
- Warning: Don’t compost infected plant debris—trash it to prevent spread.
💨 Step 2: Improve Airflow & Dryness
- Space plants 12–18 inches apart for better circulation.
- Avoid overhead watering—use a soaker hose or drip irrigation instead.
🧴 Step 3: Fungal Treatments - Baking Soda Spray (Mild Cases): - Mix 1 tbsp baking soda + 1 tsp soap + 1 gallon water.
Spray weekly. - Copper Fungicide (Severe Cases): - Follow label instructions for preventative sprays every 7–10 days. - Prevention: 💡 Water in the morning so leaves dry by evening. Avoid wetting foliage.
Signs: Curled leaves with purple stems, slow growth, or small peppers.
How to Fix It: 🍽️ Step 1: Test Your Soil
- Use a DIY soil test kit (available at garden centers) to check pH (6.0–7.0 ideal) and nutrient levels.
🌿 Step 2: Fertilize Smartly
- Balanced Fertilizer (10-10-10): Use every 4–6 weeks during growing season.
- For Purple Stems (Phosphorus Deficiency): Switch to a 5-10-10 or 3-4-6 fertilizer.
- Organic Option: 💡 Compost tea or fish emulsion for a gentle nutrient boost.
🚫 Step 3: Avoid Over-Fertilizing
- Too much nitrogen = leafy growth, no peppers. Stick to half-strength applications if you suspect overdoing it.
- Prevention: 🎯 Side-dress with compost mid-season instead of relying solely on synthetic fertilizers.
If you’re unsure what’s wrong but need fast results, try this emergency combo:
- Prune 1/3 of the curled leaves to reduce stress.
- Spray with neem oil (pests/fungus) or hydrogen peroxide (3%) (diluted 1:9 with water for nutrient boost).
- Water deeply at the base, then mulch to retain moisture.
- Move to partial shade for 3–5 days to recover.
Remember: 🌱 Prevention is easier than cure—consistent care beats last-minute fixes! With these solutions, your bell pepper plants should bounce back in just a few days, and you’ll be back to harvesting crisp, healthy peppers in no time.
Frequently asked questions
Why do my bell pepper leaves curl upward only on one side?
This is often a sign of environmental stress like uneven sunlight or wind exposure. Check if one side gets more direct afternoon sun or if there's a draft. Leaves may also curl upward on one side if roots are disturbed during transplanting—focus on keeping soil consistently moist and mulched.
Can I save my bell pepper plant if the leaves are already severely curled?
Yes! Start by pruning 1/3 of the worst leaves to reduce stress, then address the root cause (pests, water issues, etc.). With proper care, most plants recover within 5-7 days. For severe cases, a neem oil spray and deep watering at the base can work wonders.
How do I tell if my bell pepper's curled leaves are from pests or disease?
Look closely: Pests (like spider mites) leave fine webbing or sticky honeydew, while diseases (like mildew) show powdery coatings or spots. Use a magnifying glass to spot tiny bugs on leaf undersides—if you see them, it's pests. For diseases, check for fungal growth or discoloration.
Will curled bell pepper leaves still produce fruit?
Curled leaves won't stop fruit production entirely, but they reduce plant energy for peppers. Prune severely curled leaves to help the plant focus on fruit development. If the issue is pests or disease, treating it quickly will restore both leaf health and pepper yield.
Can I use coffee grounds to fix curled pepper leaves?
Coffee grounds can help with nutrient deficiencies (they're high in nitrogen), but they won't fix pest or disease issues. Use them sparingly as a soil amendment—too much can make soil acidic. For curled leaves, focus first on watering habits, pest control, or shade adjustments before adding amendments.