
Container Gardens
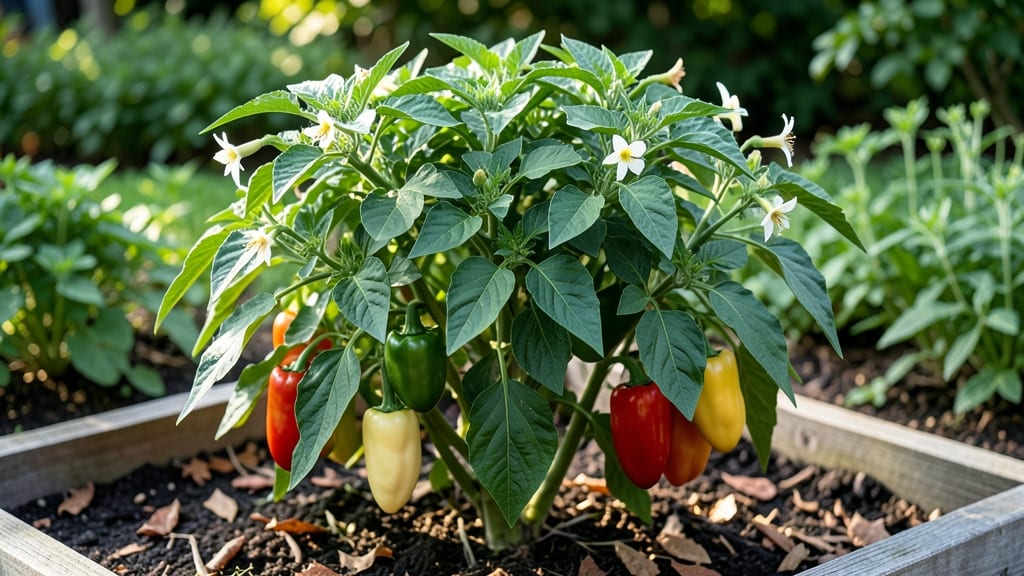
Growing spicy peppers is where bold flavors begin—with just a few plants, you can turn your balcony or windowsill into a firehouse of heat. 🌶️ I’ve grown everything from Carolina Reapers to Thai Bird’s Eye peppers, and the secret isn’t just heat tolerance—it’s patience.
These plants reward you with months of harvest, but only if you give them the right start: fertile soil, consistent warmth, and a little extra care when they’re young.
The best varieties for small spaces are compact yet prolific, like ‘Jalapeño M’ or ‘Habanero ‘Red Sensation.’’ Start seeds indoors 8-10 weeks before your last frost, or buy sturdy transplants to skip the waiting.
Peppers thrive in full sun (6+ hours daily) and well-draining soil—mix in compost to fuel that signature heat. Water at the base (never overhead) to prevent fungal issues, and fertilize lightly with a balanced formula every 4-6 weeks once flowers appear.
By mid-summer, you’ll see clusters of peppers ripening from green to red, yellow, or even purple—each one packing more heat than you dared to imagine. The first harvest is the sweetest: snip peppers at their peak color for maximum flavor, and save a few to dry or ferment.
Even a single plant can yield 20-30 peppers, enough to spice up sauces, salsas, or hot sauces for a year.
Troubleshooting is simple: yellow leaves mean overwatering; blossom end rot means inconsistent moisture. Prune suckers early to focus energy on fruit, and watch for aphids—spray with soapy water if they appear.
With the right care, your small-space garden becomes a heat factory, proving that even the tiniest plot can deliver big rewards.
📚 In This Guide
- What you need
- Instructions
- Tips and common mistakes
- Wrapping up and next steps
What you need
- ● Seeds or seedlings: Heat-loving varieties like Habanero, Ghost Pepper, Carolina Reaper, or Scotch Bonnet (start seeds indoors 8–10 weeks before last frost).
- ● Quantity: 2–4 plants per container (5+ gallons) or 1 plant per 1-gallon pot.
- ● Containers: 5-gallon fabric pots, plastic grow bags, or wooden barrels (ensure drainage holes!).
- ○ Optional: Hanging baskets (10+ inches deep) for trailing varieties like Thai Peppers.
- ● Potting mix: Well-draining, nutrient-rich mix (e.g., 60% potting soil + 30% perlite + 10% compost).
- ● Quantity: 1–2 bags (1.5–2 cubic feet) per 5-gallon container.
- ● Fertilizer: Balanced liquid fertilizer (10-10-10 or 20-20-20) or organic options like fish emulsion or worm castings.
- ● Quantity: 1–2 tbsp per plant every 2–3 weeks once flowering begins.
- ● Support structures: Cages, stakes, or trellises (for varieties like Jalapeños or Serrano that grow 2–3 feet tall).
- ● Basic tools: Trowel, pruners, and gloves (heat-resistant if handling spicy peppers!).
- ● Spray bottle (for misting seedlings).
- ○ Optional but helpful: pH test kit (ideal soil pH: 6.0–6.8).
- ● Mulch (straw or shredded leaves to retain moisture).
- ● Shade cloth (30–50%) for hot climates.
- ● Grow lights (LED or fluorescent, 12–16 hours/day for indoor setups).
- ● Sunlight: 6–8+ hours of direct sunlight daily (south-facing windows or full sun outdoors).
- ● Temperature: Warmth is key! Seedlings need 70–85°F; mature plants thrive in 75–90°F.
- ● Water: Consistent moisture (1–1.5 inches per week), but avoid soggy soil.
- ● Patience: Spicy peppers take 60–120 days to mature—plan ahead for harvests!
Step-by-step instructions for growing spicy peppers in small spaces
Here's how I turn even a sunny windowsill into a fiery pepper patch—no greenhouse required.
🌱 Step 1: Start Seeds Early Indoors
Peppers need warmth to germinate, so begin 8-10 weeks before your last frost date. Fill a seed tray with the sterile seed-starting mix and moisten it until damp but not soggy. Press seeds ¼ inch deep—they're tiny, so I use a toothpick to make individual holes. Cover lightly with more mix, then mist gently with water.
Place the tray on a seedling heat mat set to 75-85°F—this mimics tropical conditions where peppers originate. Germination takes 10-20 days, so patience is key. Keep the soil consistently moist by watering from the bottom (place the tray in a shallow dish of water for 10 minutes daily).
☀️ Step 2: Provide Bright Light Immediately
The instant seedlings emerge, move them under a grow light or to the sunniest window. Peppers need 12-16 hours of light daily to prevent leggy growth. I position my light 2-3 inches above the seedlings and raise it weekly as they grow—this ensures strong stems instead of weak, stretched plants.
Watch for seedlings leaning toward the light. If you see this, rotate the tray a quarter turn daily so they grow straight. Strong seedlings have thick stems and dark green leaves—if yours look pale or stretched, your light isn't intense enough.
🪴 Step 3: Transplant to Individual Pots
When seedlings have 3-4 true leaves (the first set are cotyledons), transplant them to 4-inch pots filled with well-draining potting mix. Gently remove each seedling, keeping the root ball intact, and place it in its new pot. Fill around the roots with soil, pressing lightly to eliminate air pockets.
Water deeply after transplanting, then let the top inch of soil dry before watering again. Peppers hate soggy roots, so I use pots with drainage holes and avoid saucers that trap excess water. Place the pots in a warm spot (70°F or warmer) with bright light.
✂️ Step 4: Fertilize and Prune for Productivity
Start fertilizing when flowers appear with a balanced liquid fertilizer (10-10-10) diluted to half strength. Feed every 2-3 weeks to encourage fruiting. For compact growth, pinch off the first few flowers that appear—this redirects energy to the plant's main stem, resulting in stronger growth and more peppers later.
When peppers form, support heavy varieties with small stakes or cages. Prune suckers (the small shoots that grow in the leaf axils) to focus energy on fruit production. I also remove any yellowing or diseased leaves immediately to prevent spread.
🌿 Step 5: Harvest and Encourage Continuous Production
Harvest peppers when they reach ¾ of their mature size—this encourages the plant to produce more. Use clean scissors or pruners to cut stems, leaving a small portion attached to the plant. Store harvested peppers in a cool, dry place for up to 2 weeks, or dry them for long-term storage.
To extend the season, bring pots indoors before the first frost. Place them near a sunny window or under grow lights and continue fertilizing lightly. With proper care, your pepper plants can keep producing for months, giving you a steady supply of homegrown heat.
Tips & tricks for growing spicy peppers in small spaces
Small-space gardening can still yield fiery rewards—here's how to maximize your pepper potential without a backyard.
Germination Warmth: That 75-85°F heat mat range is non-negotiable for pepper seeds. I've tried using regular household heaters and found they create temperature fluctuations that delay germination. If you don't have a heat mat, place your seed tray on top of your refrigerator (not inside) for consistent warmth. The key is maintaining that tropical temperature range consistently—peppers originate in warm climates and need that stable environment to sprout reliably.
Light Strategy: The 12-16 hours of daily light is critical for preventing leggy seedlings. I use a simple LED grow light on a timer for this—set it to turn on at 6am and off at 8pm. If you're using natural sunlight, rotate your seedlings a quarter turn daily to prevent them from leaning toward one light source. Watch for seedlings that look pale or stretched—they're telling you they need more light intensity. For windowsill growing, south-facing windows get the most consistent light, but even then, you might need supplemental lighting during cloudy days.
Transplant Timing: Wait until you see those 3-4 true leaves before transplanting—those first leaves (cotyledons) don't count. I've made the mistake of transplanting too early, and the delicate seedlings often get damaged. When you do transplant, use pots with drainage holes and fill them with well-draining mix. The top inch drying between waterings is crucial—peppers hate soggy roots and can develop fungal issues if kept too wet. After transplanting, place your pots in a warm spot (70°F or warmer) with bright light to help them establish quickly.
Fertilizer Frequency: The 2-3 week feeding schedule works well, but I've found that when flowers appear, you can actually increase to every 2 weeks for the first few feedings. Use that diluted 10-10-10 fertilizer—full strength can burn tender pepper plants. I also recommend using a water-soluble fertilizer so you can control the exact amount. When you see those first flowers, that's your cue to start feeding more regularly to encourage fruiting. Remember to pinch off the very first flowers that appear—they'll redirect the plant's energy to growing stronger stems that can support more peppers later.
Pro Tips for Growing Spicy Peppers
- Small-space gardening can still yield fiery rewards—here's how to maximize your pepper potential without a backyard.
- Germination Warmth: That 75-85°F heat mat range is non-negotiable for pepper seeds. I've tried using regular househol...
- Light Strategy: The 12-16 hours of daily light is critical for preventing leggy seedlings. I use a simple LED grow li...
Frequently asked questions
Got questions about growing your own fiery peppers? You’re not alone! Here are answers to the most common queries from home gardeners—whether you're a first-timer or a seasoned chilihead.
How long does it take for spicy pepper plants to mature and produce fruit?
Most spicy pepper varieties take 60–90 days from transplanting to harvest, depending on the type. For example, jalapeños mature in about 75 days, while habaneros can take up to 120 days. Start seeds indoors 8–10 weeks before your last frost date to maximize your growing season!
Can I grow spicy peppers in containers, and what size pot do I need?
Spicy peppers thrive in containers as long as you use pots at least 12–18 inches deep and 12 inches wide. A 5-gallon bucket works perfectly for one plant. Ensure the pot has drainage holes to prevent root rot—drainage is key for happy, heat-packed peppers!
Why aren’t my spicy pepper plants flowering or fruiting?
Lack of flowers or fruit can stem from low light, inconsistent watering, or nutrient deficiencies. Peppers need 6–8 hours of sunlight daily and consistent moisture (but not soggy soil). Fertilize with a balanced, phosphorus-rich formula (like 10-10-10) when buds form. If temps drop below 55°F (13°C), move pots to a warmer spot!
How do I handle the heat if I accidentally touch a spicy pepper?
If your hands feel like they’re on fire after handling peppers, don’t rub your eyes! Wash immediately with mild soap and cold water. Avoid touching your face or sensitive areas. Wear gloves when harvesting habaneros, ghost peppers, or Carolina Reapers—trust us, it’s worth the peace of mind!
What can I do with excess spicy peppers I can’t eat?
Don’t let your hard work go to waste! Preserve peppers by freezing, drying, pickling, or making hot sauce. Freeze whole peppers in bags for later cooking, or slice and dry them for homemade flakes. Share extras with neighbors—everyone loves a little heat (or a lot, if they’re brave)!
Wrapping up and next steps
Growing spicy peppers in small spaces is not only possible—it’s rewarding! 🌶️ With the right heat-intense varieties, containers, and care, you’ll soon be harvesting fiery peppers to spice up your favorite dishes.
Whether you’re a beginner or a seasoned gardener, every step—from seed to harvest—brings you closer to a bountiful harvest.
Ready to take the next step? Start with one or two plants—even a single container can yield enough peppers to make your meals unforgettable. Happy growing, and may your garden be as hot as your passion for flavor!