Planting
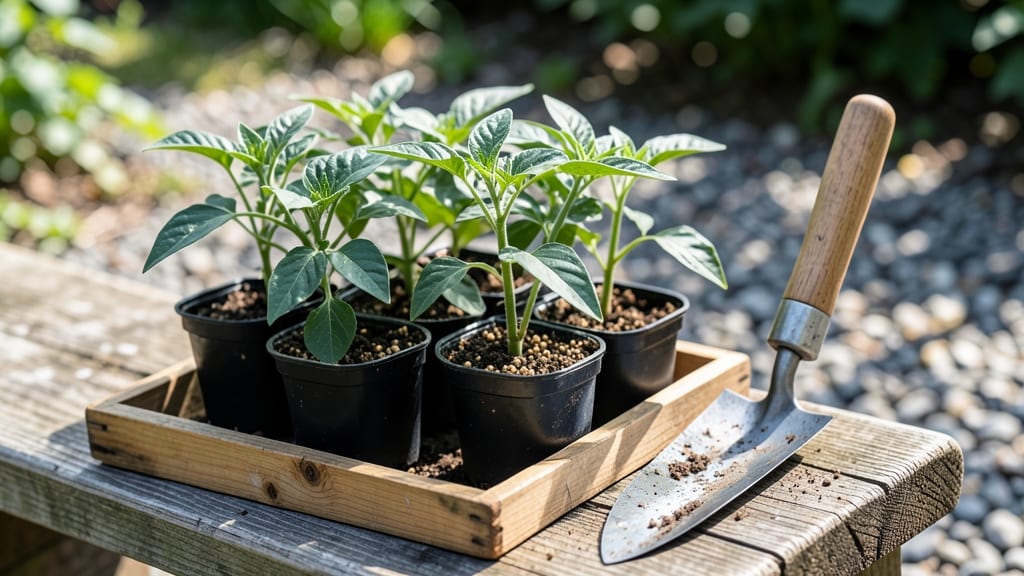
Starting pepper plant seedlings indoors means jumping the heat zone and growing spicy harvests in small spaces. ✨ I’ve turned my tiny balcony into a pepper powerhouse by stacking seedlings vertically—no sprawling garden needed. The secret lies in warm soil, bright light, and a little patience before transplanting.
You’ll need just three simple supplies: seed-starting mix, small pots or a seed tray, and a heat mat or sunny window. Pepper seeds germinate best between 75-85°F—too cool, and they’ll take forever (or never) to sprout.
Once they break soil, keep them under grow lights for 12+ hours daily to prevent leggy, weak stems. By the time you’re ready to transplant, your seedlings will be stocky, bushy, and ready for action. No more floppy, sad little plants that flop over at the first breeze.
With the right setup, you’ll be pinching off flowers indoors to focus energy on roots—trust me, it works. This method scales from one pot to a whole rack, making it perfect for apartments, greenhouses, or even kitchen counters. Let’s get those seeds sprouting!
📚 In This Guide
- What you need
- Instructions
- Tips and common mistakes
- Wrapping up and next steps
What you need
- ● Pepper seeds: Choose disease-resistant varieties like Jalapeño, Bell Pepper, or Cayenne (3–5 seeds per pot or 50+ for a larger batch).
- ● Seed-starting mix: 2–3 cups of sterile, well-draining potting soil (avoid garden soil—it’s too dense!).
- ● Seedling trays or pots: 2–4" deep containers (biodegradable pots are eco-friendly!).
- ● Vertical growing system: Tower gardens: 1–2 ft tall with pockets or slots (e.g., fabric pockets, plastic mesh).
- ● DIY options: Repurposed pallets, hanging gutters, or PVC pipes with holes.
- ● Grow lights or sunny windowsill: 12–16 hours of light daily (LED grow lights work great!).
- ● Watering can or spray bottle: With a fine mist nozzle for gentle hydration.
- ● Plant labels: Small sticks or markers to track varieties.
- ● Fertilizer: Balanced liquid fertilizer (5-5-5 NPK) or compost tea for a nutrient boost.
- ● Support structures: Twine, bamboo stakes, or trellis netting for extra stability.
- ● Humidity dome or plastic wrap: To retain moisture while seeds germinate.
- ● pH test kit: To ensure soil pH stays between 6.0–6.8 (peppers love slightly acidic soil!).
- ● Pruning shears: For trimming leggy seedlings later.
Step-by-Step guide to growing pepper seedlings vertically in compact spaces
Transform your small garden into a pepper powerhouse with this vertical training system.
🌱 Step 1: Start Seeds Indoors with Proper Warmth and Light
Fill seed trays with sterile seed-starting mix and plant pepper seeds ¼ inch deep, spacing them 1 inch apart. Peppers need warmth to germinate—place trays on a seedling heat mat set to 75-85°F for fastest results. Cover lightly with plastic wrap to retain moisture, but remove it once you see first sprouts (about 7-10 days).
Position trays under grow lights immediately after germination—pepper seedlings stretch toward weak light. Keep lights 2-3 inches above plants and adjust as they grow. You’ll know they’re getting enough light when leaves are dark green and compact, not pale or leggy.
🪴 Step 2: Transplant Seedlings to Vertical Containers
Once seedlings have 4-5 true leaves (about 6-8 weeks after sowing), transfer them to individual 5-7 gallon grow bags or fabric pots—these allow roots to breathe while supporting vertical growth. Fill containers with well-draining potting mix mixed with compost for nutrients. Bury stems up to their first set of leaves to encourage stronger root systems.
Place containers in a sunny spot (or under lights) and water deeply until water runs out the drainage holes. Peppers hate soggy roots, so let the top 1-2 inches of soil dry between waterings. You’ll see new growth within 1-2 weeks—this is your signal the transplant worked.
☀️ Step 3: Install Trellis or Cage System Early
Set up a vertical support system (cage, trellis, or stakes) right after transplanting—peppers grow fast, and waiting leads to floppy stems. For determinate varieties, use 4-5 foot cages to contain bushy growth. For indeterminate types, install tall trellises (6+ feet) and weave vines gently as they grow. Avoid tight ties—use soft plant ties or cloth strips to prevent stem damage.
Prune side shoots (small stems growing from the main stem) when they’re 1-2 inches long to direct energy upward. You’ll notice stronger central stems and more flowers/fruit if you keep the plant focused on vertical growth. Pinch off the top set of flowers on indeterminate varieties to encourage bushier growth lower down.
✂️ Step 4: Maintain Vertical Health Through the Season
Fertilize every 3-4 weeks with a balanced liquid fertilizer (10-10-10) diluted to half strength. Peppers are heavy feeders, but too much nitrogen leads to leafy growth at the expense of fruit. Watch for yellowing leaves—this often means overwatering or nutrient imbalance. Adjust watering to keep soil evenly moist but not waterlogged.
Rotate containers quarter-turn weekly to prevent leaning toward light. You’ll see even growth and fewer stretched stems if you keep them balanced. Harvest peppers regularly (every 7-10 days) to encourage continuous production. Remove any diseased or damaged leaves immediately to keep air circulating and prevent fungal issues.
⏰ Step 5: Prepare for Fall and Overwintering (If Needed)
As temperatures drop below 50°F, move containers to a protected spot or indoors near a sunny window. Peppers are frost-sensitive, so bring them inside before the first frost date. Reduce watering slightly in fall—soil stays moist longer in cooler weather. You’ll notice slower growth but can still harvest for 4-6 weeks after bringing them in.
For a year-round harvest, prune back indeterminate varieties by ⅓ in late fall to encourage new growth in spring. Store containers in a cool (40-50°F), bright spot until you’re ready to restart growth. With this vertical system, you’ll maximize space while keeping peppers productive—even in small gardens.
Tips & tricks for perfect vertical pepper seedlings
Mastering vertical pepper growth in tight spaces takes a few key strategies that make all the difference. Here's what I've learned from years of compact gardening:
Heat Mat Precision: That 75-85°F range on your seedling heat mat isn't just a suggestion—it's critical. I've seen germination fail completely when temps dip below 70°F, even with perfect moisture. Use a reliable thermometer to monitor the mat's actual surface temperature, not just the ambient air. If your home stays below 70°F at night, consider a small greenhouse tent over the trays to maintain warmth during those critical first 7-10 days.
Light Positioning Secret: The 2-3 inch distance from grow lights to seedlings is your sweet spot, but don't treat it as a fixed rule. As seedlings grow, adjust the lights so they're always just above the tallest leaves. I use a simple ruler attached to the light fixture to track this—it's amazing how quickly seedlings can outgrow their light source if you're not paying attention. Watch for leaves growing toward the light (etiolation) as your first warning sign.
Transplanting Technique: When burying stems up to the first set of leaves during transplanting (Step 2), you're essentially creating a stronger root system. The buried portion will develop additional roots along its length, giving you a more robust plant. I've found that using a clean pencil to make small holes in the soil before inserting seedlings reduces transplant shock and keeps the roots from getting damaged during transfer.
Fertilizer Timing: That 3-4 week fertilization schedule is perfect, but timing matters just as much as frequency. Always fertilize in the morning so plants have time to absorb nutrients before evening. I dilute my 10-10-10 fertilizer to half strength and add a splash of seaweed extract (optional) for extra root development. The key is to avoid "burning" your plants—always water thoroughly before and after fertilizing to help distribute nutrients evenly.
Pro Tips for Pepper Plant Seedlings
- Mastering vertical pepper growth in tight spaces takes a few key strategies that make all the difference.
- Heat Mat Precision: That 75-85°F range on your seedling heat mat isn't just a suggestion—it's critical.
- Light Positioning Secret: The 2-3 inch distance from grow lights to seedlings is your sweet spot, but don't treat it as a fixed rule.
Frequently asked questions
Got questions about growing pepper plant seedlings in compact spaces?
You’re not alone! Here are answers to the most common queries to help you crush your vertical gardening game.
How long do pepper seedlings take to grow before transplanting?
Pepper seedlings typically need 6 to 8 weeks indoors before transplanting outdoors (or to a vertical garden). Look for 2-3 sets of true leaves and sturdy stems—this signals they’re ready to handle bigger pots or trellises. Chill-sensitive varieties like bell peppers may need a head start in warmer climates.
Can I transplant seedlings too early or too late?
Transplanting too early risks shock or frost damage, while waiting too late stunts growth. Aim for after the last frost (check your USDA zone!) and when soil temps hit 60°F+. Seedlings should be 4-6 inches tall with 2-3 leaves—hardy enough to adapt but not overcrowded.
What if my seedlings look leggy or weak?
Leggy seedlings mean they’re stretching for light. Fix it by:
- Moving them closer to a sunny window (or under grow lights).
- Using reflective surfaces (like aluminum foil) to bounce light.
- Thinning crowded seedlings to 1 inch apart for better airflow.
Are there pepper varieties better for vertical gardens?
Opt for compact or bush varieties like:
- ‘Jalapeño M’ (dwarf, 18-24” tall)
- ‘Shishito’ (vigorous but manageable on trellises)
- ‘Snackable’ bell peppers (small, high-yielding)
Why are my seedlings wilting or turning yellow?
Yellowing (chlorosis) or wilting often signals:
- Overwatering (check soil moisture—it should be damp, not soggy).
- Underwatering (pepper seedlings prefer consistent moisture).
- Nutrient deficiency (use a balanced fertilizer like 10-10-10 at half strength).
- Pests (inspect for aphids or spider mites—spray with neem oil if needed).
Wrapping up and next steps
Growing pepper plant seedlings vertically is a game-changer for compact gardens—saving space, boosting yields, and adding a touch of green elegance to your setup! 🌱 With the right materials, a little patience, and these simple steps, you’re well on your way to a thriving, space-efficient pepper harvest.
Ready to transform your garden? Start by selecting your seedlings, assembling your vertical system, and giving them the love they need—soon, you’ll be reaping the rewards of your hard work!
Pro tip: 💡 Keep a gardening journal to track progress and tweak your approach for even better results next season!