
Shrubs
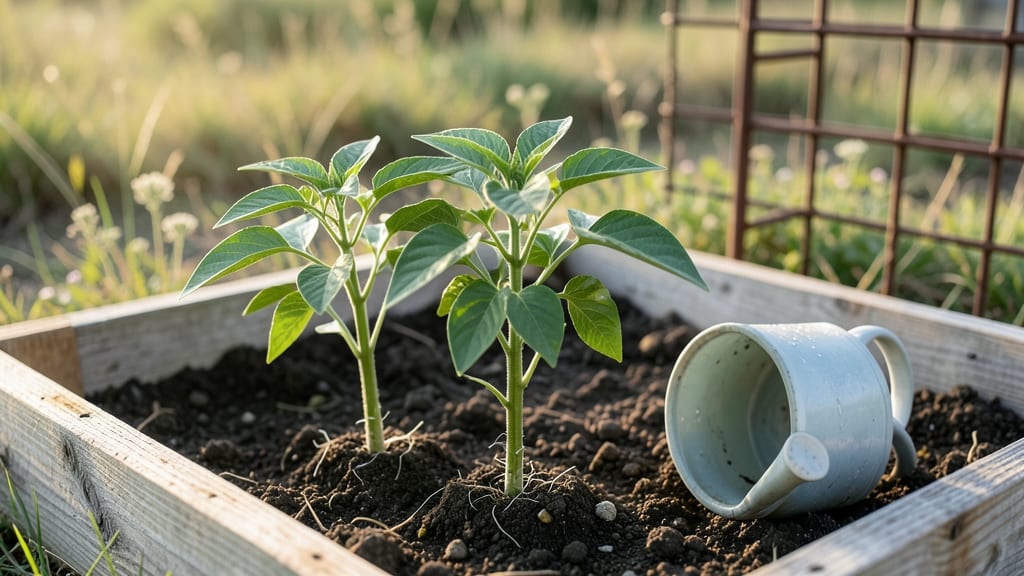
Starting red pepper seedlings indoors means you'll harvest fiery jalapeños and sweet bells in just 80 days—but only if you master the early stages. 🌱 The key isn't just patience; it's creating the right conditions from day one, whether you're working with a sunny windowsill or a grow light setup.
Peppers hate cold soil and soggy roots, so we'll focus on warm starts and precise watering. Most beginners overwater, which causes damping-off—a fungal disease that turns healthy seedlings into sad, mushy stems.
Trust me, I've lost batches to it, and I learned the hard way that less water means stronger plants. By the time you transplant, your seedlings will be stocky, dark green, and ready to handle outdoor life.
The right vertical support system (like a tomato cage or trellis) will keep them compact and productive, even in small spaces. You'll end up with plants that produce 2-3 times more peppers than those grown without support. This works for bell peppers, jalapeños, habaneros—any variety you love.
Let's get those seeds sprouting right!
📚 In This Guide
- What you need
- Instructions
- Tips and common mistakes
- Wrapping up and next steps
What you need
- ● Red pepper seeds: 5–10 seeds (choose a compact variety like ‘Jalapeño,’ ‘Thai Hot,’ or ‘Shishito’ for vertical growth).
- ● Seed-starting mix: 2–3 cups of sterile, well-draining potting soil (avoid garden soil—it’s too dense!).
- ● Seed trays or small pots: 4–6 biodegradable peat pots (2–3 inches deep) or a seed tray with cell inserts.
- ● Grow lights or sunny windowsill: A LED grow light (12–16 hours/day) or a south-facing window (6+ hours of sunlight).
- ● Spray bottle: For gentle watering (avoid over-saturating seeds!).
- ● Vertical growing system: Tower garden: 1–2 small fabric pockets or pockets (e.g., ‘AeroGarden’ or DIY fabric strips).
- ● Wall-mounted planters: 1–2 hanging pockets or mesh bags (ensure drainage holes!).
- ● DIY trellis: A sturdy wooden frame + twine (for training vines).
- ● Fertilizer: Balanced liquid fertilizer (5-5-5 or 10-10-10, diluted to half-strength).
- ● Support ties: Soft plant ties or twistable Velcro strips (for securing seedlings to vertical structures).
- ● Humidity dome or plastic wrap (to retain moisture while germinating).
- ● pH test kit (ideal soil pH for peppers: 6.0–6.8).
- ● Heat mat (if your space is chilly—peppers love warmth!).
- ● Pruning shears (for trimming excess leaves to encourage upward growth).
- ● Self-watering system (e.g., wicks or drip irrigation for hands-off care).
How to grow red pepper seedlings vertically in small spaces
Here’s how I turn tiny seedlings into bushy, productive plants using vertical space—no sprawling garden needed.
🌱 Step 1: Start with Proper Seedling Setup
Fill 4-inch biodegradable pots with sterile seed-starting mix (never garden soil—it compacts and slows growth). Press the mix down lightly so it’s firm but not packed, then water until it’s evenly moist but not soggy. I like to use a spray bottle for this step because it prevents displacing seeds.
Plant 2-3 seeds per pot at a depth of ¼ inch—about the width of a pencil eraser. Cover lightly with more mix, then mist again to settle everything. Place the pots in a warm spot (75-85°F) under a grow light (or a south-facing window) for 12-14 hours of light daily. You’ll see sprouts in 7-10 days, but don’t move them until they’ve got 2-3 true leaves—that’s when they’re strong enough for vertical training.
🪴 Step 2: Introduce Vertical Support Early
Once seedlings have 2-3 true leaves, gently transplant them into 6-inch tall, narrow containers (like fabric grow bags or deep pots) with well-draining potting mix. This early move prevents root binding and gives them room to grow vertically from the start. I use 4-inch tall bamboo stakes or plastic trellis inserts placed 1 inch from the seedling to guide growth.
Tie the main stem to the stake with soft plant ties (or even old pantyhose strips) as soon as it reaches 4-6 inches tall. The goal is to encourage upward growth while keeping the plant stable. If you wait too long, the stem gets woody and breaks when you try to train it later. Watch for new leaves forming near the top—that’s your signal to gently weave the stem around the stake in a spiral.
☀️ Step 3: Optimize Light and Airflow for Bushy Growth
Red peppers need 6-8 hours of direct sunlight daily, but too much heat can stress seedlings. If using a grow light, keep it 2-3 inches above the plants and adjust as they grow. Rotate the pots a quarter turn every few days so they don’t lean toward the light. You’ll notice stems growing straighter and leaves staying darker green—that’s the sign you’re doing it right.
Thin seedlings to one per pot once they’re 3-4 inches tall, keeping the strongest, straightest stem. Prune any side shoots that form at this stage—they’ll steal energy from the main stem. Instead, let the plant focus on growing taller and sturdier before branching out. Open a window or use a small fan on low setting for 10 minutes daily to strengthen stems—this mimics wind and prevents leggy growth.
✂️ Step 4: Train and Prune for Compact Bushes
When seedlings hit 12 inches tall, it’s time to start pruning. Pinch off the top set of leaves just above a leaf node (where leaves grow out) to encourage branching. This is where the magic happens—your single stem will soon split into 3-4 strong lateral branches, each capable of producing peppers. I like to do this on a cloudy morning so the plant has time to recover before the heat of the day.
Continue spiraling the main stem around the stake every 4-6 inches, tying it loosely to support the weight. Once the plant hits the top of the stake (18-24 inches), cut the tip to encourage wider branching. You’ll see new shoots forming within 2 weeks—these will become your pepper-producing arms. Remove any flowers that form now; you want the plant to focus on leaf and stem growth first.
💧 Step 5: Maintain Vertical Health Through Maturity
Water at the base of the plant, keeping the soil evenly moist but never soggy. Vertical plants dry out faster, so check the top inch of soil daily—if it’s dry, water deeply until it drains from the bottom. I use a self-watering system (like a drip line) to keep moisture consistent without overwatering. Fertilize every 2 weeks with a balanced liquid fertilizer (10-10-10) once the plant has 5-6 leaves, but cut back to half strength to avoid burning roots.
As peppers form, use soft ties or cloth strips to gently weave the branches around the stake in a zigzag pattern. This keeps the plant stable and prevents stems from snapping under fruit weight. Harvest peppers when they’re ½ inch long for the best flavor, and pinch off any yellowing or diseased leaves immediately. With this method, I’ve grown 4-6 peppers per plant in a 2-foot vertical space—proof that small spaces can yield big harvests!
Tips & tricks for perfect vertical red pepper seedlings
Here's what nobody tells you about growing peppers in tight spaces—these tricks will make all the difference.
Lighting is Everything: That 12-14 hours of daily light in Step 1 is non-negotiable for strong seedlings. I use a LED grow light on a timer to automate this—no guesswork about daylight hours. If you're using natural light, rotate your pots quarter-turns every few days so seedlings grow straight rather than leaning toward the window. You'll notice stems that are sturdy and leaves staying a vibrant green instead of stretching thin and pale.
Timing Your Transplant: Don't rush moving seedlings to their vertical containers in Step 2. Wait until they have those 2-3 true leaves—they need that extra energy to handle the transplant shock. I've learned this the hard way after losing seedlings that were moved too soon. Once they're ready, use the 6-inch tall containers to give roots room to establish before they hit the stake.
Pruning for Productivity: When you pinch those top leaves in Step 4, you're not just shaping the plant—you're telling it to focus its energy on producing more branches. I always do this on cloudy mornings so the plant has time to recover before the heat of the day. The key is to pinch just above a leaf node where you want new growth to emerge. You'll see those new shoots forming within 2 weeks, and suddenly you've got 3-4 strong stems instead of one.
Watering Wisdom: Vertical plants dry out faster than ground-level ones, so checking that top inch of soil daily is crucial. I use a self-watering system with a drip line that delivers moisture right at the base—no more guessing if the soil is dry. The trick is to water deeply until it drains from the bottom, but never let it sit soggy. You'll know you're doing it right when the soil stays consistently moist but never waterlogged.
Pro Tips for Red Pepper Seedlings
- Here's what nobody tells you about growing peppers in tight spaces—these tricks will make all the difference.
- Lighting is Everything: That 12-14 hours of daily light in Step 1 is non-negotiable for strong seedlings.
- Timing Your Transplant: Don't rush moving seedlings to their vertical containers in Step 2.
Frequently asked questions
Got questions about growing red pepper seedlings? You're not alone!
Here are some of the most common concerns—and their answers—to help you cultivate thriving peppers in even the tightest spaces.
How long does it take for red pepper seedlings to germinate?
Most red pepper seeds sprout within 7–14 days when kept in warm (70–85°F), moist soil. Pro tip: Use a heat mat or place them near a sunny window to speed things up! If nothing emerges after 3 weeks, try replanting—some seeds just need more patience.
When should I transplant red pepper seedlings outdoors?
Wait until after the last frost and soil temps hit at least 60°F—peppers hate cold! Seedlings should also have 4–6 true leaves and be 3–4 inches tall. Harden them off for 7–10 days first by gradually exposing them to outdoor conditions.
Can I grow red peppers in containers if I don’t have a garden?
Use 5-gallon pots or larger (peppers need room for roots and branches). Ensure they have drainage holes and a balanced fertilizer (like 10-10-10). Vertical gardening (trellises, cages) works great for compact spaces—just prune side shoots to encourage upward growth.
Why are my red pepper seedlings turning yellow or wilting?
Yellow leaves often mean overwatering (check soil moisture—it should be dry 1–2 inches down) or nutrient deficiency (feed with a mild fertilizer). Wilting could signal underwatering or root stress (like from transplant shock). Pest check: Inspect for aphids or spider mites—spray with neem oil if needed.
How do I encourage bushier (not just taller) red pepper seedlings?
Pinch off the top set of leaves when seedlings are 6–8 inches tall to promote side branching. Also, ensure they get 6–8 hours of sunlight daily and rotate pots weekly for even growth. Bonus: A light pruning of lower leaves improves airflow and prevents disease.
Wrapping up and next steps
Growing red pepper seedlings vertically is a game-changer for small gardens or urban spaces—you don’t need a sprawling plot to grow bold, flavorful peppers! 🌱 With the right setup, patience, and these hacks, you’ll enjoy a thriving harvest even in tight quarters.
Whether you’re a beginner or a seasoned gardener, start small, experiment, and watch your peppers climb to new heights!
Now that you’re armed with tips and tricks, what’s next? Grab your trellis, seed trays, and get planting—your future red peppers are waiting! 🌶️💚 Ready to dive in? Check out our step-by-step guide to kickstart your vertical garden today!