Size
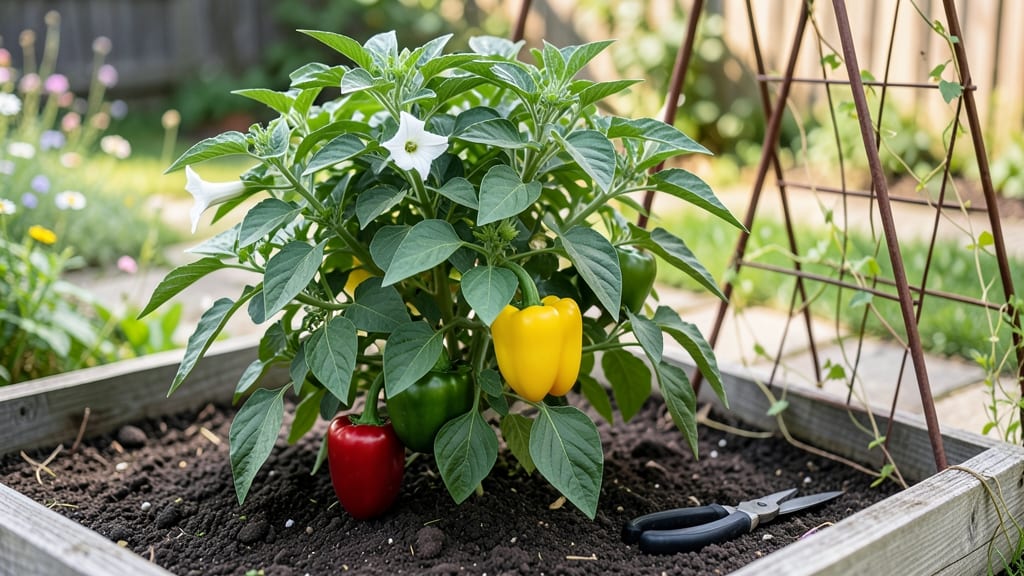
Growing peppers isn’t just about patience—it’s about sunlight, heat, and the right timing. 🌿 I’ve learned that even a few degrees too cool or a shade too much can turn your pepper plants into sad, stunted shadows instead of the productive powerhouses they should be.
The secret to bigger yields starts with mimicking their natural tropical environment, right down to the soil warmth and light exposure. Most beginners overlook how much peppers hate wet feet and inconsistent warmth.
You’ll need well-draining soil, a spot that bakes in full sun for at least 6-8 hours daily, and a way to keep roots cozy—whether that’s black plastic mulch or a simple cloche on chilly mornings. Trust me, skipping this step means fewer peppers, not more.
By midsummer, you’ll be harvesting plump, glossy peppers straight from the vine, their colors popping like jewels against the green. The key is consistency: water deeply but infrequently, feed lightly but often, and prune strategically to focus energy on fruit production.
It’s simpler than it sounds once you know the tricks. This works for bell peppers, jalapeños, or even habaneros—just adjust spacing and heat tolerance. Whether you’re in a warm climate or a cooler zone, the principles stay the same. Let’s get those plants thriving!
📚 In This Guide
- What you need
- Instructions
- Tips and common mistakes
- Wrapping up and next steps
What you need
- ● Peppers seeds or seedlings: Choose from varieties like jalapeños, bell peppers, habaneros, or cayenne. Start with 3–5 plants for a small garden or 10+ for a bigger yield.
- ● Well-draining potting mix or garden soil: Peppers hate soggy roots! Use a blend with compost or coconut coir for extra nutrients. A 5-gallon bag covers 1–2 plants.
- ● Containers (if not planting in-ground): 5–7 gallon pots with drainage holes (peppers need space to thrive!).
- ● Fertilizer: A balanced, organic fertilizer (10-10-10 or 5-5-5) or compost tea. Apply every 4–6 weeks.
- ● Mulch: Straw or wood chips (1–2 inches thick) to retain moisture and suppress weeds.
- ○ Support (optional but helpful): Cages, stakes, or trellises for taller varieties like bell peppers.
- ● Hand trowel or small shovel
- ● Watering can or hose with a gentle spray nozzle
- ● Pruning shears (for trimming dead leaves or overgrowth)
- ○ Gloves (optional—peppers can be spicy to handle!)
- ● Sunlight: 6–8+ hours of direct sun daily (peppers are sun-worshippers!).
- ● Warmth: Peppers thrive in 70–85°F (21–29°C) soil temps. Start seeds indoors 8–10 weeks before last frost or wait until soil warms up.
- ● Water: 1–1.5 inches per week, keeping soil consistently moist but not waterlogged.
- ● pH-balanced soil: Aim for a pH of 6.0–6.8 (test with a soil kit if unsure).
Step-by-step instructions for growing peppers at home
Peppers thrive with the right balance of sun, warmth, and patience—here's how to grow them like a pro.
🌱 Step 1: Start Seeds Indoors or Buy Healthy Transplants
Peppers need a long growing season, so start seeds 6-8 weeks before your last frost date if you want to grow from seed. Use biodegradable pots or small containers filled with sterile seed-starting mix—never garden soil, as it can harbor diseases. Plant seeds ¼ inch deep and keep the soil consistently moist at 70-80°F for best germination.
If you prefer transplants, choose healthy starter plants with dark green leaves and thick stems. Avoid leggy seedlings—they struggle to recover. I always check for strong root systems when picking plants at the nursery, as weak roots mean slower establishment in your garden.
☀️ Step 2: Provide Warmth and Bright Light for Strong Starts
Peppers love warmth—keep soil temperatures above 60°F for healthy growth. If starting indoors, use a seedling heat mat or place pots on top of your fridge to maintain consistent warmth. Once sprouted, place seedlings under grow lights for 14-16 hours of light daily—a sunny windowsill won’t cut it.
Watch for leggy seedlings (tall, thin stems with sparse leaves)—this means they’re stretching for light. If this happens, move the lights closer (2-3 inches above the plants) and keep them on a timer. Strong seedlings have compact growth with deep green leaves and thick stems.
🪴 Step 3: Harden Off and Transplant After Frost
Two weeks before your last frost, harden off seedlings by placing them outside in a shaded, sheltered spot for 1-2 hours the first day, gradually increasing time over 7-10 days. This prepares them for outdoor conditions without shock. Transplant after all danger of frost when soil is at least 60°F—peppers hate cold!
Dig a hole twice as wide as the root ball but no deeper. Space plants 12-18 inches apart (check your variety’s needs—some like bell peppers need more space). Mix compost or aged manure into the soil at planting to give them a nutrient boost. Water deeply right after transplanting to help roots establish.
💧 Step 4: Water Deeply and Keep Soil Consistent
Peppers hate soggy soil but also can’t handle drought. Water deeply once a week (or more in extreme heat) until the top 2 inches of soil feel moist. Use drip irrigation or soaker hoses to keep water at the roots—wet leaves invite disease. Mulch with straw or shredded leaves to retain moisture and keep soil temps stable.
You’ll know your watering is right when new leaves emerge steadily and the soil stays crumbly but damp between waterings. Avoid overhead watering after dark—wet foliage at night encourages fungal issues like blight. A rain gauge helps track moisture levels if you’re unsure.
✂️ Step 5: Prune and Support for Bigger Harvests
Prune suckers (the small shoots that grow in the leaf axils) to redirect energy to fruit production. Use clean pruners and snip suckers early in the morning when plants are hydrated. Leave 3-4 main branches on each plant for best airflow and sunlight penetration—this prevents disease and boosts yield.
Stake or cage plants before they get too tall—peppers can get top-heavy with fruit. I use bamboo stakes or tomato cages for support. Pinch off early flowers if your plant looks stressed—it’s better to build strong growth first. Once established, fertilize lightly with a balanced 10-10-10 every 4-6 weeks to keep them producing.
Tips & tricks for growing peppers like a pro
Here's what nobody tells you about growing peppers that'll make all the difference in your harvest.
Seed Starting Strategy: If you're starting seeds indoors, use a clear plastic dome or plastic wrap to create a mini greenhouse effect over your seed trays. This traps warmth and humidity, which peppers love for germination. Remove the cover once sprouts appear to prevent mold. I've found that maintaining that 70-80°F soil temperature is crucial—if your home runs cooler, consider using a seedling heat mat or placing pots on top of your refrigerator to maintain consistent warmth. This extra care pays off with stronger, healthier seedlings.
Lighting Game-Changer: That 14-16 hours of light daily requirement isn't just about quantity—it's about quality too. If you're using grow lights, LED bulbs with a full spectrum (especially red and blue wavelengths) work best. Position them 2-3 inches above the plants and adjust as they grow. I've ruined seedlings by leaving them too far away—they stretch like crazy! Watch for leggy seedlings (tall, thin stems) and adjust immediately. A simple timer makes this maintenance effortless.
Transplanting Wisdom: When it's time to transplant, don't rush the process. The 7-10 day hardening off period is your secret weapon against transplant shock. Start with just 1-2 hours in shade and gradually increase exposure. I've seen peppers wilt dramatically when transplanted too soon—this method prevents that. Also, dig those holes twice as wide as the root ball to encourage root spread. The wider hole gives roots room to establish without circling, which leads to stronger plants.
Pruning Secrets: When pruning suckers in Step 5, don't just chop them off—use clean pruners and make cuts at a 45-degree angle just above a leaf node. This prevents disease entry points and encourages better regrowth. I've noticed that removing suckers early in the morning gives them time to dry before evening moisture sets in, reducing fungal risks. Remember to leave those 3-4 main branches for optimal airflow and sunlight penetration—this simple step can double your yield!
Pro Tips for Grow Peppers
- Here's what nobody tells you about growing peppers that'll make all the difference in your harvest.
- Seed Starting Strategy: If you're starting seeds indoors, use a clear plastic dome or plastic wrap to create a mini greenhouse effect over your seed trays.
- Lighting Game-Changer: That 14-16 hours of light daily requirement isn't just about quantity—it's about quality too.
Frequently asked questions
Got questions about growing peppers? You’re not alone—even seasoned gardeners hit snags! Here are answers to the most common queries to help you grow a thriving pepper patch with confidence.
How long does it take for pepper plants to produce fruit?
Most pepper varieties take 60–90 days from transplanting to harvest, depending on the type. Sweet peppers (like bell peppers) mature faster (70–80 days), while hot peppers (like jalapeños or habaneros) can take longer (90+ days). Start seeds indoors 8–10 weeks before your last frost for a head start!
Can I grow peppers in containers, and what size pot do I need?
Peppers thrive in containers as long as the pot is at least 5 gallons (for bush varieties) or 10+ gallons (for larger plants like banana peppers). Use well-draining soil, place pots in full sun, and fertilize regularly. Pro tip: Add a trellis for vining types to save space!
What are the most common pepper plant pests, and how do I prevent them?
Watch for aphids, spider mites, and hornworms—they love pepper leaves! Prevent pests with:
- Neem oil sprays (organic deterrent)
- Row covers (for early-season protection)
- Handpick hornworms (they’re easy to spot!)
- Encourage beneficial insects like ladybugs
What if my pepper plants aren’t getting enough sun? Can I save them?
Peppers need 6–8+ hours of direct sunlight daily. If yours are shaded, try:
This usually means stress from heat, poor pollination, or uneven watering. Here’s how to fix it:
If sunlight is unchangeable, opt for shorter varieties like ‘Snackable’ peppers—they tolerate partial shade better.
Why are my pepper flowers falling off before fruiting?
Bonus: Aphids can also interfere—check leaves for sticky residue!
Wrapping up and next steps
Growing peppers is a rewarding journey that combines patience, care, and a little sunshine magic! 🌱 With the right soil, consistent watering, and smart sunlight strategies, you’ll soon be harvesting vibrant, flavorful peppers—whether you crave sweet bell peppers or fiery jalapeños. Remember: every gardener starts with a single seed!
Ready to take the next step? Start small—plant a few seeds or seedlings this season and watch your confidence (and pepper patch!) grow. Before you know it, you’ll be experimenting with varieties, troubleshooting like a pro, and maybe even sharing your bounty with neighbors. Happy growing! 🌿