Propagation
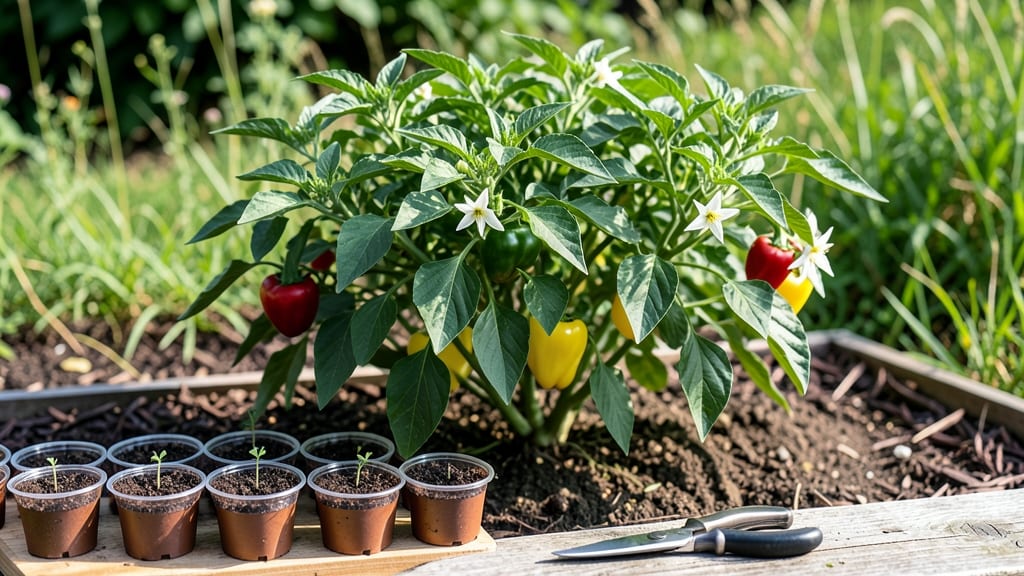
Propagating pepper plants from seed lets you grow exactly the varieties you crave—hot, sweet, or heirloom—without paying nursery prices. 🌱 I’ve turned my balcony into a pepper powerhouse by starting seeds indoors in early spring, and the secret isn’t expensive gear but matching light, heat, and patience to what peppers need.
The process starts with a simple setup: seed-starting mix, a heat mat (or warm windowsill), and a clear plastic dome or bag to trap humidity. Most seeds sprout in 10-14 days if kept consistently warm and moist—just don’t drown them.
Transplant seedlings into larger pots when they’ve got their first true leaves, and you’ll be hardening them off by late spring. By midsummer, you’ll have bushy plants loaded with peppers, all grown from seeds you nurtured yourself.
The flavor? Unmatched—nothing beats homegrown, especially when you’ve watched them grow from tiny sprouts to fruiting machines. Works for any space, from sunny windowsills to raised beds. Here’s how to avoid the common pitfalls and get every seed to thrive!
📚 In This Guide
- What you need
- Instructions
- Tips and common mistakes
- Wrapping up and next steps
What you need
- ● Pepper seeds: 10–20 seeds (choose varieties like Jalapeño, Cayenne, or Bell Peppers for compact growth).
- ● Seed-starting trays or small pots: 2–4 inch pots (biodegradable or plastic, 10–20 units).
- ● Seed-starting mix: Lightweight, sterile potting soil (avoid garden soil—it’s too dense!).
- ● Grow lights or sunny windowsill: 12–16 hours of light daily (LED grow lights work best).
- ● Misting bottle or spray nozzle: For gentle watering (avoid oversaturating seeds!).
- ● Plastic wrap or humidity dome: To retain moisture while seeds germinate.
- ● Fertilizer: Balanced, water-soluble fertilizer (5-10-5 ratio) for seedlings.
- ● Pole or trellis: 6–8 ft tall (bamboo, metal, or PVC pipe—diameter: 1–2 inches).
- ● Tie-downs: Soft plant ties or twine (avoid wire—it can damage stems!).
- ● Pruning shears: Sharp, clean scissors for trimming (sterilize with rubbing alcohol).
- ● pH test kit: To check soil pH (peppers thrive at 6.0–6.8).
- ○ Heat mat (optional): For faster germination (70–85°F is ideal).
- ● Compost or worm castings: For nutrient-rich soil amendments.
- ● Label markers: To track pepper varieties and planting dates.
- ● Garden gloves: Protect your hands from soil and thorns (some varieties have them!).
Step-by-step instructions for propagating pepper plants
Here's how I grow healthy pepper seedlings fast—ready for pole training in just weeks.
🌱 Step 1: Select and Prepare Healthy Pepper Plants
Choose mature pepper plants with at least 4-6 leaves and no signs of disease. I always pick plants from the middle of the bush—they're stronger than outer stems. Use clean, sharp scissors to cut a 4-6 inch stem just below a leaf node where new growth appears.
Strip the lower leaves from the cutting, leaving only the top 2-3 leaves. This prevents rot while the roots develop. Place the cuttings in room-temperature water for 24 hours—this helps them absorb moisture before planting. You'll see tiny bubbles forming along the stem, which means the cells are already waking up.
💧 Step 2: Root in Moist Growing Medium
Fill small pots (about 3-4 inches deep) with a mix of 50% perlite and 50% peat moss—this ensures fast drainage while keeping roots moist. Moisten the mix until it feels like a damp sponge, not soggy. Stick your finger 1 inch deep; it should feel cool but not dripping.
Plant each cutting 2 inches deep at a slight angle, which encourages more root growth along the stem. Gently press the soil around the cutting to remove air pockets. Cover the pot with a clear plastic bag to create a humid environment—pepper cuttings need 80-90% humidity to root successfully.
☀️ Step 3: Provide Warmth and Indirect Light
Place the pots in a warm spot with bright, indirect light—a south-facing window with sheer curtains works well. Keep the temperature between 70-75°F; a heat mat underneath the pots can help if your home runs cooler. Roots typically form in 2-4 weeks, but don't rush—wait until you see new leaves emerging before transplanting.
Mist the cuttings lightly every 2-3 days to maintain humidity inside the bag. Remove the bag for 30 minutes daily to prevent mold growth. You'll know the roots are ready when the cutting feels firm at the base and you see small roots peeking through the drainage holes.
✂️ Step 4: Transplant and Train on Poles
Once rooted, transplant each cutting into individual 5-inch pots filled with standard potting mix. Handle the plants gently—pepper roots are delicate. Insert a 3-foot bamboo stake next to each plant and tie the main stem loosely with soft twine. This keeps the plant upright while it adjusts to its new home.
Water thoroughly after transplanting, then let the top 1 inch of soil dry between waterings. Place the pots in full sun (6+ hours daily) and watch for new growth. Pinch off any side shoots that form below the first 12 inches—this directs energy upward for faster pole training.
🪴 Step 5: Maintain and Harvest
Fertilize every 4-6 weeks with a balanced liquid fertilizer (10-10-10) to encourage vigorous growth. Keep the plants tied to the poles as they grow, adjusting the twine every 2 weeks to prevent stem damage. You'll see the first peppers forming in 8-10 weeks—harvest them when they're firm and fully colored.
Prune regularly to maintain airflow—remove any yellow leaves or damaged stems immediately. If your garden space is limited, this pole-training method lets you grow 4-5 peppers per plant in a compact footprint. The key is patience; with proper care, your propagated peppers will produce just like store-bought plants—but with better flavor and fewer pests.
Tips & tricks for perfect pole-trained pepper propagation
These simple tricks will help you grow healthy pepper plants faster and with fewer headaches.
Cutting Selection: Look for stems with at least 4-6 leaves and no flowers or buds. These stems contain the most growth hormones, which speeds up root development. I always avoid outer stems—they're more prone to disease and stress. Make your cut just below a leaf node at a 45-degree angle for maximum surface area to absorb water during the 24-hour soaking. This angled cut also prevents the stem from sitting flat on the soil later.
Humidity Control: Pepper cuttings need that 80-90% humidity to root successfully, but too much moisture creates mold. I use clear plastic bags with tiny holes poked in them—just enough to let air circulate while maintaining humidity. Remove the bag for 30 minutes daily to prevent mold growth, and always check for condensation buildup. If you see water droplets on the bag, it's too humid—open it longer next time.
Rooting Accelerator: For faster rooting, add a pinch of cinnamon powder to the soil mix before planting. Cinnamon has natural antifungal properties that prevent rot while encouraging root growth. I also dip the cut end of each stem in rooting hormone powder before planting—this can cut your rooting time from 4 weeks to just 2 weeks. Just be sure to follow the instructions on the packet for best results.
Pole Training Pro Tip: When you're ready for Step 4, use soft velcro plant ties instead of twine—they're gentler on the stems and easier to adjust as your plants grow. I like to tie the main stem to the stake at three points: near the base, halfway up, and near the top. This provides better support without restricting growth. Adjust the ties every 2 weeks as the plant grows taller.
Pro Tips for Propagate Pepper Plants
- These simple tricks will help you grow healthy pepper plants faster and with fewer headaches.
- Cutting Selection: Look for stems with at least 4-6 leaves and no flowers or buds.
- Humidity Control: Pepper cuttings need that 80-90% humidity to root successfully, but too much moisture creates mold.
Frequently asked questions
Got questions about propagating pepper plants? You’re not alone! Here are answers to the most common queries to help you grow a thriving pepper garden—even in compact spaces.
How long does it take for pepper cuttings to root?
Most pepper cuttings take 2–4 weeks to root in water or soil, depending on humidity and temperature. Keep them in a warm, humid environment (70–80°F) with indirect light. Patience is key—don’t rush the process!
Can I propagate peppers from store-bought plants?
Yes! If your store-bought pepper plant is healthy, take 4–6-inch cuttings from non-flowering stems. Just avoid hybrid varieties (marked "F1"), as their offspring may not match the parent plant’s traits. Seed-grown peppers are better for propagation.
Why are my pepper cuttings turning yellow or mushy?
Yellowing or mushy stems usually mean overwatering, rot, or low light. Ensure cuttings have well-draining soil or water and place them in bright, indirect light. Trim any rotten parts and let them dry slightly before replanting.
What’s the best time of year to propagate peppers?
Start indoors 8–10 weeks before your last frost date (early spring) for transplanting outdoors. In warm climates, you can propagate year-round. Avoid winter propagation unless you have a heated greenhouse—peppers need warmth to thrive!
Can I propagate peppers from seeds instead of cuttings?
Seeds are the easiest method for beginners. Sow pepper seeds ½ inch deep in moist, warm soil (75–85°F) and keep them consistently damp. Germination takes 10–20 days. Cuttings are faster but require more skill—seeds offer more variety!
Wrapping up and next steps
Growing your own pepper plants through propagation is a rewarding way to expand your garden efficiently—especially in small spaces! Whether you’re using cuttings, seeds, or pole training, the key is patience and consistency. With the right techniques, you’ll enjoy a bountiful harvest of flavorful peppers in no time.
Ready to take the next step? Start with just one plant and watch your garden flourish! 🌱 For even more tips, explore our guide on maintaining pole-trained peppers or share your progress with fellow gardening enthusiasts.